

These adorable Mini Heart Shaped Cakes bring instant joy with their delightful buttery texture and sweet vanilla fragrance. Each bite-sized treat combines a tender crumb with a silky frosting that melts perfectly on your tongue. Whether you’re celebrating Valentine’s Day, an anniversary, or simply want to show someone you care, these mini heart shaped cakes create an unforgettable impression on any dessert table. The charming presentation belies how simple they are to create in your own kitchen. You’ll learn how to bake, frost, and decorate these irresistible treats while mastering techniques you can use for countless other baking projects.
Why You’ll Love This Recipe
These mini heart shaped cakes are guaranteed to become a favorite in your baking repertoire for numerous reasons. First, their impressive appearance suggests hours of work, but they actually come together with surprising ease—perfect for both novice bakers and experienced pastry enthusiasts.
The contrast between the moist, tender cake interior and the smooth, creamy frosting creates a textural masterpiece in every bite. Each heart cake delivers the perfect frosting-to-cake ratio that’s often missed with larger desserts.
The recipe’s versatility allows for countless personalization options. Change the colors to match any celebration, adjust flavors with different extracts, or switch up decorations to suit any occasion. These cakes work wonderfully as individual servings, eliminating the need for cutting and serving a full-sized cake.
Perhaps best of all, these mini heart shaped cakes evoke pure delight when presented. Few desserts can match their ability to communicate love and thoughtfulness with such simple elegance.
Ingredients
For the Mini Heart Shaped Cakes:
- 1¾ cups (210g) all-purpose flour – sifted for the lightest texture
- 1½ cups (300g) granulated sugar
- ½ cup (113g) unsalted butter, softened to room temperature
- ½ cup (120ml) vegetable oil
- 3 large eggs, room temperature
- 1 cup (240ml) buttermilk, room temperature
- 2 teaspoons pure vanilla extract
- 1½ teaspoons baking powder
- ¼ teaspoon baking soda
- ½ teaspoon salt
For the Frosting:
- 1 cup (226g) unsalted butter, softened
- 4 cups (480g) powdered sugar, sifted
- 3-4 tablespoons heavy cream
- 2 teaspoons pure vanilla extract
- Pinch of salt
- Food coloring (pink or red for traditional heart cakes)
The quality of vanilla extract significantly impacts the flavor of these delicate cakes, so use the purest extract available. The buttermilk creates exceptional tenderness, but you can substitute with regular milk mixed with 1 tablespoon of lemon juice if needed.
Pro Tips
Achieve Perfect Cake Texture
For the most tender mini heart shaped cakes, avoid overmixing the batter. Once you add the dry ingredients to the wet, mix just until combined—a few small lumps are preferable to overmixing. This gentle handling prevents the development of gluten, which would make your cakes tough rather than tender. Room temperature ingredients also blend more uniformly, creating a smoother batter and more consistent texture.
Master Even Baking
Ensure your heart-shaped pans are properly prepared with both cooking spray and a light dusting of flour to prevent sticking. Fill each cavity only two-thirds full to allow for proper rising without overflow. For even baking, rotate your pans halfway through the baking time, especially if you know your oven has hot spots.
Perfect Your Frosting Technique
For professional-looking mini heart cakes, chill them before frosting. This firms the cakes and prevents crumbs from mixing into your frosting. For the smoothest frosting application, use a piping bag with a large round tip to create an initial layer, then smooth with an offset spatula that’s been dipped in hot water and wiped clean.
Instructions
Step 1: Prepare Your Equipment
Preheat your oven to 350°F (175°C). Thoroughly grease your mini heart-shaped pans with cooking spray, then dust lightly with flour, tapping out any excess. If using silicone molds, place them on a sturdy baking sheet for easier handling. This preparation ensures your mini heart shaped cakes will release cleanly after baking.
Step 2: Create Your Cake Batter
In a medium bowl, whisk together the flour, baking powder, baking soda, and salt until well combined. In a separate large bowl, cream the butter and sugar with an electric mixer on medium speed until light and fluffy, about 3-4 minutes. Add the oil and continue beating until incorporated. Add eggs one at a time, beating well after each addition and scraping down the sides of the bowl as needed. Mix in the vanilla extract.
Step 3: Combine Wet and Dry Ingredients
Reduce mixer speed to low. Add the dry ingredients in three batches, alternating with the buttermilk, beginning and ending with the dry ingredients. Mix just until the batter is smooth—overmixing will result in dense cakes. The batter should be thick but pourable, with a silky consistency that falls slowly from a spoon.
Step 4: Bake the Cakes
Spoon or pipe the batter into your prepared pans, filling each cavity approximately two-thirds full. Gently tap the pans on the counter to release any air bubbles. Bake for 15-18 minutes, or until a toothpick inserted into the center comes out clean and the tops spring back when lightly touched. Allow the mini heart shaped cakes to cool in the pans for 10 minutes before carefully removing them to a wire rack to cool completely.
Step 5: Prepare the Frosting
While the cakes cool, beat the softened butter in a large bowl until creamy and pale, about 2-3 minutes. Gradually add the sifted powdered sugar, one cup at a time, mixing on low speed after each addition. Add the vanilla extract, salt, and 3 tablespoons of heavy cream. Increase speed to medium-high and beat for 3-4 minutes until light and fluffy. Add food coloring a few drops at a time until you achieve your desired shade. If the frosting is too thick, add the remaining tablespoon of cream.
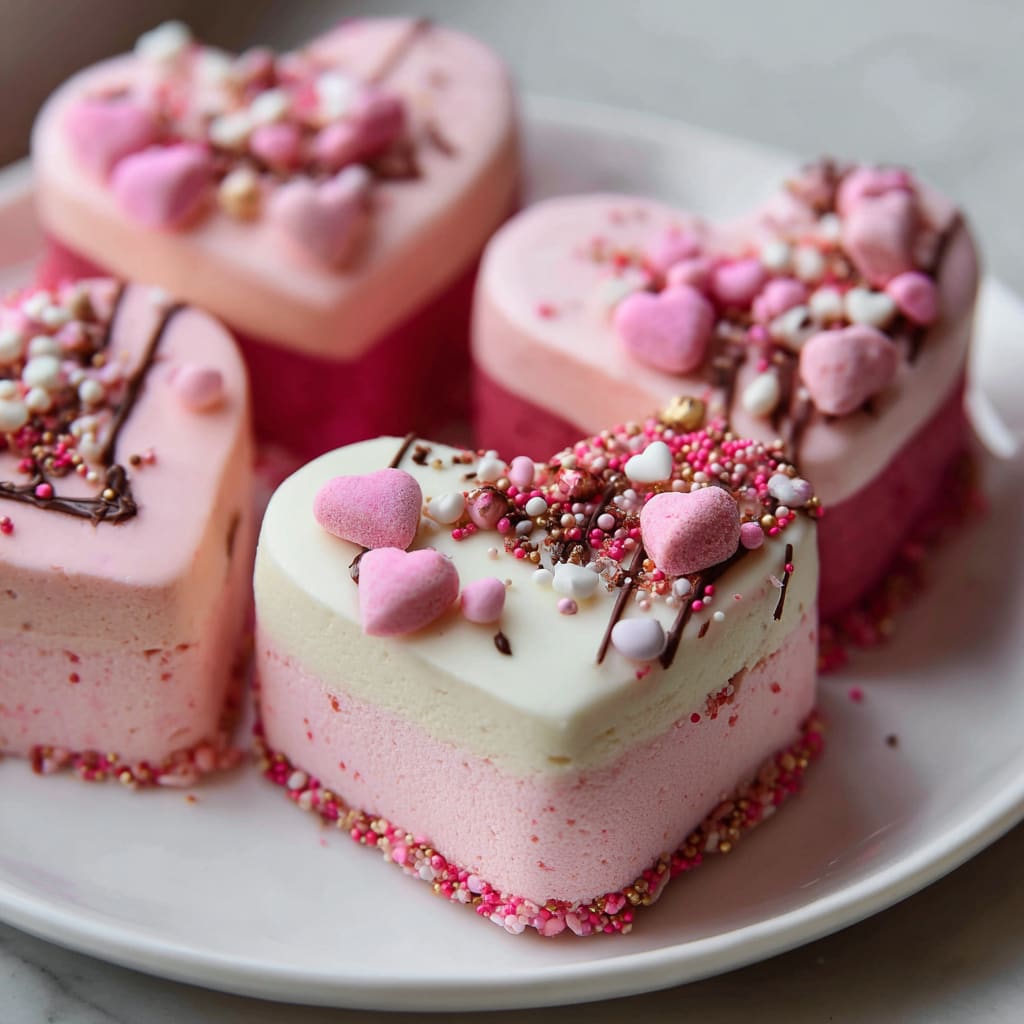
Step 6: Decorate Your Cakes
Once the heart cakes are completely cool, place them on a clean work surface. Fill a piping bag fitted with your chosen tip with frosting. For a classic look, use a star tip to pipe swirls on top of each cake, or spread frosting with an offset spatula for a smooth finish. Add sprinkles, edible pearls, or other decorations while the frosting is still soft. For a more elaborate presentation, consider adding a thin layer of jam between cake layers before frosting.
Variations
Chocolate Heart Cakes
Transform these mini heart shaped cakes into chocolate treats by replacing ¼ cup of flour with unsweetened cocoa powder. For an even richer flavor, add ½ cup of mini chocolate chips to the batter and substitute chocolate extract for half of the vanilla. Pair with chocolate ganache instead of frosting for an indulgent dessert that chocolate lovers will adore.
Lemon-Raspberry Heart Cakes
Create a refreshing twist by adding 2 tablespoons of lemon zest and 1 tablespoon of lemon juice to the cake batter. Before baking, drop a teaspoon of raspberry preserves into the center of each cake, or fold fresh raspberries directly into the batter. Top these mini heart cakes with a lemon glaze instead of frosting for a lighter, tangier finish perfect for spring celebrations.
Gluten-Free Option
For those with dietary restrictions, substitute the all-purpose flour with a high-quality gluten-free baking blend that contains xanthan gum. Add ¼ teaspoon of xanthan gum if your blend doesn’t include it already. These adjustments ensure your mini heart shaped cakes maintain their tender texture while accommodating gluten sensitivities.
Storage and Serving
Store unfrosted mini heart shaped cakes in an airtight container at room temperature for up to 2 days. Once frosted, refrigerate the cakes for up to 5 days, but allow them to come to room temperature for about 30 minutes before serving for the best texture and flavor. For longer storage, unfrosted cakes can be frozen for up to 3 months; wrap each individually in plastic wrap and place in a freezer-safe container.
For an elegant dessert presentation, serve individual heart cakes on small dessert plates with a dusting of powdered sugar and fresh berries on the side. Create a stunning dessert table by arranging these cakes on a tiered stand, varying colors and decorations for visual impact.
Turn these treats into a complete dessert experience by pairing with complementary beverages. Serve alongside coffee with cream for a classic combination, or offer champagne for a celebratory touch. For family gatherings, a glass of cold milk makes these mini heart shaped cakes even more delightful for younger guests.
FAQs
Can I make these cakes without a specialty pan?
Yes! If you don’t have heart-shaped pans, bake the batter in a regular cupcake pan, then use a heart-shaped cookie cutter to cut shapes from each cooled cupcake. Alternatively, bake in a sheet pan and cut out hearts once cooled.
Why did my cakes sink in the middle?
Sinking usually happens when the oven temperature is too high, the cakes are underbaked, or the oven door was opened during baking. Make sure your oven is properly calibrated and resist the urge to peek until they’re nearly done.
Can I make the batter in advance?
It’s best to bake the batter immediately after mixing since the leavening agents activate once combined with liquid ingredients. However, you can prepare the dry and wet ingredients separately and combine them just before baking.
How do I get the perfect shade of pink frosting?
Start with just a tiny amount of gel food coloring and gradually add more until you reach your desired shade. Remember that colors typically deepen as they set, so aim for a slightly lighter shade than your target color.
Can these be made as a two-layer mini cake?
Absolutely! Bake the cakes as directed, then slice each horizontally once cooled. Add a thin layer of frosting or jam between the layers before frosting the exterior for an elegant mini layered heart shaped cake.

Mini Heart Shaped Cakes
- Prep Time: 25 minutes
- Cook Time: 15-18 minutes
- Total Time: 43 minutes
- Yield: 24 mini heart cakes 1x
- Category: Dessert
- Method: Baking
- Cuisine: Americaine
Description
Mini Heart Shaped Cakes: Decadent chocolate treats with a hint of raspberry, perfect for any occasion. Easy to make and guaranteed to impress!
Ingredients
- 1¾ cups (210g) all-purpose flour
- 1½ cups (300g) granulated sugar
- ½ cup (113g) unsalted butter, softened to room temperature
- ½ cup (120ml) vegetable oil
- 3 large eggs, room temperature
- 1 cup (240ml) buttermilk, room temperature
- 2 teaspoons pure vanilla extract
- 1½ teaspoons baking powder
- ¼ teaspoon baking soda
- ½ teaspoon salt
- 1 cup (226g) unsalted butter, softened
- 4 cups (480g) powdered sugar, sifted
- 3–4 tablespoons heavy cream
- 2 teaspoons pure vanilla extract
- Pinch of salt
- Food coloring (pink or red for traditional heart cakes)
Instructions
- Step 1: Prepare Your Equipment Preheat your oven to 350°F (175°C). Thoroughly grease your mini heart-shaped pans with cooking spray, then dust lightly with flour, tapping out any excess. If using silicone molds, place them on a sturdy baking sheet for easier handling. This preparation ensures your mini heart shaped cakes will release cleanly after baking.
- Step 2: Create Your Cake Batter In a medium bowl, whisk together the flour, baking powder, baking soda, and salt until well combined. In a separate large bowl, cream the butter and sugar with an electric mixer on medium speed until light and fluffy, about 3-4 minutes. Add the oil and continue beating until incorporated. Add eggs one at a time, beating well after each addition and scraping down the sides of the bowl as needed. Mix in the vanilla extract.
- Step 3: Combine Wet and Dry Ingredients Reduce mixer speed to low. Add the dry ingredients in three batches, alternating with the buttermilk, beginning and ending with the dry ingredients. Mix just until the batter is smooth—overmixing will result in dense cakes. The batter should be thick but pourable, with a silky consistency that falls slowly from a spoon.
- Step 4: Bake the Cakes Spoon or pipe the batter into your prepared pans, filling each cavity approximately two-thirds full. Gently tap the pans on the counter to release any air bubbles. Bake for 15-18 minutes, or until a toothpick inserted into the center comes out clean and the tops spring back when lightly touched. Allow the mini heart shaped cakes to cool in the pans for 10 minutes before carefully removing them to a wire rack to cool completely.
- Step 5: Prepare the Frosting While the cakes cool, beat the softened butter in a large bowl until creamy and pale, about 2-3 minutes. Gradually add the sifted powdered sugar, one cup at a time, mixing on low speed after each addition. Add the vanilla extract, salt, and 3 tablespoons of heavy cream. Increase speed to medium-high and beat for 3-4 minutes until light and fluffy. Add food coloring a few drops at a time until you achieve your desired shade. If the frosting is too thick, add the remaining tablespoon of cream.
- Step 6: Decorate Your Cakes Once the heart cakes are completely cool, place them on a clean work surface. Fill a piping bag fitted with your chosen tip with frosting. For a classic look, use a star tip to pipe swirls on top of each cake, or spread frosting with an offset spatula for a smooth finish. Add sprinkles, edible pearls, or other decorations while the frosting is still soft. For a more elaborate presentation, consider adding a thin layer of jam between cake layers before frosting.
- Step 7: Storage and Serving Store unfrosted mini heart shaped cakes in an airtight container at room temperature for up to 2 days. Once frosted, refrigerate the cakes for up to 5 days, but allow them to come to room temperature for about 30 minutes before serving for the best texture and flavor. For longer storage, unfrosted cakes can be frozen for up to 3 months; wrap each individually in plastic wrap and place in a freezer-safe container. For an elegant dessert presentation, serve individual heart cakes on small dessert plates with a dusting of powdered sugar and fresh berries on the side. Create a stunning dessert table by arranging these cakes on a tiered stand, varying colors and decorations for visual impact. Turn these treats into a complete dessert experience by pairing with complementary beverages. Serve alongside coffee with cream for a classic combination, or offer champagne for a celebratory touch. For family gatherings, a glass of cold milk makes these mini heart shaped cakes even more delightful for younger guests.
- Step 8: Variations Chocolate Heart Cakes: Transform these mini heart shaped cakes into chocolate treats by replacing ¼ cup of flour with unsweetened cocoa powder. For an even richer flavor, add ½ cup of mini chocolate chips to the batter and substitute chocolate extract for half of the vanilla. Pair with chocolate ganache instead of frosting for an indulgent dessert that chocolate lovers will adore. Lemon-Raspberry Heart Cakes: Create a refreshing twist by adding 2 tablespoons of lemon zest and 1 tablespoon of lemon juice to the cake batter. Before baking, drop a teaspoon of raspberry preserves into the center of each cake, or fold fresh raspberries directly into the batter. Top these mini heart cakes with a lemon glaze instead of frosting for a lighter, tangier finish perfect for spring celebrations. Gluten-Free Option: For those with dietary restrictions, substitute the all-purpose flour with a high-quality gluten-free baking blend that contains xanthan gum. Add ¼ teaspoon of xanthan gum if your blend doesn’t include it already. These adjustments ensure your mini heart shaped cakes maintain their tender texture while accommodating gluten sensitivities.
- Step 9: Pro Tips Achieve Perfect Cake Texture: For the most tender mini heart shaped cakes, avoid overmixing the batter. Once you add the dry ingredients to the wet, mix just until combined—a few small lumps are preferable to overmixing. This gentle handling prevents the development of gluten, which would make your cakes tough rather than tender. Room temperature ingredients also blend more uniformly, creating a smoother batter and more consistent texture. Master Even Baking: Ensure your heart-shaped pans are properly prepared with both cooking spray and a light dusting of flour to prevent sticking. Fill each cavity only two-thirds full to allow for proper rising without overflow. For even baking, rotate your pans halfway through the baking time, especially if you know your oven has hot spots. Perfect Your Frosting Technique: For professional-looking mini heart cakes, chill them before frosting. This firms the cakes and prevents crumbs from mixing into your frosting. For the smoothest frosting application, use a piping bag with a large round tip to create an initial layer, then smooth with an offset spatula that’s been dipped in hot water and wiped clean.
Notes
Fresh ingredients will always yield the best flavor results.
Nutrition
- Serving Size: 1 mini heart cake
- Calories: 220
- Sugar: 22g
- Sodium: 160mg
- Fat: 12g
- Saturated Fat: 6g
- Unsaturated Fat: 5g
- Trans Fat: 0g
- Carbohydrates: 27g
- Fiber: 0.5g
- Protein: 2g
- Cholesterol: 55mg


