
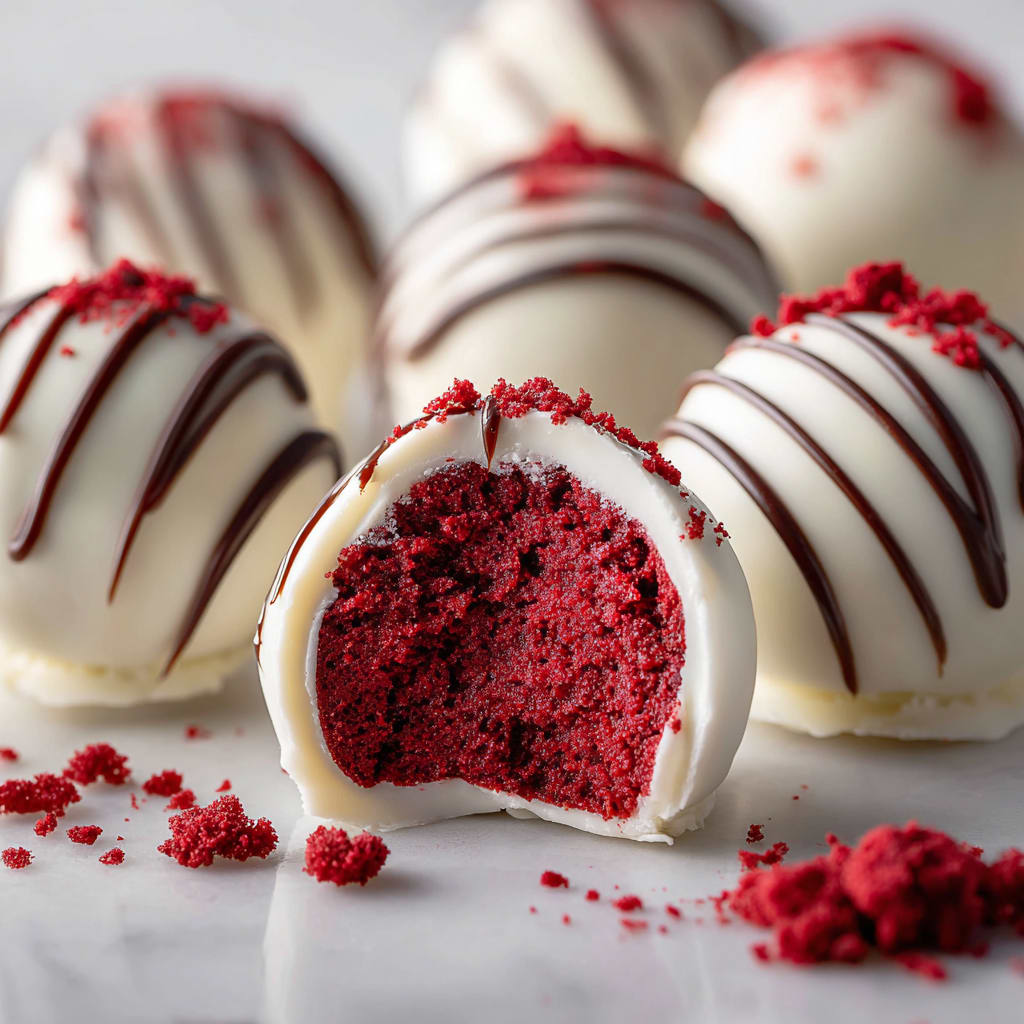
Imagine biting into a silky, rich Red Velvet Truffle that melts in your mouth, releasing waves of chocolate and cream cheese flavor with that distinctive crimson hue. These decadent Red Velvet Truffles are the perfect bite-sized indulgence that captures all the charm of traditional red velvet cake but in an elegant, no-fork-needed package. Whether you’re hosting a sophisticated gathering or simply treating yourself to something special, these truffles deliver pure bliss in every bite. You’ll learn how to create these showstopping confections with surprisingly simple techniques that yield professional-quality results.
Why You’ll Love This Recipe
These Red Velvet Truffles will become your new favorite treat for so many delicious reasons. First, they strike that perfect balance between the slight tanginess of cream cheese frosting and the rich depth of chocolate coating, creating an irresistible flavor profile that red velvet enthusiasts adore. The textural contrast is equally impressive – a velvety smooth interior surrounded by a satisfying chocolate shell that provides just the right amount of snap.
What makes these Red Velvet Truffles particularly appealing is their versatility. They’re elegant enough for special occasions yet simple enough for everyday indulgence. Plus, they’re make-ahead friendly, allowing you to prepare them when convenient and serve when needed.
Despite their sophisticated appearance, these truffles require no advanced pastry skills. The process is forgiving and accessible even to novice bakers, making this recipe perfect for anyone wanting to impress with minimal stress. The vibrant red centers also create a beautiful visual impact when bitten into, making these red velvet cake truffles a true crowd-pleaser for both the eyes and palate.
Ingredients
For the Red Velvet Truffles base:
- 1 box (15.25 oz/432g) red velvet cake mix
- 3 large eggs, room temperature
- ⅓ cup (79ml) vegetable oil
- 1 cup (8oz/227g) cream cheese, softened
- ½ cup (113g) unsalted butter, softened
- 3 cups (360g) powdered sugar
- 1 teaspoon (5ml) pure vanilla extract
For the coating:
- 24 oz (680g) white chocolate or candy melts
- 12 oz (340g) semi-sweet chocolate (optional for drizzling)
- 2 tablespoons (30ml) vegetable shortening or coconut oil (divided)
The quality of your chocolate significantly impacts the final taste. Premium white chocolate with real cocoa butter creates the smoothest coating and richest flavor. The cream cheese should be full-fat for the creamiest texture. For an authentic red velvet flavor, use a cake mix with natural cocoa powder rather than Dutch-processed, as the slight acidity enhances the classic red velvet taste in these chocolate red velvet truffles.
Pro Tips
Mastering these Red Velvet Truffles comes down to a few critical techniques that elevate them from good to extraordinary:
Temperature control is crucial: After forming your truffle centers, chill them thoroughly for at least 2 hours or preferably overnight. This prevents them from melting when dipped in warm chocolate. Conversely, your melted chocolate should be warm enough to create a smooth coating but not so hot it melts the centers—aim for 90-95°F (32-35°C) for perfect dipping consistency.
Perfect your dipping technique: Use a fork or specialized dipping tools to fully submerge each truffle center, then tap gently to remove excess chocolate. This ensures an even coating without unsightly pooling at the base. For the cleanest results, let excess chocolate drip through the tines of the fork before transferring to parchment paper.
Prevent chocolate bloom: Add 1 tablespoon of vegetable shortening or coconut oil per 12 ounces of chocolate to help stabilize the chocolate coating. This prevents the whitish discoloration (bloom) that can occur when chocolate isn’t properly tempered. Additionally, allow your truffles to set at room temperature rather than in the refrigerator to further prevent condensation that leads to bloom, ensuring your Red Velvet Truffles maintain their glossy finish.

Instructions
Step 1: Prepare the Cake
Preheat your oven to 350°F (175°C) and grease a 9×13-inch baking pan. Combine the red velvet cake mix, eggs, and vegetable oil in a large bowl and beat with an electric mixer until fully incorporated and smooth, about 2 minutes. Pour the batter into your prepared pan and bake for 25-30 minutes, until a toothpick inserted in the center comes out clean. Let the cake cool completely on a wire rack – patience here results in better-textured Red Velvet Truffles.
Step 2: Make the Cream Cheese Mixture
While your cake cools, beat together the softened cream cheese and butter until light and fluffy, about 2-3 minutes. Gradually add the powdered sugar, mixing on low speed initially to prevent a sugar cloud, then increase to medium-high until smooth. Stir in the vanilla extract until fully incorporated. This mixture provides that classic tangy-sweet element that makes Red Velvet Truffles so distinctive.
Step 3: Create the Truffle Mixture
Crumble the cooled cake into fine crumbs in a large mixing bowl – using your hands works best for even texture. Add the cream cheese mixture to the cake crumbs and mix thoroughly until fully combined. The mixture should be moist enough to hold together when pressed but not so wet that it’s sticky. If needed, refrigerate for 30 minutes to firm up slightly.
Step 4: Form the Truffles
Line a baking sheet with parchment paper. Using a small cookie scoop or tablespoon, portion the mixture into 1-inch balls. Roll each portion between your palms to create smooth, even spheres. For consistent-sized Red Velvet Truffles, weigh each portion to about 1 oz (28g). Place the formed truffles on the prepared baking sheet and refrigerate for at least 2 hours or overnight to firm up completely.
Step 5: Dip and Decorate
In a microwave-safe bowl, combine the white chocolate with 1 tablespoon of shortening. Microwave in 30-second intervals, stirring between each, until completely melted and smooth. Working with a few truffles at a time (keeping the rest refrigerated), dip each truffle into the melted chocolate. Use a fork to lift it out, gently tap off excess, and place on parchment paper. If desired, drizzle with melted semi-sweet chocolate for a beautiful contrast. Let your Red Velvet Truffles set completely before serving or storing, approximately 1 hour at room temperature.
Variations
Dark Chocolate Red Velvet Truffles: For chocolate lovers, substitute the white chocolate coating with high-quality dark chocolate (70% cocoa). The bitterness of the dark chocolate beautifully balances the sweetness of the red velvet filling, creating a more sophisticated flavor profile. Finish with a light dusting of cocoa powder for an elegant touch that enhances the chocolate notes in these Red Velvet Truffles.
Cream Cheese Frosted Truffles: Instead of fully coating in chocolate, dip just the bottoms of the truffle balls in white chocolate and let set. Then mix 4oz cream cheese with 1 cup powdered sugar and a splash of vanilla, pipe this frosting on top of each truffle, and finish with red velvet cake crumbs. This creates a delightful hybrid between a truffle and a cupcake with the signature cream cheese frosting flavor more prominently featured.
Spiced Red Velvet Truffles: Add ½ teaspoon of cinnamon and a pinch of cayenne pepper to your truffle mixture for a subtle warmth that elevates the cocoa notes in the red velvet. These spiced Red Velvet Truffles pair exceptionally well with coffee or red wine and make a sophisticated addition to holiday dessert platters when rolled in a mixture of cocoa powder and cinnamon before serving.
Storage and Serving
Your Red Velvet Truffles can be stored in an airtight container in the refrigerator for up to 2 weeks, making them perfect for advance preparation. For the best flavor and texture, allow them to come to room temperature for about 15-20 minutes before serving. This brings out the full depth of flavors and achieves that perfect melt-in-your-mouth consistency. If you need longer storage, these truffles freeze beautifully for up to 3 months – simply thaw overnight in the refrigerator before bringing to room temperature.
For an elegant presentation, serve your Red Velvet Truffles on a white porcelain platter to showcase their vibrant color, perhaps nestled on a bed of cocoa powder or alongside fresh berries for a beautiful color contrast. They make a stunning addition to a dessert charcuterie board alongside complementary treats like chocolate-dipped strawberries and vanilla shortbread.
For a special occasion, stack these chocolate red velvet truffles in a pyramid on a cake stand and dust lightly with powdered sugar or edible gold dust. This creates a show-stopping centerpiece that’s both elegant and delicious, perfect for weddings, Valentine’s Day celebrations, or holiday gatherings.
FAQs
Why are my truffle centers too soft to work with?
If your Red Velvet Truffles mixture is too soft, you likely need more cake crumbs or a longer chilling time. Add cake crumbs a tablespoon at a time until you reach a moldable consistency, then refrigerate for at least 2 hours before attempting to form balls.
Can I use homemade red velvet cake instead of a mix?
Absolutely! Homemade red velvet cake works wonderfully in these truffles. Just ensure it’s completely cooled and slightly dry (day-old cake works perfectly) to achieve the right texture when mixed with the cream cheese.
How do I prevent the white chocolate from seizing?
Ensure all utensils are completely dry, as even a drop of water can cause chocolate to seize. Also, melt chocolate slowly at low heat, stirring frequently. Adding a bit of shortening helps create a smoother consistency for dipping your Red Velvet Truffles.
Can these truffles be made without food coloring?
Yes, though they won’t have the signature red hue. You can create a natural version using beet powder (about 2-3 tablespoons) mixed into a traditional chocolate cake for a subtler red tone.
My truffles have white spots after setting. What happened?
This is called “bloom” and occurs when chocolate isn’t properly tempered or experiences temperature fluctuations. While it doesn’t affect taste, you can prevent it by adding shortening to your chocolate and allowing truffles to set at room temperature rather than in the refrigerator.

Red Velvet Truffles
- Prep Time: 30 minutes
- Cook Time: 30 minutes
- Total Time: 3 hours
- Yield: 24 truffles 1x
- Category: Dessert
- Method: Baking, Mixing, Chilling, Dipping
- Cuisine: Americaine
Description
Red Velvet Truffles: Indulgent chocolate treats with a creamy red velvet center. Quick, easy, and perfect for any crowd.
Ingredients
- 1 box (15.25 oz/432g) red velvet cake mix
- 3 large eggs, room temperature
- ⅓ cup (79ml) vegetable oil
- 1 cup (8oz/227g) cream cheese, softened
- ½ cup (113g) unsalted butter, softened
- 3 cups (360g) powdered sugar
- 1 teaspoon (5ml) pure vanilla extract
- 24 oz (680g) white chocolate or candy melts
- 12 oz (340g) semi-sweet chocolate (optional for drizzling)
- 2 tablespoons (30ml) vegetable shortening or coconut oil (divided)
Instructions
- Step 1: Prepare the Cake Preheat your oven to 350°F (175°C) and grease a 9×13-inch baking pan. Combine the red velvet cake mix, eggs, and vegetable oil in a large bowl and beat with an electric mixer until fully incorporated and smooth, about 2 minutes. Pour the batter into your prepared pan and bake for 25-30 minutes, until a toothpick inserted in the center comes out clean. Let the cake cool completely on a wire rack – patience here results in better-textured **Red Velvet Truffles**.
- Step 2: Make the Cream Cheese Mixture While your cake cools, beat together the softened cream cheese and butter until light and fluffy, about 2-3 minutes. Gradually add the powdered sugar, mixing on low speed initially to prevent a sugar cloud, then increase to medium-high until smooth. Stir in the vanilla extract until fully incorporated. This mixture provides that classic tangy-sweet element that makes **Red Velvet Truffles** so distinctive.
- Step 3: Create the Truffle Mixture Crumble the cooled cake into fine crumbs in a large mixing bowl – using your hands works best for even texture. Add the cream cheese mixture to the cake crumbs and mix thoroughly until fully combined. The mixture should be moist enough to hold together when pressed but not so wet that it’s sticky. If needed, refrigerate for 30 minutes to firm up slightly.
- Step 4: Form the Truffles Line a baking sheet with parchment paper. Using a small cookie scoop or tablespoon, portion the mixture into 1-inch balls. Roll each portion between your palms to create smooth, even spheres. For consistent-sized **Red Velvet Truffles**, weigh each portion to about 1 oz (28g). Place the formed truffles on the prepared baking sheet and refrigerate for at least 2 hours or overnight to firm up completely.
- Step 5: Dip and Decorate In a microwave-safe bowl, combine the white chocolate with 1 tablespoon of shortening. Microwave in 30-second intervals, stirring between each, until completely melted and smooth. Working with a few truffles at a time (keeping the rest refrigerated), dip each truffle into the melted chocolate. Use a fork to lift it out, gently tap off excess, and place on parchment paper. If desired, drizzle with melted semi-sweet chocolate for a beautiful contrast. Let your **Red Velvet Truffles** set completely before serving or storing, approximately 1 hour at room temperature.
Notes
Fresh ingredients will always yield the best flavor results.
Nutrition
- Serving Size: 1 truffle
- Calories: 180
- Sugar: 15g
- Sodium: 110mg
- Fat: 10g
- Saturated Fat: 6g
- Unsaturated Fat: 3g
- Trans Fat: 0g
- Carbohydrates: 20g
- Fiber: 0.5g
- Protein: 2g
- Cholesterol: 30mg


