

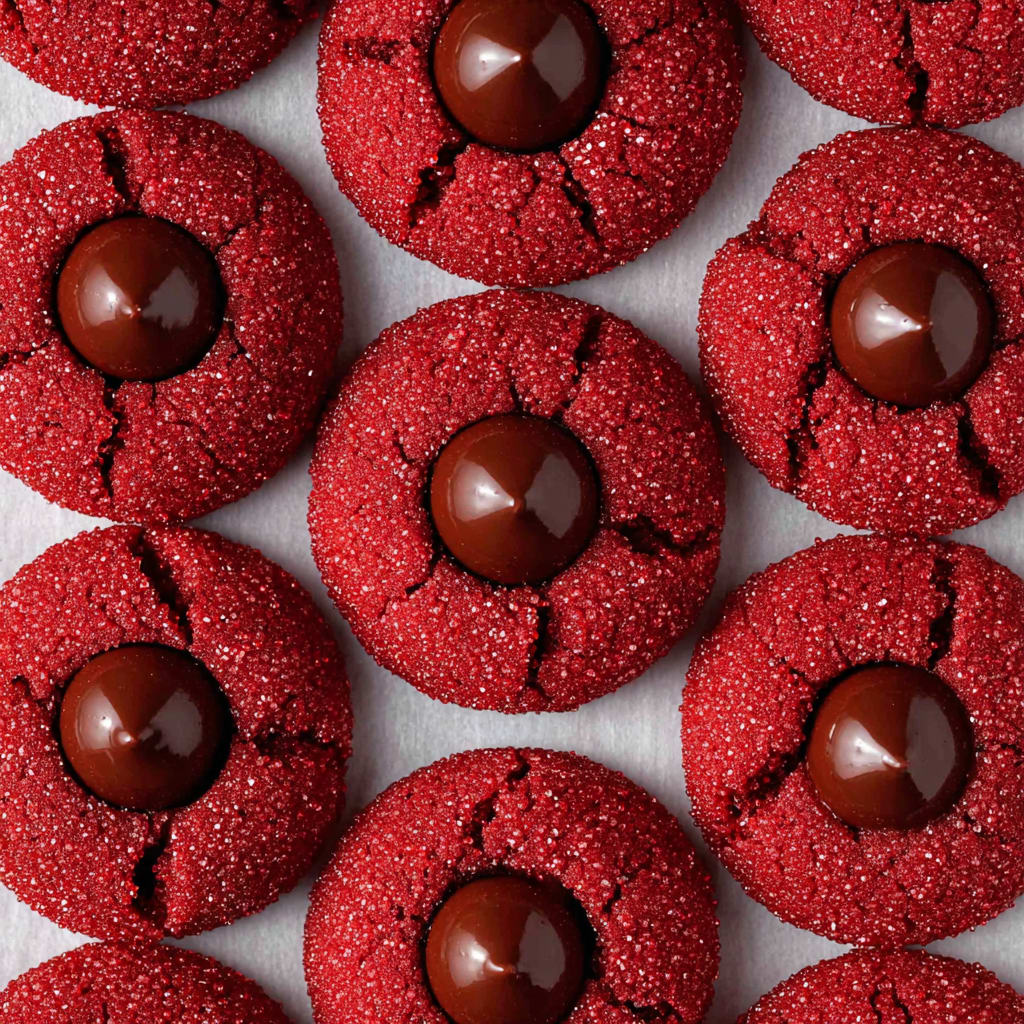
Indulge in the irresistible allure of these velvety, melt-in-your-mouth Easy Red Velvet Blossoms Cookies that combine the rich cocoa undertones of traditional red velvet with a decadent chocolate kiss center. The striking crimson color against the chocolate creates a visual masterpiece that’s as delightful to look at as it is to devour. These festive cookies bring a touch of elegance to any cookie platter while remaining wonderfully simple to create. You’ll learn how to achieve that perfect crackly exterior, soft interior, and how to time the addition of chocolate kisses for that picture-perfect presentation that will have everyone reaching for seconds.
Why You’ll Love This Recipe
These Easy Red Velvet Blossoms Cookies are bound to become your new favorite holiday tradition for several irresistible reasons. First, the texture contrast is absolutely divine – a slightly crisp, sugar-coated exterior gives way to a tender, cake-like center, all complemented by the smooth chocolate kiss that slowly melts as you bite into it.
The vibrant red color makes these cookies instantly festive and perfect for Valentine’s Day, Christmas, or any celebration where you want to impress without spending hours in the kitchen. The simple drop-cookie technique requires no special equipment or decorating skills, making them accessible even to novice bakers.
What truly sets these red velvet blossoms apart is their versatility – they’re elegant enough for special occasions but easy enough for a random Tuesday when the cookie craving strikes. The balanced flavor profile with subtle cocoa notes, vanilla undertones, and rich chocolate center appeals to both sophisticated palates and picky eaters alike, making them a unanimous crowd-pleaser.
Ingredients
For these delectable Easy Red Velvet Blossoms Cookies, you’ll need:
• 1¾ cups (219g) all-purpose flour
• ¼ cup (21g) unsweetened cocoa powder (natural, not Dutch-processed for true red color)
• 1 teaspoon baking soda
• ¼ teaspoon salt
• ½ cup (113g) unsalted butter, softened to room temperature
• 1 cup (200g) granulated sugar, plus ¼ cup (50g) for rolling
• 1 large egg, at room temperature
• 2 tablespoons milk
• 1 teaspoon vanilla extract
• 1 tablespoon red food coloring (liquid) or 2 teaspoons gel food coloring
• 24 chocolate kisses, unwrapped and chilled in the refrigerator
The combination of cocoa powder and red food coloring creates that signature red velvet flavor with subtle chocolate undertones. Using room temperature butter and eggs ensures proper incorporation and helps achieve that perfect tender crumb that makes red velvet blossoms so irresistible.
Pro Tips
Master Baker’s Secret: For the most vibrant red velvet cookies blossoms, use natural cocoa powder instead of Dutch-processed. The natural acidity in regular cocoa powder reacts better with the baking soda and helps maintain the bright red color that makes these cookies so visually stunning.
Perfect Timing Technique: The key to the perfect chocolate kiss center lies in timing. Press the chocolate kisses into the cookies immediately after they come out of the oven while they’re still hot and soft. If you wait too long, the cookies will set and may crack unevenly; too soon, and the kisses will melt completely. Then, place the cookies in the refrigerator for 5 minutes to prevent the kisses from losing their distinctive shape.
Texture Control Method: For soft, pillowy Easy Red Velvet Blossoms Cookies, do not overbake! Remove them from the oven when the edges are just set but the centers still look slightly underdone. They’ll continue cooking from residual heat on the baking sheet. For a more precise approach, bake until the internal temperature reaches 175°F (79°C) on an instant-read thermometer – this is the sweet spot for perfectly soft red velvet cookies.
Instructions
Step 1: Prepare Your Ingredients and Workspace
Preheat your oven to 350°F (175°C) and line two baking sheets with parchment paper. Unwrap your chocolate kisses and place them in the refrigerator to keep them firm. In a medium bowl, whisk together the flour, cocoa powder, baking soda, and salt until well combined – this ensures your Easy Red Velvet Blossoms Cookies have a consistent texture throughout.
Step 2: Cream the Butter and Sugar
In a large bowl, beat the softened butter and 1 cup of sugar with an electric mixer on medium speed for about 2-3 minutes until the mixture becomes light and fluffy. This step is crucial for incorporating air into the dough, so don’t rush it! You’ll notice the color change from yellow to almost white when it’s properly creamed.
Step 3: Add Wet Ingredients
Add the egg to your butter mixture and beat until fully incorporated. Pour in the milk, vanilla extract, and red food coloring. Mix until the batter is evenly colored and smooth. For a more intense red color that really makes these red velvet blossoms pop, you might need to add a bit more food coloring depending on the brand you’re using.
Step 4: Combine Wet and Dry Ingredients
Gradually add your dry ingredient mixture to the wet ingredients, mixing on low speed just until combined. Be careful not to overmix – stop as soon as the flour disappears! The dough will be soft and slightly sticky. If it seems too soft to handle, chill it in the refrigerator for 30 minutes.
Step 5: Shape and Bake
Place the remaining ¼ cup of sugar in a small bowl. Scoop rounded tablespoons of dough and roll them into 1-inch balls between your palms. Roll each ball in the sugar until completely coated, then place on the prepared baking sheets about 2 inches apart. Bake for 10-12 minutes until the edges are set but the centers still look soft.
Step 6: Add the Chocolate Kiss
As soon as you remove the cookies from the oven, immediately press a chilled chocolate kiss into the center of each cookie. The hot cookie will partially melt the bottom of the kiss, securing it in place. Transfer the cookies to a wire rack and allow them to cool completely. Your gorgeous Easy Red Velvet Blossoms Cookies are ready to dazzle everyone who sees (and tastes) them!
Variations
White Chocolate Red Velvet Blossoms: For a stunning color contrast, substitute white chocolate kisses for the traditional milk chocolate ones. The creamy white against the vibrant red creates a beautiful visual effect that’s especially perfect for Valentine’s Day or Christmas. The white chocolate’s sweeter flavor also complements the subtle cocoa notes in the Easy Red Velvet Blossoms Cookies.
Cream Cheese Stuffed Blossoms: For the ultimate red velvet experience, freeze small teaspoons of sweetened cream cheese mixture for 30 minutes, then wrap the red velvet cookie dough around these cream cheese balls before baking. After baking, press the chocolate kiss on top for a delightful surprise of cream cheese filling that mimics the classic red velvet cake and frosting combination.
Gluten-Free Red Velvet Blossoms: These cookies can be easily adapted for gluten-free diets by substituting the all-purpose flour with a 1:1 gluten-free baking blend. Add ¼ teaspoon of xanthan gum if your blend doesn’t already contain it to maintain the perfect texture that makes these red velvet blossom cookies so irresistible.
Storage and Serving
Your Easy Red Velvet Blossoms Cookies will stay fresh in an airtight container at room temperature for up to 5 days. Place parchment paper between layers to prevent the cookies from sticking together and to protect the chocolate kiss tops. For longer storage, these cookies freeze beautifully for up to 3 months – simply thaw at room temperature for 2 hours before serving.
For an elegant dessert presentation, serve these vibrant cookies on a white platter with a light dusting of powdered sugar to enhance the festive red color. They pair wonderfully with a glass of cold milk, hot cocoa, or even a dessert wine for adult gatherings.
Create an impressive dessert table by serving your red velvet blossoms alongside complementary treats like white chocolate-dipped strawberries or chocolate truffles. For a special touch at holiday gatherings, stack them in clear cellophane bags tied with ribbon as delightful take-home gifts that showcase the beautiful red and chocolate color combination.
FAQs
Why did my red velvet cookies turn brown instead of red?
Dutch-processed cocoa powder can neutralize the red coloring. Use natural unsweetened cocoa powder and make sure you’re adding enough food coloring – gel colors provide more intense color with less liquid.
Can I make the cookie dough ahead of time?
Absolutely! The dough for Easy Red Velvet Blossoms Cookies can be refrigerated for up to 3 days or frozen for up to 3 months. If frozen, thaw overnight in the refrigerator before rolling and baking.
Why are my chocolate kisses melting too much?
Be sure to refrigerate the kisses before using them, and let the cookies cool for about 1-2 minutes after baking before adding the kisses. If your kitchen is warm, place the finished cookies in the refrigerator for 5 minutes to help the kisses set.
How can I make these cookies without artificial red food coloring?
You can substitute beetroot powder (2-3 tablespoons) for a natural red color. The shade will be more burgundy than bright red, but still beautiful and festive.
Can I use other chocolate candies instead of kisses?
Yes! Chocolate bells, peanut butter cups, or even chocolate-covered caramels work beautifully as alternatives for these versatile red velvet blossoms. Just make sure whatever you choose is proportional to the cookie size.
Easy Red Velvet Blossoms Cookies
- Prep Time: 20 minutes
- Cook Time: 10-12 minutes
- Total Time: 32-42 minutes
- Yield: 24 cookies 1x
- Category: Dessert
- Method: Baking
- Cuisine: Americaine
Description
Easy Red Velvet Blossoms Cookies: Quick, comforting, and crowd-pleasing cookies made with red velvet cake mix, cream cheese, and love.
Ingredients
- 1¾ cups (219g) all-purpose flour
- ¼ cup (21g) unsweetened cocoa powder (natural, not Dutch-processed for true red color)
- 1 teaspoon baking soda
- ¼ teaspoon salt
- ½ cup (113g) unsalted butter, softened to room temperature
- 1 cup (200g) granulated sugar, plus ¼ cup (50g) for rolling
- 1 large egg, at room temperature
- 2 tablespoons milk
- 1 teaspoon vanilla extract
- 1 tablespoon red food coloring (liquid) or 2 teaspoons gel food coloring
- 24 chocolate kisses, unwrapped and chilled in the refrigerator
Instructions
- Step 1: Prepare Your Ingredients and Workspace Preheat your oven to 350°F (175°C) and line two baking sheets with parchment paper. Unwrap your chocolate kisses and place them in the refrigerator to keep them firm. In a medium bowl, whisk together the flour, cocoa powder, baking soda, and salt until well combined – this ensures your **Easy Red Velvet Blossoms Cookies** have a consistent texture throughout.
- Step 2: Cream the Butter and Sugar In a large bowl, beat the softened butter and 1 cup of sugar with an electric mixer on medium speed for about 2-3 minutes until the mixture becomes light and fluffy. This step is crucial for incorporating air into the dough, so don’t rush it! You’ll notice the color change from yellow to almost white when it’s properly creamed.
- Step 3: Add Wet Ingredients Add the egg to your butter mixture and beat until fully incorporated. Pour in the milk, vanilla extract, and red food coloring. Mix until the batter is evenly colored and smooth. For a more intense red color that really makes these red velvet blossoms pop, you might need to add a bit more food coloring depending on the brand you’re using.
- Step 4: Combine Wet and Dry Ingredients Gradually add your dry ingredient mixture to the wet ingredients, mixing on low speed just until combined. Be careful not to overmix – stop as soon as the flour disappears! The dough will be soft and slightly sticky. If it seems too soft to handle, chill it in the refrigerator for 30 minutes.
- Step 5: Shape and Bake Place the remaining ¼ cup of sugar in a small bowl. Scoop rounded tablespoons of dough and roll them into 1-inch balls between your palms. Roll each ball in the sugar until completely coated, then place on the prepared baking sheets about 2 inches apart. Bake for 10-12 minutes until the edges are set but the centers still look soft.
- Step 6: Add the Chocolate Kiss As soon as you remove the cookies from the oven, immediately press a chilled chocolate kiss into the center of each cookie. The hot cookie will partially melt the bottom of the kiss, securing it in place. Transfer the cookies to a wire rack and allow them to cool completely. Your gorgeous **Easy Red Velvet Blossoms Cookies** are ready to dazzle everyone who sees (and tastes) them!
Notes
Fresh ingredients will always yield the best flavor results.
Nutrition
- Serving Size: 1 cookie
- Calories: 150
- Sugar: 13g
- Sodium: 90mg
- Fat: 7g
- Saturated Fat: 4g
- Unsaturated Fat: 2g
- Trans Fat: 0g
- Carbohydrates: 21g
- Fiber: 1g
- Protein: 2g
- Cholesterol: 20mg


