
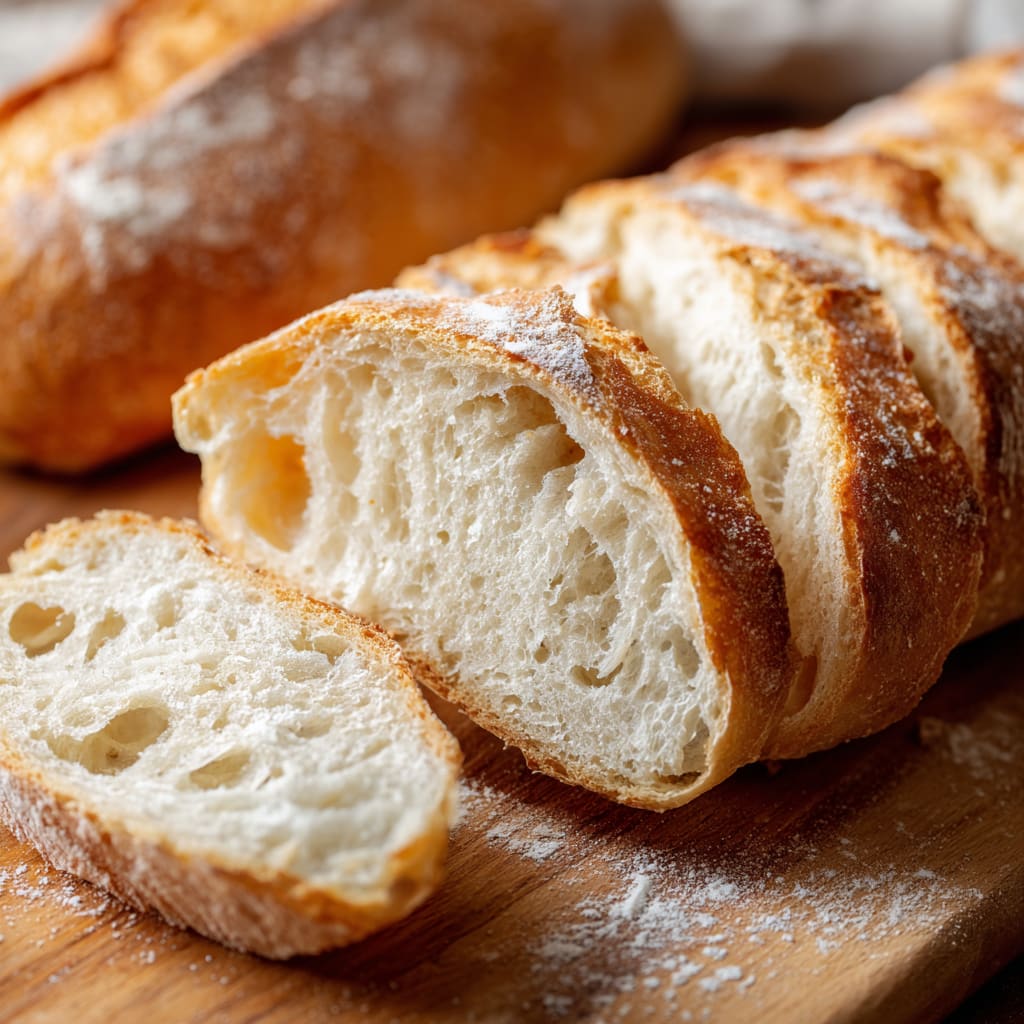
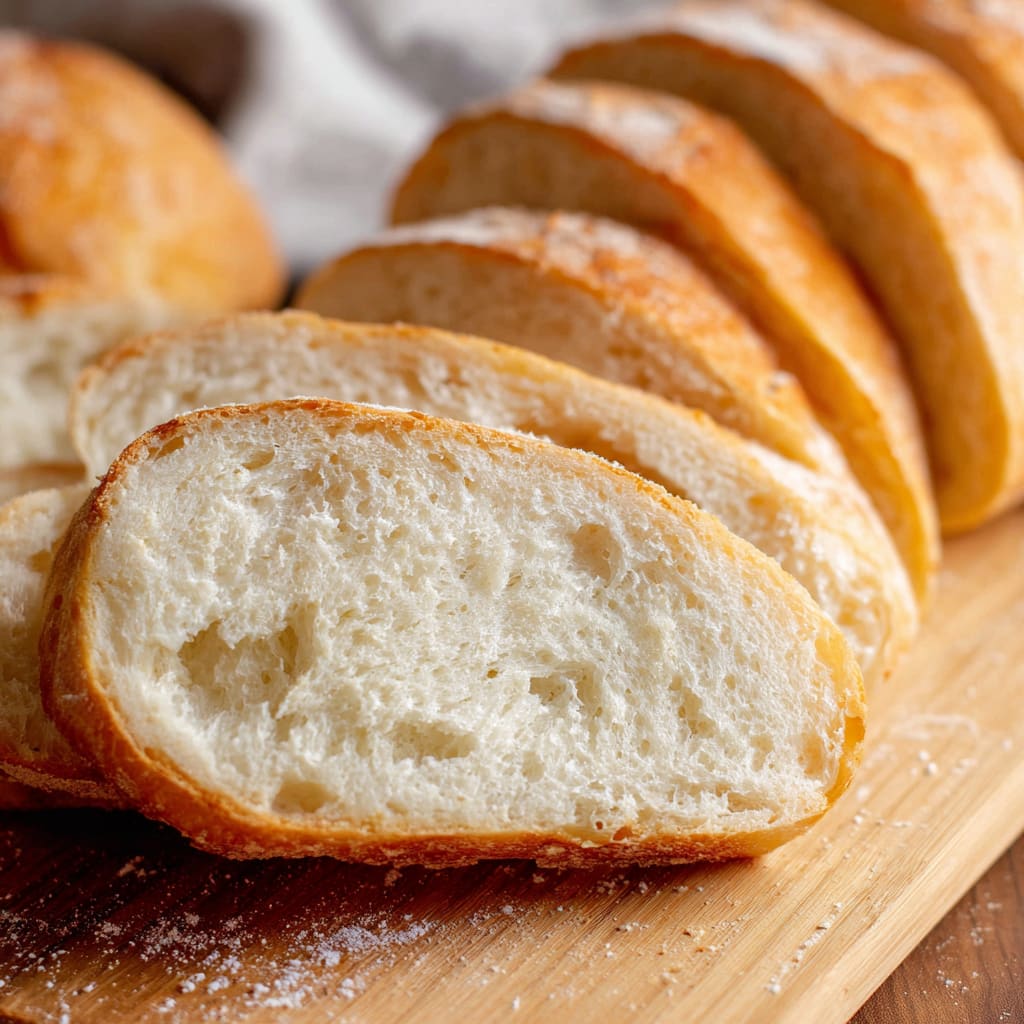
There’s nothing quite like the intoxicating aroma of freshly baked Homemade French Bread filling your kitchen. With its crispy golden crust that crackles under your fingers and the soft, pillowy interior that melts in your mouth, this classic bread is the epitome of simple yet profound culinary pleasure. This Homemade French Bread recipe creates two beautiful loaves that rival anything from an artisan bakery, but made right in your own kitchen with basic ingredients. You’ll learn how to achieve that perfect crusty exterior and tender crumb that makes French bread so irresistible, plus all the techniques that transform ordinary flour and yeast into something extraordinary.
Why You’ll Love This Recipe
This Homemade French Bread recipe stands out from store-bought versions in so many delightful ways. First, the contrast between the crackling crust and the airy, tender interior creates a textural experience that simply cannot be matched by mass-produced breads. The addition of the ice cube trick during baking creates that authentic bakery-style crust that shatters beautifully when sliced.
What’s more, despite its impressive results, this French bread is surprisingly forgiving for beginners. The dough is resilient and the technique straightforward, making it accessible even if you’re new to bread baking. The ingredients are pantry staples you likely already have on hand, eliminating the need for special shopping trips or unusual components.
Perhaps best of all, the sensory experience of making your own French bread—from the yeasty aroma of the rising dough to the heavenly scent that fills your home as it bakes—creates a deeply satisfying cooking experience that connects you to centuries of baking tradition. Once you master this traditional French loaf, you’ll find yourself making it regularly for everything from weeknight dinners to special occasions.
Ingredients List for the Homemade French Bread
These simple ingredients come together to create bread magic. The combination of proper hydration, the right amount of yeast, and good quality flour ensures your Homemade French Bread will have that authentic texture and flavor that makes it so special.
- 2½ cups water (warm (95-105 degrees F))
- 2 tablespoons sugar
- 1 tablespoon active dry yeast
- 2 tablespoons olive oil
- 3/4 tablespoon salt
- 5½ cups all-purpose flour
- 1 large egg
- 1 tablespoon water
Pro Tips
To elevate your Homemade French Bread from good to exceptional, focus on these three critical techniques:
First, temperature matters immensely when working with yeast. Your water must be between 95-105°F—too hot will kill the yeast, too cool will prevent proper activation. Use a thermometer until you can gauge this by touch (it should feel warm but not hot on your wrist, similar to testing baby formula).
Second, the ice cube technique creates that signature crispy crust. When you add ice cubes to the hot oven, they create steam that helps develop that authentic bakery-style crust. Make sure to close the oven door quickly to trap the steam. Some bakers even use a spray bottle to mist the oven walls for extra steam.
Finally, don’t rush the rising time. Proper fermentation develops flavor and texture. If your kitchen is cool, create a warm environment by placing the covered dough near (not on) a preheating oven or in an oven with just the light turned on. The dough should visibly double in size during each rise for best results.
Instructions
Step 1: In the bowl of a standing mixer, add warm water (between 95-105 degrees Fahrenheit), sugar, and yeast. Stir, and let sit for about 10 minutes, or until frothy.
Step 2: Add the oil, salt, and about half of the flour. Using the dough hook, mix on low for 1-2 minutes, or until all the flour is mixed in. Continue to mix on low and add flour 1/2 cup at a time until the dough pulls away from the sides of the bowl. You may need up to 1/2 cup of additional flour.
Step 3: Once the dough pulls away from the sides, mix on low for about 2 minutes. If the dough feels sticky, add a little more flour, until the dough is no longer sticky but is still soft.
Step 4: Turn the mixer off, cover the bowl with a towel, and let the dough rise for about 30 minutes.
Step 5: Meanwhile, lightly spray a large baking sheet or French bread loaf pans.
Step 6: Once your dough has risen, remove it from the bowl onto a lightly floured surface. Separate the dough into 2 equal pieces.
Step 7: Gently roll each piece of dough into a rectangle using a rolling pin, about 14″ x 8″. Using your hands, roll each rectangle up, starting from the longer edge and gently pressing out large air bubbles with the heel of your hand until you have 2 long narrow loaves.
Step 8: Carefully place the dough onto your prepared baking pans with the seam sides down. Cover with a kitchen towel, and let the dough rise in a warm place for 30-40 minutes, or until the dough has doubled.
Step 9: Preheat your oven to 375 degrees F.
Step 10: While the bread is rising, make your egg wash by beating the egg and water together in a small bowl. Once your bread has doubled in size, remove the towel and brush your egg wash all over the loaves using a pastry brush. Make sure you get all along each side.
Step 11: Score each loaf by making about 4 angled slashes with a bakers lame (or a razor blade).
Step 12: Put your baking pan in the hot oven and carefully place 5-6 ice cubes in the bottom of the oven, then quickly shut the oven door.
Step 13: Bake for 20-25 minutes, or until the bread is golden brown and baked through.
Step 14: Remove from the oven and let cool before slicing. Enjoy!
Variations
This classic Homemade French Bread recipe serves as a wonderful canvas for creative variations. For a rustic herb version, add 2 tablespoons of fresh chopped rosemary, thyme, or herbs de Provence to the dough during step 2. The aromatic herbs infuse throughout the bread, making it perfect for serving alongside soups or stews.
For a whole wheat adaptation, substitute 2 cups of the all-purpose flour with whole wheat flour. This creates a heartier loaf with more fiber and a slightly nuttier flavor profile. You may need to add an extra tablespoon or two of water, as whole wheat flour absorbs more moisture.
If you love garlic bread, transform one of your French loaves into the ultimate garlic bread by slicing the baked loaf horizontally, spreading a mixture of softened butter, minced garlic, and parsley between the halves, then wrapping in foil and warming in the oven for 10-15 minutes. This easy French bread garlic bread will disappear in minutes!
Storage and Serving
Your freshly baked Homemade French Bread is best enjoyed within 24 hours of baking when the crust is at its crispiest. Store any leftover bread in a paper bag at room temperature for up to 2 days. For longer storage, freeze whole or half loaves wrapped tightly in plastic wrap and then aluminum foil for up to 3 months. Thaw at room temperature and refresh in a 350°F oven for 5-10 minutes for that just-baked texture.
Serve this beautiful bread as the perfect companion to a hearty beef stew or classic French onion soup, where the crusty slices can be used for dipping into rich broth. For a simple yet elegant appetizer, slice the bread diagonally, brush with olive oil, and toast lightly to make crostini topped with bruschetta or a creamy cheese spread.
My favorite weeknight serving suggestion is to slice the warm loaf and serve it with good quality salted butter and a drizzle of honey – a simple combination that allows the bread’s flavor and texture to shine through perfectly.
FAQs
Can I make this French bread without a stand mixer?
Absolutely! While a stand mixer makes the process easier, you can mix the ingredients with a wooden spoon until combined, then knead by hand on a floured surface for about 8-10 minutes until smooth and elastic.
Why didn’t my bread rise properly?
If your bread didn’t rise, check your yeast’s expiration date, as expired yeast won’t activate properly. Also ensure your water temperature was correct (95-105°F) and that your rising environment was warm enough.
How do I get a crispier crust on my French bread?
For an even crispier crust, increase the steam by adding more ice cubes to the oven floor or spraying the walls with water before closing the door. You can also leave the bread in the turned-off oven with the door cracked open for 5 minutes after baking.
Can I prepare the dough ahead of time?
Yes! You can refrigerate the dough after the first rise for up to 24 hours. This slow fermentation actually improves flavor. Let the cold dough sit at room temperature for 30 minutes before shaping into loaves.
Why is scoring the bread important?
Scoring (making slashes) allows the bread to expand properly during baking without bursting in unexpected places. It also creates that classic French bread appearance and provides more crunchy crust surface area, enhancing the overall texture experience.

Homemade French Bread
- Prep Time: 15 mins
- Cook Time: 30 mins
- Total Time: 45 mins
- Yield: 4 people 1x
- Category: Appetizer
- Method: Cooking
- Cuisine: American
Description
Learn how to make Homemade French Bread with this easy recipe. Discover the secrets to creating a crusty loaf at home. Try it today!
Ingredients
- 2½ cups water (warm (95–105 degrees F))
- 2 tablespoons sugar
- 1 tablespoon active dry yeast
- 2 tablespoons olive oil
- 3/4 tablespoon salt
- 5½ cups all-purpose flour
- 1 large egg
- 1 tablespoon water
Instructions
- Step 1: In the bowl of a standing mixer, add warm water (between 95-105 degrees Fahrenheit), sugar, and yeast. Stir, and let sit for about 10 minutes, or until frothy.
- Step 2: Add the oil, salt, and about half of the flour. Using the dough hook, mix on low for 1-2 minutes, or until all the flour is mixed in. Continue to mix on low and add flour 1/2 cup at a time until the dough pulls away from the sides of the bowl. You may need up to 1/2 cup of additional flour.
- Step 3: Once the dough pulls away from the sides, mix on low for about 2 minutes. If the dough feels sticky, add a little more flour, until the dough is no longer sticky but is still soft.
- Step 4: Turn the mixer off, cover the bowl with a towel, and let the dough rise for about 30 minutes.
- Step 5: Meanwhile, lightly spray a large baking sheet or French bread loaf pans.
- Step 6: Once your dough has risen, remove it from the bowl onto a lightly floured surface. Separate the dough into 2 equal pieces.
- Step 7: Gently roll each piece of dough into a rectangle using a rolling pin, about 14″ x 8″. Using your hands, roll each rectangle up, starting from the longer edge and gently pressing out large air bubbles with the heel of your hand until you have 2 long narrow loaves.
- Step 8: Carefully place the dough onto your prepared baking pans with the seam sides down. Cover with a kitchen towel, and let the dough rise in a warm place for 30-40 minutes, or until the dough has doubled.
- Step 9: Preheat your oven to 375 degrees F.
- Step 10: While the bread is rising, make your egg wash by beating the egg and water together in a small bowl. Once your bread has doubled in size, remove the towel and brush your egg wash all over the loaves using a pastry brush. Make sure you get all along each side.
- Step 11: Score each loaf by making about 4 angled slashes with a bakers lame (or a razor blade).
- Step 12: Put your baking pan in the hot oven and carefully place 5-6 ice cubes in the bottom of the oven, then quickly shut the oven door.
- Step 13: Bake for 20-25 minutes, or until the bread is golden brown and baked through.
- Step 14: Remove from the oven and let cool before slicing. Enjoy!
Notes
Try This Recipe and Leave a comment Below, your opinion matters to me!
Nutrition
- Serving Size: 4 serving
- Calories: 400
- Sugar: 5g
- Sodium: 400mg
- Fat: 10g
- Saturated Fat: 3g
- Unsaturated Fat: 7g
- Trans Fat: 0g
- Carbohydrates: 40g
- Fiber: 5g
- Protein: 15g
- Cholesterol: 50mg


