
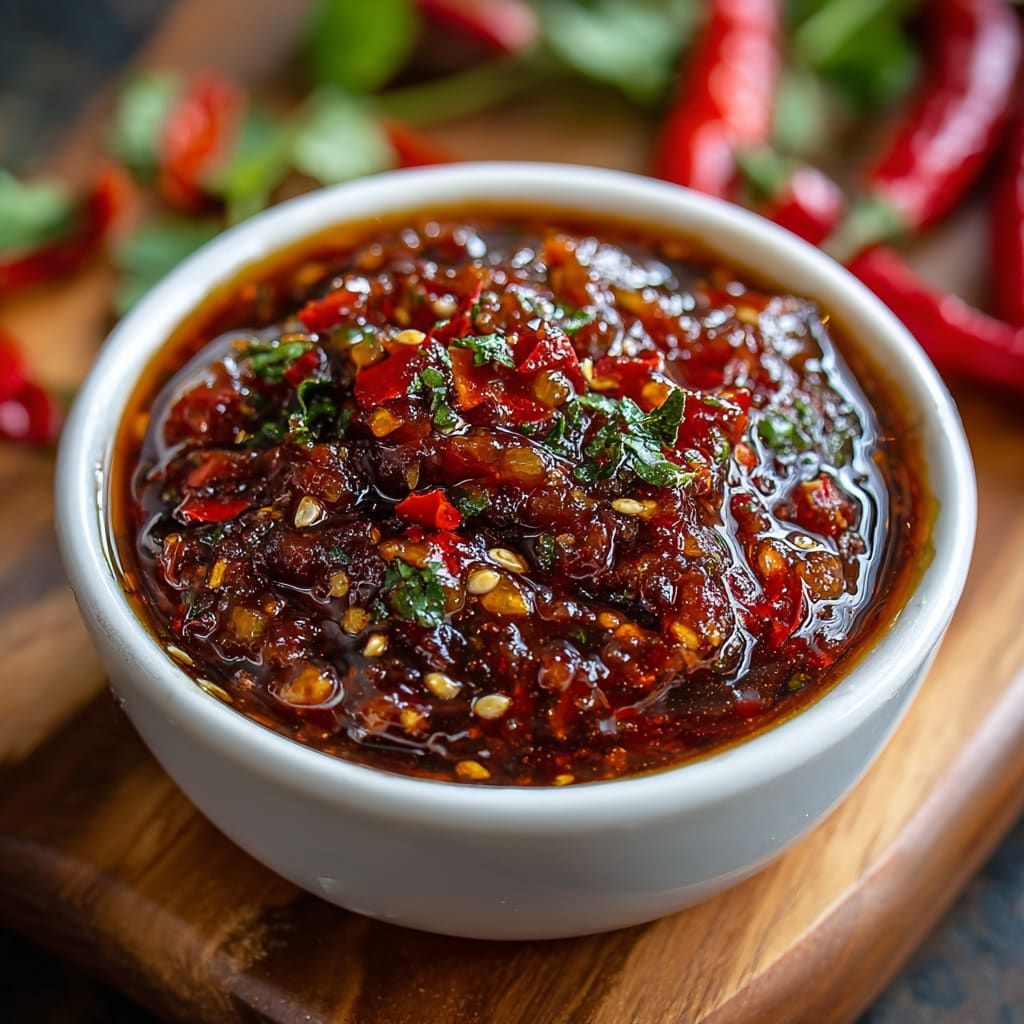
The moment you open a jar of homemade chili garlic sauce, the sharp, fiery aroma hits you first — warm garlic, bright heat, and a subtle tang that makes your mouth water instantly. This isn’t just another condiment. Homemade chili garlic sauce is the kind of bold, versatile staple that transforms every meal it touches, from simple fried rice to grilled meats and noodle bowls. Unlike store-bought versions loaded with preservatives, this recipe uses only fresh, wholesome ingredients you can trust. You’ll learn exactly how to make this rich, glossy sauce from scratch, including key techniques, smart storage tips, and delicious ways to use it.
Why You’ll Love This Recipe
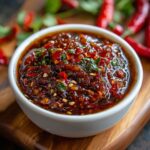
This homemade chili garlic sauce earns a permanent spot in your refrigerator for so many good reasons. First, the flavor is incomparable — intensely garlicky, fiery from fresh Thai chilies, and perfectly balanced with a touch of vinegar and brown sugar. The result is a thick, glossy, deeply red paste that packs real heat with beautiful complexity.
Second, it is surprisingly simple to make. With just six pantry-friendly ingredients and under 20 minutes of active cooking time, you get a restaurant-quality condiment at a fraction of the cost. No special equipment is needed beyond a food processor and a heavy pan.
Finally, this chili garlic hot sauce is endlessly versatile. Use it as a dip, a marinade, a stir-fry base, or a flavor bomb stirred into soups and sauces. Once you taste the homemade version, you will never reach for a store-bought jar again.
Ingredients List for the Homemade Chili Garlic Sauce
You only need six simple, fresh ingredients to make this bold and fiery sauce. Gather everything before you start cooking for a smooth, efficient process.
• 1 cup fresh Thai chilies (stems removed)
• 6 cloves fresh garlic
• 2 tablespoons vinegar (rice or white)
• 1 tablespoon light brown sugar
• 1 tablespoon salt
• 1½ cups neutral oil (such as extra light olive oil)
Pro Tips
Mastering a few key techniques will take your chili garlic sauce from good to exceptional.
Control your heat carefully. When cooking the chili-garlic mixture, medium-high heat is essential for evaporating the water content and developing that deep red color. However, stay attentive — the mixture can burn quickly. Stir frequently and lower the heat slightly if you notice any scorching on the bottom of the pan.
Use fresh ingredients only. Fresh Thai chilies and fresh garlic make an enormous difference in flavor intensity. Dried chilies or jarred garlic simply cannot replicate the bright, punchy heat that fresh produce delivers. The fresher your ingredients, the better your final sauce will taste.
Let it cool completely before storing. Pouring warm sauce into a jar traps steam, which introduces moisture and shortens shelf life. Always allow the sauce to reach room temperature before sealing and refrigerating. This single step protects both the flavor and the longevity of your batch.
Instructions
Step 1: Prepare the Ingredients
Begin by removing the stems from the fresh Thai chilies and peeling the garlic cloves. Place the chilies, garlic, salt, light brown sugar, and vinegar into a food processor. Process the mixture until the ingredients are finely chopped and well combined.
Step 2: Cook the Chili-Garlic Mixture
Heat ½ cup of neutral oil in a heavy-bottomed pan over medium heat. Once the oil is warm, add the processed chili-garlic mixture to the pan. Increase the heat to medium-high and cook the mixture for 8 to 9 minutes, stirring frequently to prevent burning. The sauce is ready when it transitions from a runny, pink consistency to a thick, rich red paste, indicating that the water content has evaporated.
Step 3: Incorporate the Remaining Oil
Once the mixture has thickened, add the remaining 1 cup of neutral oil to the pan. Stir thoroughly to combine, ensuring the sauce achieves a smooth and glossy texture. Turn off the heat and allow the sauce to cool completely.
Step 4: Store the Sauce
Transfer the cooled chili garlic sauce into a clean, airtight jar. If you do not plan to use the sauce within a few days, store it in the refrigerator to maintain freshness. Properly stored, the sauce can last for several weeks.
Variations
This recipe is incredibly flexible and adapts beautifully to personal taste preferences.
Smoky Chili Garlic Sauce: Add one teaspoon of smoked paprika to the food processor during Step 1. This introduces a subtle, woodsy depth that pairs exceptionally well with grilled chicken, roasted vegetables, and barbecue dishes.
Fermented Chili Garlic Paste: For a more complex, umami-rich flavor profile similar to traditional Asian fermented chili pastes, mix the processed chili-garlic blend with an extra half teaspoon of salt and let it sit at room temperature for 24 to 48 hours before cooking. The natural fermentation adds tang and depth that takes this spicy garlic sauce to a completely new level.
Milder Garlic Chili Sauce: Replace half the Thai chilies with seeded red bell peppers. This reduces the overall heat while preserving the gorgeous red color and garlicky richness, making it far more approachable for heat-sensitive eaters.
Storage and Serving
Storage: Once fully cooled, transfer your homemade chili garlic sauce into a clean glass jar with a tight-fitting lid. Store it in the refrigerator, where it will remain fresh and flavorful for up to four to six weeks. Always use a clean, dry spoon when scooping to prevent contamination. For longer storage, freeze the sauce in small portions using an ice cube tray, then transfer the frozen cubes to a zip-lock bag for up to three months.
Serving Suggestions: This sauce is incredibly versatile. Serve it alongside dumplings, spring rolls, or grilled meats as a bold dipping sauce. Stir a spoonful into ramen, pho, or fried rice for instant depth and heat. Use it as a base for marinades, salad dressings, or spicy stir-fry sauces. Even a small amount drizzled over scrambled eggs or avocado toast transforms the ordinary into something memorable.
FAQs
1. Can I use a different type of chili instead of Thai chilies?
Yes. Red Fresno chilies, serrano peppers, or even dried chili flakes can work as substitutes. Keep in mind that each variety delivers a different heat level and flavor profile, so adjust quantities accordingly to suit your personal tolerance.
2. Is this sauce very spicy?
Thai chilies are quite hot, so this homemade chili garlic sauce delivers significant heat. To reduce spiciness, remove the seeds from the chilies before processing, or replace a portion of the Thai chilies with milder red peppers such as Fresno or bell peppers.
3. Can I make this sauce without a food processor?
Absolutely. You can finely mince the chilies and garlic by hand using a sharp knife. The texture will be slightly chunkier, but the flavor will remain just as bold and delicious.
4. Why does my sauce look more orange than red?
The sauce transitions to a deeper red color during the cooking process as moisture evaporates. If your sauce looks orange, it may need a few more minutes on the heat. Continue stirring and cooking until the color darkens and the consistency thickens into a rich paste.
5. What type of oil works best for this recipe?
A neutral oil with a high smoke point is ideal. Extra light olive oil, vegetable oil, sunflower oil, or avocado oil all work well. Avoid extra-virgin olive oil, as its strong flavor can overpower the delicate balance of the chili and garlic.
Homemade Chili Garlic Sauce
- Prep Time: 15 mins
- Cook Time: 30 mins
- Total Time: 45 mins
- Yield: 4 people 1x
- Category: Appetizer
- Method: Cooking
- Cuisine: American
Description
Learn how to make Homemade Chili Garlic Sauce with this easy recipe. Discover the perfect combination of spicy and savory flavors. Try it today!
Ingredients
- 1 cup fresh Thai chilies (stems removed)
- 6 cloves fresh garlic
- 2 tablespoons vinegar (rice or white)
- 1 tablespoon light brown sugar
- 1 tablespoon salt
- 1½ cups neutral oil (such as extra light olive oil)
Instructions
- Step 1: Prepare the Ingredients: Begin by removing the stems from the fresh Thai chilies and peeling the garlic cloves. Place the chilies, garlic, salt, light brown sugar, and vinegar into a food processor. Process the mixture until the ingredients are finely chopped and well combined.
- Step 2: Cook the Chili-Garlic Mixture: Heat ½ cup of neutral oil in a heavy-bottomed pan over medium heat. Once the oil is warm, add the processed chili-garlic mixture to the pan. Increase the heat to medium-high and cook the mixture for 8 to 9 minutes, stirring frequently to prevent burning. The sauce is ready when it transitions from a runny, pink consistency to a thick, rich red paste, indicating that the water content has evaporated.
- Step 3: Incorporate the Remaining Oil: Once the mixture has thickened, add the remaining 1 cup of neutral oil to the pan. Stir thoroughly to combine, ensuring the sauce achieves a smooth and glossy texture. Turn off the heat and allow the sauce to cool completely.
- Step 4: Store the Sauce: Transfer the cooled chili garlic sauce into a clean, airtight jar. If you do not plan to use the sauce within a few days, store it in the refrigerator to maintain freshness. Properly stored, the sauce can last for several weeks.
Notes
Try This Recipe and Leave a comment Below, your opinion matters to me!
Nutrition
- Serving Size: 4 serving
- Calories: 400
- Sugar: 5g
- Sodium: 400mg
- Fat: 10g
- Saturated Fat: 3g
- Unsaturated Fat: 7g
- Trans Fat: 0g
- Carbohydrates: 40g
- Fiber: 5g
- Protein: 15g
- Cholesterol: 50mg


