
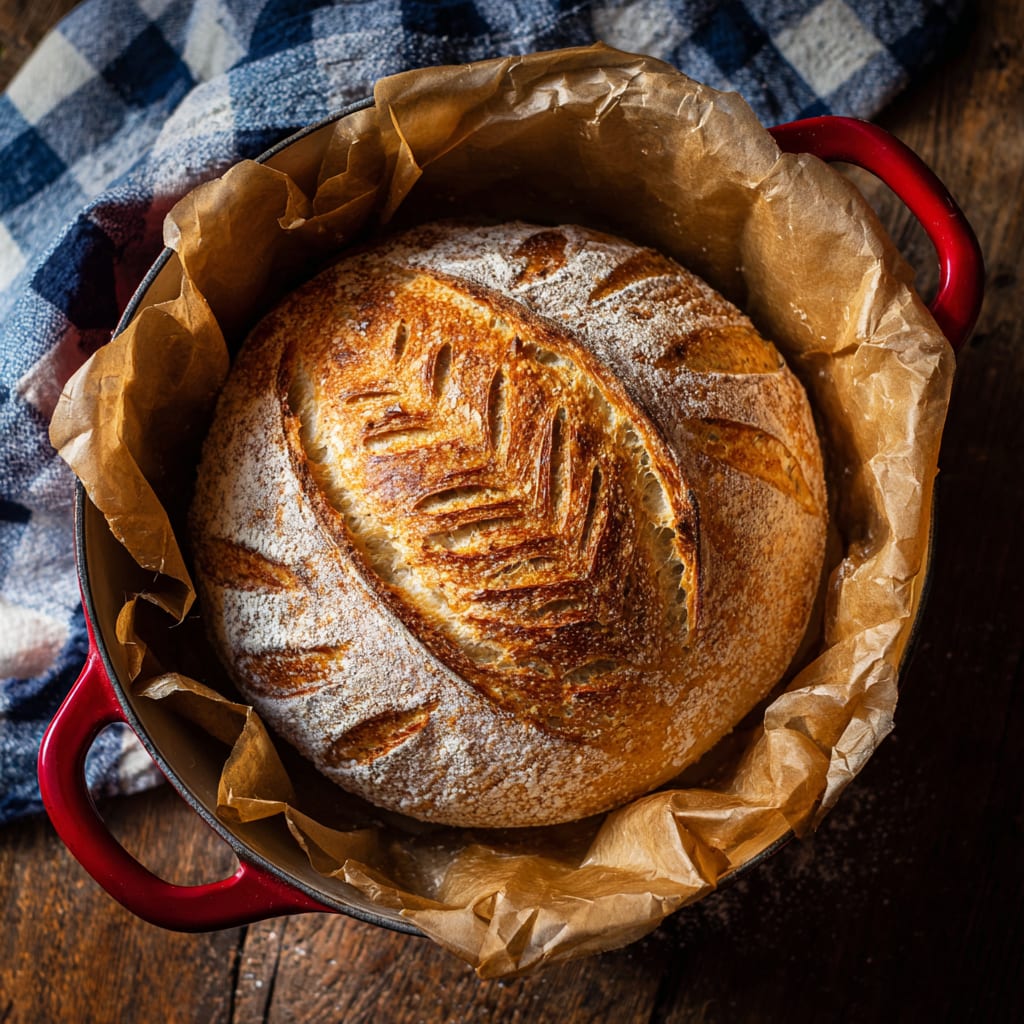
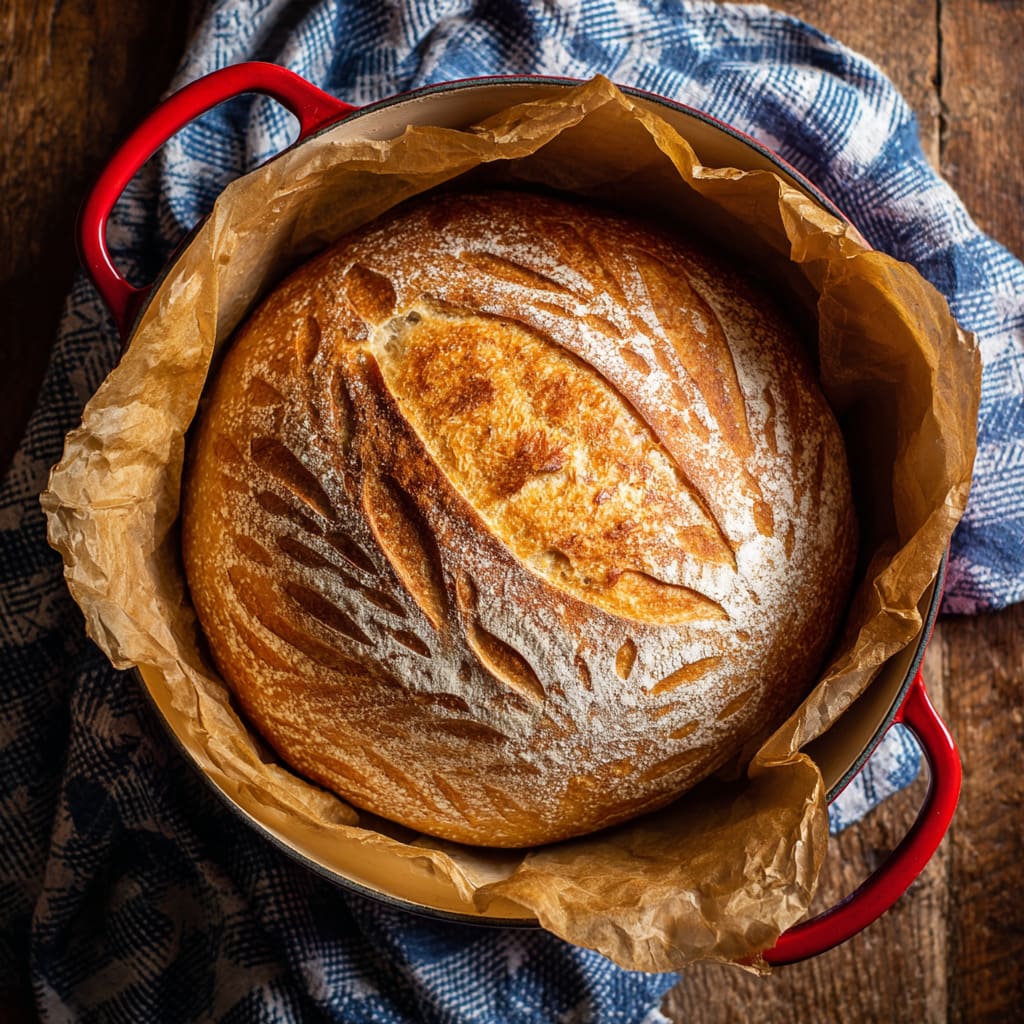
The crackling crust shatters beneath your fingers, revealing a pillowy interior with perfect air pockets waiting to soak up butter. There’s nothing quite like homemade Dutch Oven French Bread fresh from your oven. This artisan-style loaf achieves bakery-quality results using simple ingredients and the magical heat-trapping abilities of a Dutch oven. The enclosed cooking environment creates the perfect steamy atmosphere for developing that signature crisp crust and tender crumb that’s impossible to replicate with standard baking sheets. You’ll learn how to mix, shape, and bake a spectacular loaf that will impress family and friends—all without specialized equipment beyond your trusty Dutch oven.
Why You’ll Love This Recipe
This Dutch Oven French Bread recipe delivers professional-quality bread with minimal effort, making it perfect for both beginners and experienced bakers. The contrast between the crackling, golden exterior and the soft, airy interior creates a sensory experience that store-bought bread simply can’t match. Each bite offers a delightful textural journey from crust to crumb.
Unlike complicated artisan bread recipes that require elaborate techniques or specialized equipment, this method harnesses your Dutch oven’s natural ability to trap steam, creating the perfect environment for bread development. The result is a gorgeous loaf with artisanal qualities—all achievable in your home kitchen.
The hands-on time is surprisingly brief, with the bulk of the process being passive rising and baking time. This means you can easily fit breadmaking into your day while handling other tasks. Plus, the irresistible aroma of freshly baked bread will fill your home, creating an atmosphere of warmth and comfort that simply can’t be bottled.
Ingredients List for the Dutch Oven French Bread
The beauty of this bread lies in its simplicity—just a few quality ingredients transform into something extraordinary through proper technique. The high protein content in bread flour gives this loaf its perfect structure and chewy texture.
- 4 cups bread flour
- 2 teaspoons salt
- 2½ teaspoons instant yeast (SAF brand recommended)
- 1½ cups water
- Pinch cornmeal (for sprinkling on the parchment)
Pro Tips
For the perfect Dutch Oven French Bread, temperature matters tremendously. Use water between 100-110°F—too hot will kill the yeast, too cool will slow fermentation. When testing for proper kneading, the windowpane test is non-negotiable; stretch a small piece of dough between your fingers until translucent without tearing to ensure proper gluten development.
Your Dutch oven should be preheated along with your oven for at least 30 minutes before baking. This creates the intense initial heat that contributes to dramatic oven spring (the rapid rise that happens in the first few minutes of baking). The lid traps steam released from the dough, creating the perfect environment for crust development.
Don’t rush the cooling process. Though the temptation to slice into warm bread is nearly irresistible, cutting too soon allows steam to escape and can result in a gummy interior. Allow your loaf to cool for at least 20 minutes on a wire rack for the perfect texture and flavor development.
Instructions
Step 1: Mix the dough. Combine the flour, salt, yeast, and water in a large mixing bowl or the bowl of a stand mixer. There’s no need to proof instant yeast—toss everything together. Then, mix until the dough clears the sides of the bowl but remains slightly sticky to the touch. If it’s too dry, add a tablespoon of water at a time. If it’s too wet, sprinkle in a bit of flour.
Step 2: Knead the dough. Knead by hand (15–20 minutes) or with a stand mixer (5–10 minutes). You’ll know it’s ready when the dough is smooth, elastic, and passes the windowpane test: stretch a small piece thin enough to see the light through it without tearing.
Step 3: First rise. Place the dough in a lightly oiled bowl and cover with plastic wrap or a clean towel. Let it rise in a warm, draft-free place for 60 minutes or until doubled in size. Tip: An oven warmed briefly (then turned off), or a sunny windowsill works well.
Step 4: Shape the loaf. Turn the risen dough onto a floured surface. Gently shape it into a round loaf by folding the edges under and pinching the bottom until the top is smooth. Then, line your Dutch oven with parchment paper and sprinkle a pinch of cornmeal on top. Place the loaf seam-side down on the parchment.
Step 5: Second rise. Cover the loaf with heavily greased plastic wrap or the lid of your Dutch oven. Let it rise for 45–60 minutes until it significantly puffs up. Preheat your oven to 450°F during the last 15 minutes of rising.
Step 6: Slash and flour. Dust the top of the dough lightly with flour for a rustic finish. Using a very sharp knife or bread lame, make three or four shallow slashes across the top. This helps the bread expand evenly in the oven.
Step 7: Bake. Place the Dutch oven in the preheated oven (with the lid on). Bake for 35–40 minutes total:
First 20 minutes: Bake with the lid on to trap steam, which creates a crisp crust.
Final 15–20 minutes: Remove the lid and bake until the loaf is golden brown and has an internal temperature of at least 190°F.
Step 8: Cool and serve. Remove the bread from the Dutch oven and cool on a wire rack. Let it cool for at least 20 minutes before slicing—if you can wait that long! Serve warm or at room temperature.
Variations
Transform your basic Dutch Oven French Bread into something special with these simple variations. For a rustic Rosemary Garlic version, fold in 2 tablespoons of fresh chopped rosemary and 3 cloves of minced garlic during the initial mixing stage. The herbs infuse the dough with aromatic flavors that make this perfect for serving alongside Italian dishes.
For a hearty Whole Wheat version, substitute up to 2 cups of the bread flour with whole wheat flour. This creates a nuttier flavor profile and adds nutritional benefits, though the texture will be slightly denser. You may need to add an extra 1-2 tablespoons of water to accommodate the whole wheat flour’s higher absorption rate.
Olive lovers can create a Mediterranean-inspired loaf by gently folding in ¾ cup of chopped Kalamata olives and 1 tablespoon of chopped fresh thyme after the first rise. This creates bursts of briny flavor throughout the homemade Dutch oven bread that pairs beautifully with cheese boards and soups.
Storage and Serving
Your homemade Dutch Oven French Bread will maintain its best quality for 2-3 days when stored properly. Keep it at room temperature in a paper bag or bread box—avoid plastic, which traps moisture and softens that beautiful crust. For longer storage, slice the completely cooled bread and freeze in an airtight container for up to 3 months, thawing slices as needed.
Serve this bread as a stunning centerpiece for any meal. Create an elevated breakfast experience by toasting thick slices and topping with avocado, poached eggs, and flaky sea salt. For lunch, nothing beats a hearty sandwich built on fresh slices of homemade bread—try it with premium deli meats, aged cheeses, and grainy mustard.
For dinner, pair your crusty Dutch oven bread with robust soups and stews—the bread’s sturdy structure makes it perfect for dipping into rich broths. Alternatively, create an impressive appetizer by cutting into chunks and serving alongside high-quality olive oil infused with herbs and garlic for dipping.
FAQs
Can I use all-purpose flour instead of bread flour?
Yes, all-purpose flour can be substituted, but the bread may have a slightly less chewy texture and lower rise. Bread flour has a higher protein content (12-14%) compared to all-purpose (10-12%), which creates stronger gluten networks that trap gas bubbles more effectively.
Why is my Dutch oven bread not rising properly?
Insufficient rise typically results from inactive yeast (check expiration date), too cool of an environment, or insufficient kneading. Ensure your water is 100-110°F, and your rising environment is draft-free and warm. The windowpane test during kneading confirms proper gluten development.
Can I make this dough ahead of time?
Absolutely! After the first rise, punch down the dough, cover tightly, and refrigerate for up to 24 hours. This slow fermentation actually enhances flavor. Allow the cold dough to sit at room temperature for 30 minutes before shaping and proceeding with the second rise.
Why is preheating the Dutch oven necessary?
A preheated Dutch oven creates immediate steam when the dough is introduced, which is crucial for proper crust development. The enclosed space traps moisture from the dough, creating the perfect environment for that characteristic crispy crust and soft interior of artisan bread.
My bread crust is too hard. What went wrong?
While Dutch Oven French Bread should have a crisp crust, excessive hardness might result from over-baking or too low moisture. Try reducing baking time by 3-5 minutes or placing a small oven-safe dish of water in the oven during the lid-off portion of baking to maintain humidity.
Dutch Oven French Bread
- Prep Time: 15 mins
- Cook Time: 30 mins
- Total Time: 45 mins
- Yield: 4 people 1x
- Category: Dinner
- Method: Cooking
- Cuisine: American
Description
Bake mouthwatering Dutch Oven French Bread at home with these easy tips. Discover the recipe now!
Ingredients
- 4 cups bread flour
- 2 teaspoons salt
- 2½ teaspoons instant yeast ((SAF brand recommended))
- 1½ cups water
- Pinch cornmeal ((for sprinkling on the parchment))
Instructions
- Step 1: Mix the dough. Combine the flour, salt, yeast, and water in a large mixing bowl or the bowl of a stand mixer. There’s no need to proof instant yeast—toss everything together. Then, mix until the dough clears the sides of the bowl but remains slightly sticky to the touch. If it’s too dry, add a tablespoon of water at a time. If it’s too wet, sprinkle in a bit of flour.
- Step 2: Knead the dough. Knead by hand (15–20 minutes) or with a stand mixer (5–10 minutes). You’ll know it’s ready when the dough is smooth, elastic, and passes the windowpane test: stretch a small piece thin enough to see the light through it without tearing.
- Step 3: First rise. Place the dough in a lightly oiled bowl and cover with plastic wrap or a clean towel. Let it rise in a warm, draft-free place for 60 minutes or until doubled in size.Tip: An oven warmed briefly (then turned off), or a sunny windowsill works well.
- Step 4: Shape the loaf. Turn the risen dough onto a floured surface. Gently shape it into a round loaf by folding the edges under and pinching the bottom until the top is smooth. Then, line your Dutch oven with parchment paper and sprinkle a pinch of cornmeal on top. Place the loaf seam-side down on the parchment.
- Step 5: Second rise. Cover the loaf with heavily greased plastic wrap or the lid of your Dutch oven. Let it rise for 45–60 minutes until it significantly puffs up. Preheat your oven to 450°F during the last 15 minutes of rising.
- Step 6: Slash and flour. Dust the top of the dough lightly with flour for a rustic finish. Using a very sharp knife or bread lame, make three or four shallow slashes across the top. This helps the bread expand evenly in the oven.
- Step 7: Bake. Place the Dutch oven in the preheated oven (with the lid on). Bake for 35–40 minutes total:First 20 minutes: Bake with the lid on to trap steam, which creates a crisp crust.Final 15–20 minutes: Remove the lid and bake until the loaf is golden brown and has an internal temperature of at least 190°F.
- Step 8: Cool and serve. Remove the bread from the Dutch oven and cool on a wire rack. Let it cool for at least 20 minutes before slicing—if you can wait that long! Serve warm or at room temperature.
Notes
Try This Recipe and Leave a comment Below, your opinion matters to me!
Nutrition
- Serving Size: 4 serving
- Calories: 400
- Sugar: 5g
- Sodium: 400mg
- Fat: 10g
- Saturated Fat: 3g
- Unsaturated Fat: 7g
- Trans Fat: 0g
- Carbohydrates: 40g
- Fiber: 5g
- Protein: 15g
- Cholesterol: 50mg


