
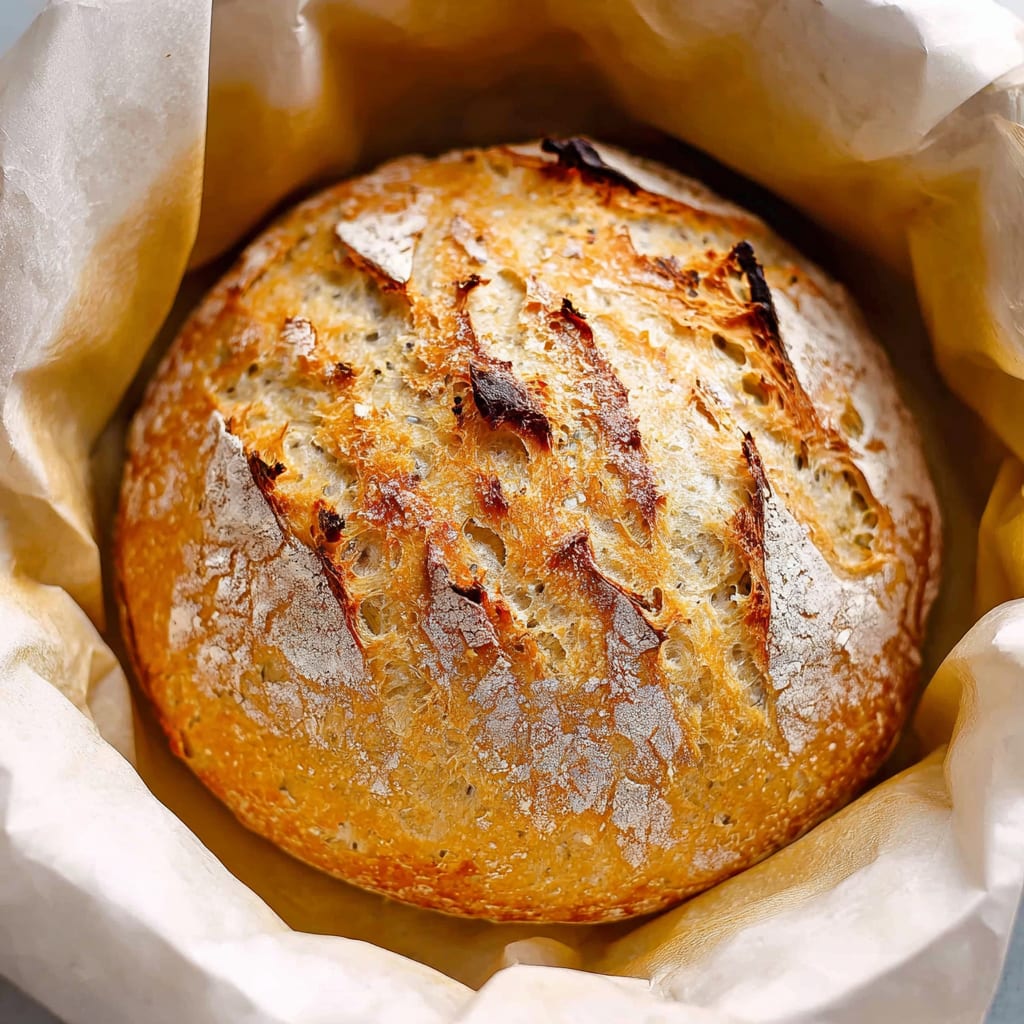
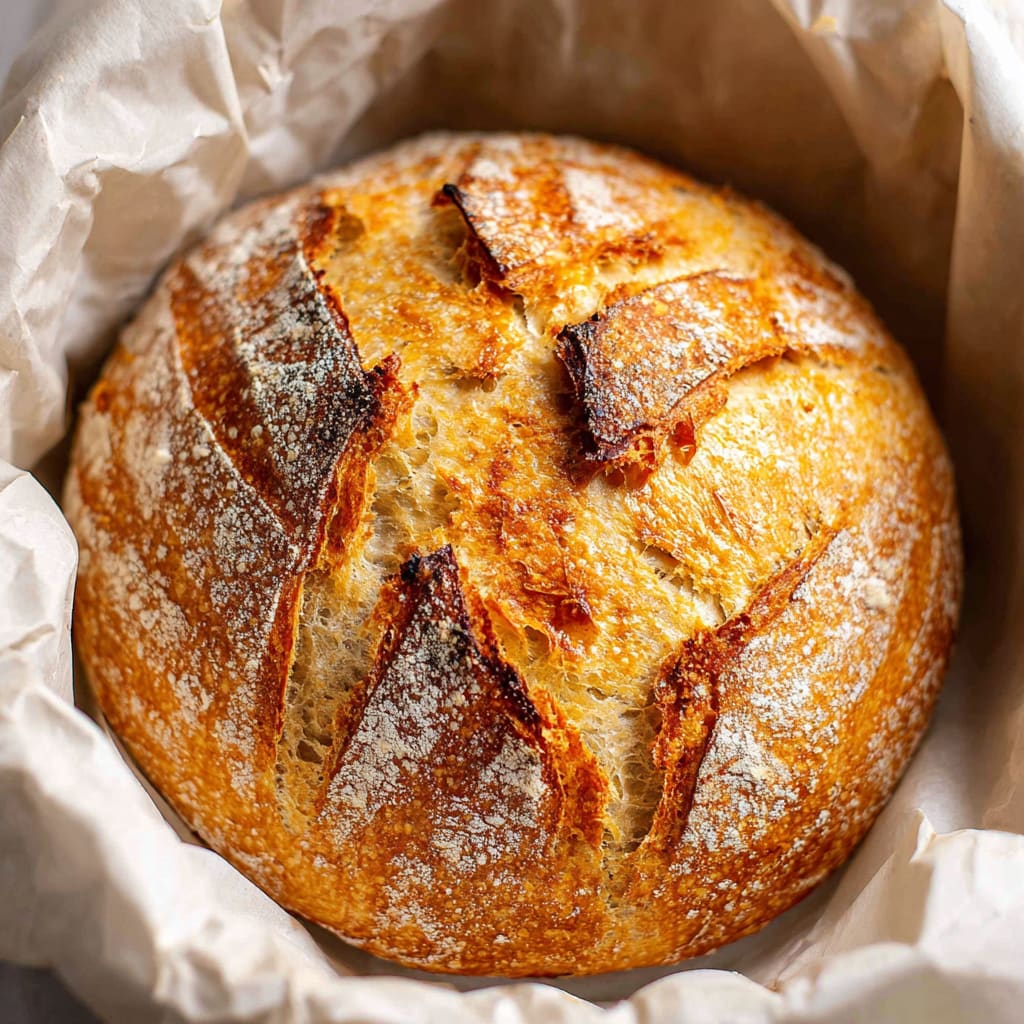
The aroma of freshly baked Dutch Oven No Knead Bread filling your kitchen is truly one of life’s simple pleasures. This rustic loaf boasts a crackling crust that shatters beneath your knife and reveals a tender, airy interior with perfect chew. What makes this Dutch Oven No Knead Bread so revolutionary is its simplicity—with just four basic ingredients and almost no hands-on work, even complete beginners can create artisan-quality bread at home. The magic happens during the long fermentation and the Dutch oven’s unique ability to create bakery-worthy results. You’ll learn how this foolproof method transforms flour, water, yeast, and salt into a bread that rivals your favorite bakery’s best offerings.
Why You’ll Love This Recipe
This Dutch Oven No Knead Bread will quickly become a staple in your baking repertoire for so many reasons. First, it’s incredibly forgiving—perfect for both novice bakers and seasoned bread enthusiasts. The contrast between the crackling, golden exterior and the pillowy, open-crumb interior creates a texture experience that’s impossible to find in store-bought loaves.
The hands-off approach means you’ll spend less than 10 minutes of active time creating a loaf that looks and tastes professionally made. The long fermentation develops complex, slightly tangy flavors that make this bread perfect for everything from sandwiches to sopping up soup.
Perhaps best of all, this recipe uses equipment you likely already have—no special bread tools required beyond a Dutch oven. The process works with your schedule, not against it; you can bake after the initial rise or refrigerate the dough for up to a week for even more flavor development and convenience. Each time you make this easy no-knead bread, you’ll be amazed that something so simple can taste so extraordinary.
Ingredients List for the Dutch Oven No Knead Bread
The beauty of this Dutch Oven No Knead Bread lies in its simplicity—just four humble ingredients that transform into something magical. The slow fermentation allows these basic components to develop deep, complex flavors without any additives or enhancers.
- 1 1/2 cups warm water (about 100 degrees F)
- 1 packet yeast (active dry, instant, or quick rise- 2.25 teaspoons)
- 1 ½ teaspoons fine grain salt
- 3 1/4 cups all-purpose flour
Pro Tips
To elevate your Dutch Oven No Knead Bread from good to exceptional, these three critical techniques make all the difference:
First, don’t rush the preheating process. Allowing your Dutch oven to thoroughly heat for at least 20-30 minutes after your oven reaches temperature ensures that crucial initial blast of heat that creates the perfect crust. This mimics professional steam-injected ovens and is the secret to that artisan crust.
Second, embrace the sticky dough. Many new bakers make the mistake of adding too much flour because they expect a smooth, traditional dough. The high hydration is intentional—it creates those beautiful air pockets. Use a silicone spatula for mixing and handling rather than your hands.
Finally, let your bread cool properly before slicing. This resting period allows the interior to set properly and the flavors to develop. Cutting too soon results in gummy texture and lost moisture. Patience yields the perfect slice with optimal texture and flavor, worth every minute of waiting.
Instructions
Step 1: In a large bowl (or container), mix together the 1 1/2 cups warm water, 1 packet yeast (or 2.25 teaspoons), and 1 ½ teaspoons fine grain salt, until yeast and salt are fully or almost dissolved (I like using a whisk for this).
Step 2: Add the 3 1/4 cups all-purpose flour to the bowl all at once and stir together until a sticky dough forms. Don’t worry about mixing it too much, just make sure everything is uniformly wet. It WILL be messy and sticky. You can scrape what’s left on the spoon with a silicone spatula. (photo below provided for what the texture should look like – if it seems too wet, add 1-2 tablespoons more flour at a time until it is more like the photo. If it seems too dry, do the same thing with more water).
Step 3: Cover the bowl with a kitchen towel (or place the container to the lid on ajar). Leave it for 2-3 hours to rise in a somewhat warm place until it’s doubled in volume, like photo in previous step (If it’s cold out, I like to preheat my oven for a few minutes, then turn it off, then place the bowl in the oven, trapping the heat inside. If your house is warm just leave it out, or if it’s warm outside you can place it there).
Step 4: After the two-three hour rise time when the dough has about doubled, you have two options: bake, or store in the fridge. See notes for how to store.
Step 5: 30 minutes to an hour before you are ready to bake, preheat your oven to 450 degrees F. Place your Dutch oven in the oven, with the lid ON, while the oven is preheating. Once the oven reaches 450, keep it preheating for another 20 minutes, so the Dutch oven gets good and hot.
Step 6: Scrape the dough into the edge of a piece of parchment paper dusted with flour. Make it into as much of a “loaf” shape as you can by folding the edges up on top of it (a silicone spatula works well for this).
Step 7: Then, use the edges of the parchment paper to flip the loaf over so the floured side is on top and the loaf is in the center of the parchment paper. Don’t worry about it looking beautiful or smooth on top. My Dutch oven is an oval, so I made an oval shape. You can do a circle if yours is round.
Step 8: Optional: use a very sharp knife or clean razor blade to cut a few slits across the top of the loaf about 1/2″ deep, across the entire top. I did this in a cross shape for mine.
Step 9: Take out the preheated Dutch oven and take off the lid, carefully! Grab the parchment from the sides and place the loaf in your Dutch oven.
Step 10: Place the cover back on the Dutch oven and place in the preheated oven on the center rack. Bake for 35 minutes at 450 degrees F (40 minutes if dough was cold from the fridge). Remove the lid and bake for another 5-10 minutes, until a golden brown color forms- longer if necessary. Remove the loaf from the dutch oven (grabbing the sides of the parchment paper works well here) and place it on a wire rack or cutting board to cool for at least 10 minutes (preferably 30 minutes – an hour, if you have time) before slicing.
Variations
The basic Dutch Oven No Knead Bread recipe is incredibly versatile and serves as a perfect canvas for delicious variations. For a rustic herb version, mix in 2 tablespoons of fresh rosemary, thyme, and sage just before adding the flour. The slow fermentation beautifully infuses the herbs throughout the loaf.
For a heartier option, add 1/3 cup each of toasted sunflower seeds and pumpkin seeds plus 1/4 cup of flax seeds to create a seeded multigrain bread. The seeds add wonderful texture and nutritional benefits while maintaining the bread’s signature crust.
Those looking for a sweeter twist can fold in 1/2 cup of dried cranberries and 1/3 cup of chopped walnuts for a no-knead cranberry walnut bread that makes exceptional toast. For a more robust flavor profile, substitute 1 cup of whole wheat flour for an equal amount of all-purpose flour in any of these variations.
Storage and Serving
Your homemade Dutch Oven No Knead Bread will stay fresh at room temperature for up to 3 days when stored properly. Keep it cut-side down on a cutting board or wrap it in a clean kitchen towel—avoid plastic bags, which soften that perfect crust. For longer storage, slice the bread once completely cooled and freeze in a ziplock bag for up to 3 months, toasting slices as needed.
This bread truly shines when served alongside hearty soups like beef stew or tomato bisque, where its sturdy texture holds up perfectly for dipping. It makes exceptional grilled cheese sandwiches with its crisp exterior and chewy interior. For a simple yet elegant appetizer, slice thinly, toast lightly, and top with ricotta, honey, and cracked black pepper. The bread’s neutral flavor profile also makes it an ideal accompaniment to charcuterie boards, where it complements rather than competes with various cheeses and cured meats.
FAQs
Can I use a different type of flour for this no-knead bread?
Yes, you can experiment with different flours, but be aware that changing the flour will affect hydration. For whole wheat, start by substituting just 1 cup of the all-purpose flour and add an extra 2 tablespoons of water. Bread flour works beautifully and creates a slightly chewier texture.
What if I don’t have a Dutch oven?
While a Dutch oven creates the best crust, you can use any oven-safe pot with a tight-fitting lid that can withstand 450°F. Some bakers have success with a heavy-duty pot covered with a baking sheet as a makeshift lid.
Can I let the dough rise longer than 3 hours?
Absolutely! A longer rise at room temperature (up to 8-12 hours) or in the refrigerator (up to a week) develops more flavor. The refrigerator slows fermentation and makes the dough easier to handle.
Why is my bread dense instead of airy?
The most common causes are insufficient rising time, too much flour, or not enough preheating of the Dutch oven. Make sure your dough doubles in size during rising and looks bubbly before baking.
Is the dough supposed to be this wet and sticky?
Yes! The high hydration level in this Dutch Oven No Knead Bread creates those beautiful air pockets. Resist the urge to add more flour unless the dough is truly soupy.
Dutch Oven No Knead Bread
- Prep Time: 15 mins
- Cook Time: 30 mins
- Total Time: 45 mins
- Yield: 4 people 1x
- Category: Dinner
- Method: Cooking
- Cuisine: American
Description
Discover how to make delicious Dutch Oven No Knead Bread at home with this easy recipe. Try it today and impress your friends and family!
Ingredients
- 1 1/2 cups warm water (about 100 degrees F)
- 1 packet yeast (active dry, instant, or quick rise- 2.25 teaspoons)
- 1 ½ teaspoons fine grain salt
- 3 1/4 cups all-purpose flour
Instructions
- Step 1: In a large bowl (or container), mix together the 1 1/2 cups warm water, 1 packet yeast (or 2: 25 teaspoons), and 1 ½ teaspoons fine grain salt, until yeast and salt are fully or almost dissolved (I like using a whisk for this).
- Step 2: Add the 3 1/4 cups all-purpose flour to the bowl all at once and stir together until a sticky dough forms. Don’t worry about mixing it too much, just make sure everything is uniformly wet. It WILL be messy and sticky. You can scrape what’s left on the spoon with a silicone spatula. (photo below provided for what the texture should look like – if it seems too wet, add 1-2 tablespoons more flour at a time until it is more like the photo. If it seems too dry, do the same thing with more water).
- Step 3: Cover the bowl with a kitchen towel (or place the container to the lid on ajar). Leave it for 2-3 hours to rise in a somewhat warm place until it’s doubled in volume, like photo in previous step (If it’s cold out, I like to preheat my oven for a few minutes, then turn it off, then place the bowl in the oven, trapping the heat inside. If your house is warm just leave it out, or if it’s warm outside you can place it there).
- Step 4: After the two-three hour rise time when the dough has about doubled, you have two options: bake, or store in the fridge. See notes for how to store.
- Step 5: 30 minutes to an hour before you are ready to bake, preheat your oven to 450 degrees F. Place your Dutch oven in the oven, with the lid ON, while the oven is preheating. Once the oven reaches 450, keep it preheating for another 20 minutes, so the Dutch oven gets good and hot.
- Step 6: Scrape the dough into the edge of a piece of parchment paper dusted with flour. Make it into as much of a “loaf” shape as you can by folding the edges up on top of it (a silicone spatula works well for this).
- Step 7: Then, use the edges of the parchment paper to flip the loaf over so the floured side is on top and the loaf is in the center of the parchment paper. Don’t worry about it looking beautiful or smooth on top. My Dutch oven is an oval, so I made an oval shape. You can do a circle if yours is round.
- Step 8: Optional: use a very sharp knife or clean razor blade to cut a few slits across the top of the loaf about 1/2″ deep, across the entire top. I did this in a cross shape for mine.
- Step 9: Take out the preheated Dutch oven and take off the lid, carefully! Grab the parchment from the sides and place the loaf in your Dutch oven.
- Step 10: Place the cover back on the Dutch oven and place in the preheated oven on the center rack. Bake for 35 minutes at 450 degrees F (40 minutes if dough was cold from the fridge). Remove the lid and bake for another 5-10 minutes, until a golden brown color forms- longer if necessary. Remove the loaf from the dutch oven (grabbing the sides of the parchment paper works well here) and place it on a wire rack or cutting board to cool for at least 10 minutes (preferably 30 minutes – an hour, if you have time) before slicing.
Notes
Try This Recipe and Leave a comment Below, your opinion matters to me!
Nutrition
- Serving Size: 4 serving
- Calories: 400
- Sugar: 5g
- Sodium: 400mg
- Fat: 10g
- Saturated Fat: 3g
- Unsaturated Fat: 7g
- Trans Fat: 0g
- Carbohydrates: 40g
- Fiber: 5g
- Protein: 15g
- Cholesterol: 50mg


