

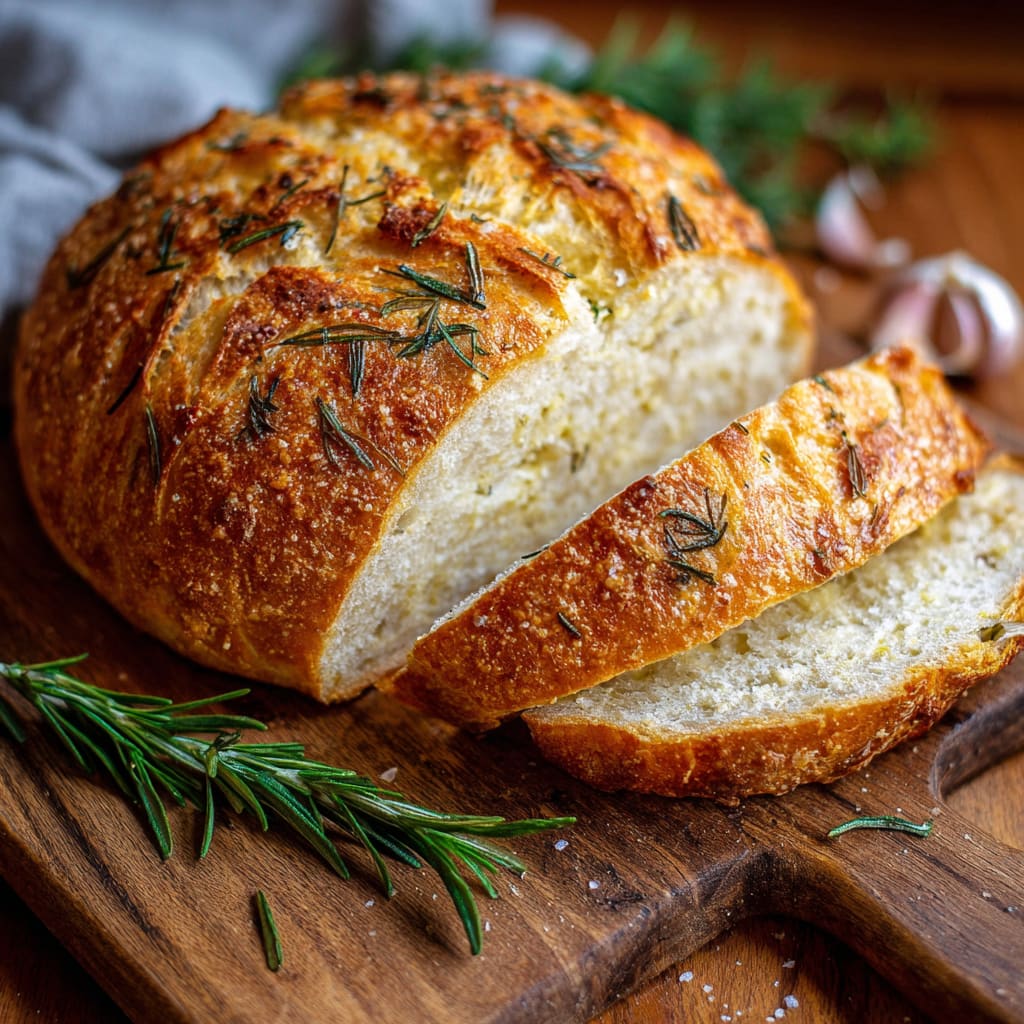
The intoxicating aroma of fresh Garlic Rosemary Bread baking in your kitchen is an experience that simply cannot be matched. As the fragrant herbs release their essential oils and the garlic caramelizes slightly in the heat, your entire home will be filled with a scent that makes mouths water instantly. This rustic, artisanal Garlic Rosemary Bread combines the earthy, pine-like notes of fresh rosemary with the warm, pungent flavor of garlic in a perfectly crusty exterior that gives way to a soft, airy interior. You’ll learn how to create bakery-quality bread with minimal effort, using a dutch oven technique that guarantees professional results every single time.
Why You’ll Love This Recipe
This Garlic Rosemary Bread recipe will quickly become a staple in your home baking repertoire for so many reasons. First, it’s deceptively simple—requiring just a handful of basic ingredients that transform into something extraordinary. The contrast between the crackling, golden crust and the pillowy soft interior creates a textural masterpiece that’s impossible to resist when still slightly warm from the oven.
Unlike many homemade bread recipes, this one doesn’t require extensive kneading or complicated techniques. The magic happens during the dutch oven baking process, which creates the perfect environment for developing that professional bakery-style crust. The combination of fresh rosemary and garlic infuses every bite with Mediterranean-inspired flavor that elevates this bread beyond a simple side.
Best of all, this recipe is incredibly forgiving. Even if you’ve had bread-baking disasters in the past, this foolproof method will build your confidence and have you creating Instagram-worthy loaves that friends and family will beg you to make again and again. The irresistible garlic herb aroma alone is worth the minimal effort this recipe requires.
Ingredients List for the Garlic Rosemary Bread
The beauty of this bread lies in its simplicity—just a few quality ingredients create something truly spectacular. The fresh rosemary and garlic are the stars here, infusing the dough with their aromatic oils during the baking process.
- 3 cups All Purpose Flour
- 1 1/2 tsp sugar
- 2 tsps salt
- 2 1/2 tsp quick yeast (1 package)
- 1 1/3 cups water (warm)
- 2 large rosemary sprigs (taken off stems and diced)
- 3 garlic cloves (diced)
Pro Tips
Achieving the perfect loaf of Garlic Rosemary Bread comes down to a few critical techniques that make all the difference. First, don’t be alarmed by the sticky, shaggy texture of the dough—this high-hydration dough is exactly what creates those beautiful air pockets in the finished bread. Resist the urge to add more flour; the wet dough is essential for that artisanal texture.
Second, the preheated dutch oven is non-negotiable. This creates the steam environment professional bakers use to achieve that crackly, perfect crust. The extreme heat of the preheated vessel gives the bread its immediate rise (what bakers call “oven spring”) and creates the ideal crust development.
Finally, be patient with the cooling time. Although it’s tempting to slice into your gorgeous homemade rosemary garlic loaf immediately, waiting at least 30 minutes allows the interior to set properly and prevents a gummy texture. This cooling period is actually part of the baking process as the residual heat continues to cook the interior while the exterior begins to cool.
Instructions
First Rise:
1. Add all of the ingredients to a mixing bowl and stir together. The dough will be sticky, shaggy and a hot mess. That’s okay, it’s supposed to be that way.
2. Cover with the lid and transfer it to the oven. Bake for 30 minutes. When it’s done the color will be pale. Place it back in the oven without the lid for another 10 minutes, or until is golden brown of to your liking.
Shaping the bread:
1. Lay out a piece of parchment paper and dust it with flour. Transfer the dough from the bowl to the paper and behind shaping it. You’ll want to stretch out each side and fold it over and work around until you have it in the shape of a ball. (Don’t worry you can’t mess this up).
2. Flip it over to where the smooth side is up. Cover with the towel and let it rise for roughly 20 minutes (or until the dutch oven is read in the next step).
3. Remove from the oven and lift the bread out of the dutch oven using the parchment paper. Let cool for at least 30 minutes.
Heating the dutch oven:
1. Place the dutch oven in the oven (I didn’t include the lid). Preheat your oven to 450F and let it come to temperature. Your bread will rise while your dutch oven heats up.
Baking the bread:
1. Using oven mitts, take the dutch oven out of your oven and place it on top of the stove. Lift the bread using the parchment paper and transfer it to the dutch oven. Score the bread to let steam escape while it bakes. I just did a simple slash down the center with a knife, but you can make it pretty with designs if you’d like.
2. Cover with the lid and transfer it to the oven. Bake for 30 minutes. When it’s done the color will be pale. Place it back in the oven without the lid for another 10 minutes, or until is golden brown of to your liking.
3. Remove from the oven and lift the bread out of the dutch oven using the parchment paper. Let cool for at least 30 minutes.
4. Serving ideas: butter and a sprinkle of sea salt, olive oil and balsamic, or straight up.
Variations
The beauty of this Garlic Rosemary Bread recipe is how adaptable it is to different flavor profiles. For a Mediterranean twist, add 1/2 cup of pitted and chopped Kalamata olives and 1/4 cup of crumbled feta cheese to the dough before the first rise. The saltiness of the olives and cheese pairs beautifully with the herbal notes of rosemary.
For those who enjoy a bit more texture, try adding 1/3 cup of toasted pine nuts or sunflower seeds to the dough. This adds a delightful crunch to the rustic bread and complements the garlic herb flavors perfectly. You can also experiment with herb variations—substitute half the rosemary with fresh thyme for a slightly different aromatic profile that still maintains the essence of this homemade garlic bread with herbs.
For a heartier version perfect for fall and winter, fold in 1/4 cup of crispy bacon bits and 1/3 cup of shredded Gruyère cheese. This creates a more substantial rosemary garlic loaf that can serve as the centerpiece of a meal rather than just an accompaniment.
Storage and Serving
Your freshly baked Garlic Rosemary Bread will maintain its optimal texture and flavor for about 2-3 days when stored properly. Keep it at room temperature in a paper bag or wrapped loosely in a clean kitchen towel—this preserves the crust better than plastic, which tends to soften it. For longer storage, slice the bread once completely cooled and freeze in a ziplock bag for up to 3 months, removing slices as needed and toasting them to refresh.
This aromatic bread makes an incredible accompaniment to hearty soups and stews, where it can be used to soak up flavorful broths. It also elevates a simple pasta dinner to restaurant quality when served alongside with good olive oil for dipping. For an impressive appetizer, slice the bread thinly, brush with olive oil, and toast lightly to make crostini topped with ricotta and honey or a tomato bruschetta mixture. The robust flavors of this garlic and herb bread can stand up to bold toppings while still shining through.
FAQs
Can I use active dry yeast instead of quick yeast?
Yes, you can substitute active dry yeast, but you’ll need to proof it first. Dissolve the yeast in the warm water with the sugar and let it sit for 5-10 minutes until foamy before mixing with the remaining ingredients.
My dough seems too wet. Should I add more flour?
Resist the urge to add more flour! This high-hydration dough is supposed to be sticky and wet. This creates the artisanal texture with those lovely air pockets. Use floured hands when handling the dough instead.
Can I make this bread without a dutch oven?
While a dutch oven provides the best results, you can use any oven-safe pot with a tight-fitting lid. Alternatively, place a metal baking pan with water on the bottom rack of your oven while baking the bread on a baking sheet to create steam.
How do I know when my bread is fully baked?
Beyond the golden color, properly baked bread should sound hollow when tapped on the bottom. If you have an instant-read thermometer, the internal temperature should reach about 200°F (93°C).
Can I make the dough ahead of time?
Absolutely! You can refrigerate the dough after the first rise for up to 24 hours. This slow fermentation actually enhances the flavor. Just bring it to room temperature before shaping and continuing with the recipe.
Garlic Rosemary Bread
- Prep Time: 15 mins
- Cook Time: 30 mins
- Total Time: 45 mins
- Yield: 4 people 1x
- Category: Appetizer
- Method: Cooking
- Cuisine: American
Description
Discover how to make delicious Garlic Rosemary Bread at home with our easy recipe and enjoy the amazing flavors!
Ingredients
- 3 cups All Purpose Flour
- 1 1/2 tsp sugar
- 2 tsps salt
- 2 1/2 tsp quick yeast ((1 package))
- 1 1/3 cups water (warm)
- 2 large rosemary sprigs (taken off stems an diced)
- 3 garlic cloves (diced)
Instructions
First Rise:
- Step 1: Add all of the ingredients to a mixing bowl and stir together. The dough will be sticky, shaggy and a hot mess. That’s okay, it’s supposed to be that way.
- Step 2: Cover with the lid and transfer it to the oven. Bake for 30 minutes. When it’s done the color will be pale. Place it back in the oven without the lid for another 10 minutes, or until is golden brown of to your liking.
Shaping the bread:
- Step 1: Lay out a piece of parchment paper and dust it with flour. Transfer the dough from the bowl to the paper and behind shaping it. You’ll want to stretch out each side and fold it over and work around until you have it in the shape of a ball. (Don’t worry you can’t mess this up).
- Step 2: Flip it over to where the smooth side is up. Cover with the towel and let it rise for roughly 20 minutes (or until the dutch oven is read in the next step.
Step 3: Remove from the oven and lift the bread out of the dutch oven using the parchment paper. Let cool for at least 30 minutes. - Heating the dutch oven :
Step 1: Place the dutch oven in the oven (I didn’t include the lid). Preheat your oven to 450F and let it come to temperature. Your bread will rise while your dutch oven heats up. - Baking the bread:
Step 1: Using oven mitts, take the dutch oven out of your oven and place it on top of the stove. Lift the bread using the parchment paper and transfer it to the dutch oven. Score the bread to let steam escape while it bakes. I just did a simple slash down the center with a knife, but you can make it pretty with designs if you’d like.
Step 2: Cover with the lid and transfer it to the oven. Bake for 30 minutes. When it’s done the color will be pale. Place it back in the oven without the lid for another 10 minutes, or until is golden brown of to your liking.
Step 3: Remove from the oven and lift the bread out of the dutch oven using the parchment paper. Let cool for at least 30 minutes.
Step 4: Serving ideas: butter and a sprinkle of sea salt, olive oil and balsamic, or straight up.
Notes
Try This Recipe and Leave a comment Below, your opinion matters to me!
Nutrition
- Serving Size: 4 serving
- Calories: 400
- Sugar: 5g
- Sodium: 400mg
- Fat: 10g
- Saturated Fat: 3g
- Unsaturated Fat: 7g
- Trans Fat: 0g
- Carbohydrates: 40g
- Fiber: 5g
- Protein: 15g
- Cholesterol: 50mg


