
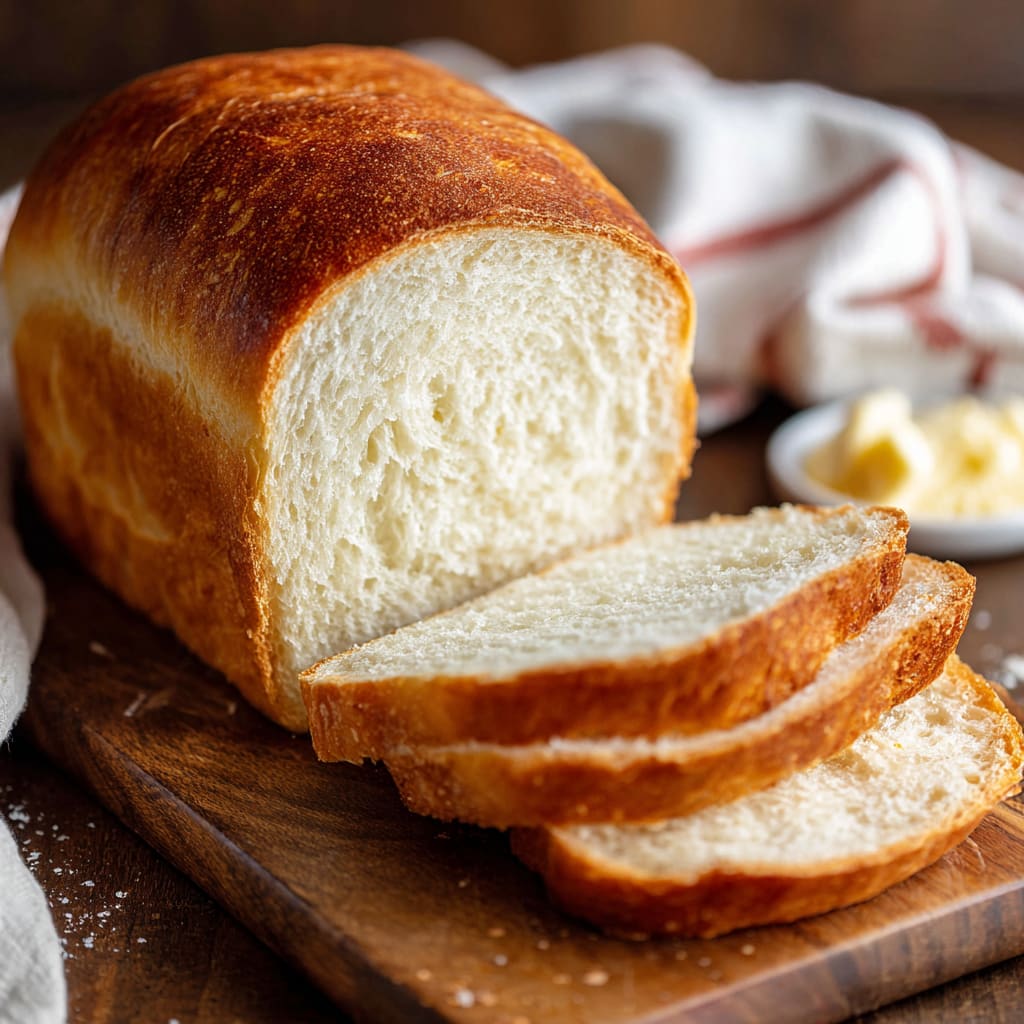
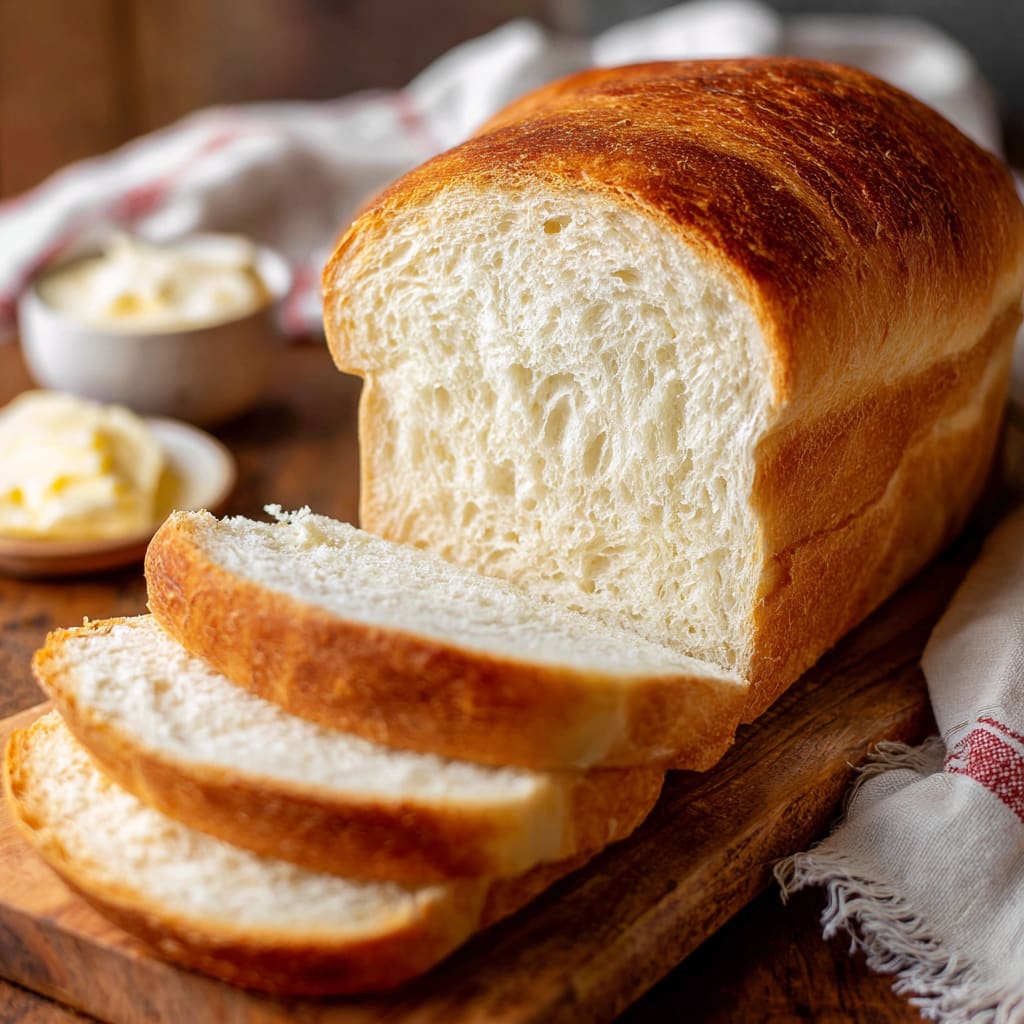
Imagine the warm, yeasty aroma of freshly baked homemade bread filling your kitchen as you slice into a loaf with a perfectly golden, crackling crust that gives way to a soft, pillowy interior. There’s something deeply satisfying about creating homemade bread from scratch—watching simple ingredients transform into something so delicious through the magic of fermentation and heat. This classic homemade bread recipe yields two beautiful loaves with the perfect texture and flavor that store-bought varieties simply can’t match. You’ll learn the essential techniques for mixing, kneading, and baking bread that will empower you to create bakery-quality results in your own kitchen.
Why You’ll Love This Recipe
This homemade bread recipe stands out from others for several compelling reasons. First, it strikes the perfect balance between simplicity and quality—using basic pantry ingredients but yielding professional results. The texture contrast is remarkable: a satisfyingly crisp crust protecting the tender, airy crumb within that’s perfect for sopping up soups or slathering with butter.
Unlike many artisan bread recipes that require complicated techniques or special equipment, this recipe is approachable for bakers of any skill level. The dough is forgiving and the process is straightforward, making it ideal for beginners while still producing results that will impress experienced bread makers.
The dual rising periods might require some patience, but they’re essential for developing the complex, slightly sweet flavor that makes this bread so irresistible. Plus, there’s an undeniable sense of accomplishment that comes from pulling two gorgeous loaves of warm, fragrant bread from your oven—a tactile, sensory experience that connects you to generations of bakers before you.
Ingredients List for the Homemade Bread Recipe
These simple ingredients combine to create bread with exceptional flavor and texture. The balance of honey and salt creates a perfectly seasoned loaf, while the combination of yeast and flour provides the foundation for that classic bread structure we all love.
- 2 cups warm water (105-115 degrees) ((474g))
1 Tablespoons active dry yeast
- 1/4 cup honey or sugar ((85g honey, 50g sugar))
- 2 teaspoons salt
- 2 Tablespoons oil (canola or vegetable) ((30 ml))
4 – 5 1/2 cups all-purpose or bread flour ((500g-688g))
Pro Tips
Achieving perfect homemade bread requires attention to a few critical details that can make or break your loaves. First, temperature matters tremendously—your water must be warm (105-115°F) but not hot to properly activate the yeast without killing it. Use a thermometer if you’re unsure, as this single factor can determine whether your bread rises properly.
Second, resist the temptation to add too much flour. The dough should feel slightly tacky but not actually stick to your hands in clumps. Many bakers ruin their bread by adding excess flour, resulting in dense, dry loaves. Remember that humidity affects flour absorption, so use the visual and tactile cues rather than strictly following measurements.
Finally, the “hollow tap test” is the most reliable way to check if your bread is fully baked. When you tap the bottom of a properly baked loaf, it should sound hollow. If you’re uncertain, an instant-read thermometer inserted into the center should read around 190°F for perfectly baked bread with a tender interior and golden crust.
Instructions
Step 1: Prepare the dough: In a large bowl or stand mixer add the yeast, water and a pinch of the sugar or honey. Allow to rest for 5-10 minutes until foaming and bubbly. (This is called “proofing” the yeast, to make sure it is active. If it doesn’t foam, the yeast is no good, and you need to start over with fresh yeast).
Step 2: Add remaining sugar or honey, salt, oil, and 3 cups of flour. Mix to combine.
Step 3: Add another cup of flour and mix to combine. With the mixer running add more flour, ½ cup at a time, until the dough begins to pull away from the sides of the bowl. The dough should be smooth and elastic, and slightly stick to a clean finger, but not be overly sticky. Add a little more flour, if needed.
Step 4: Knead the dough: Mix the dough for 4-5 minutes on medium speed (or knead with your hands on a lightly floured surface, for 5-8 minutes).
Step 5: First Rise: Grease a large bowl with oil or cooking spray and place the dough inside, turning to coat. Cover with a dish towel or plastic wrap and allow to rise in a warm place* until doubled in size, about 1 1/2 hours.
Step 6: Spray two 9×5” bread pans generously with cooking spray on all sides. (I also like to line the bottom of the pans with a small piece of parchment paper, but this is optional.).
Step 7: Punch the dough down well to remove air bubbles. Divide into two equal portions. Shape each ball into long logs and place into greased loaf pans.
Step 8: Second rise: Cover pans with a lightweight, dry dish towel (or spray two pieces of plastic wrap generously with cooking spray and lay them gently over the pans). Allow dough to rise again for about 45 minutes to one hour, or until risen about 1 inch above the loaf pans. Gently removing covering.
Step 9: Bake: Preheat oven to 350 F. Bake bread for about 30-33 minutes, or until golden brown on top. Give the top of a loaf a gentle tap; it should sound hollow.
Step 10: Invert the loaves onto a wire cooling rack. Brush the tops with butter and allow to cool for at least 10 minutes before slicing.
Step 11: Once cool, store in an airtight container or bag for 2-3 days at room temperature, or up to 5 days in the refrigerator.
Variations
The beauty of this classic homemade bread recipe lies in its versatility as a foundation for creative variations. For a wholesome whole wheat version, substitute half of the all-purpose flour with whole wheat flour, adding an extra tablespoon of honey to balance the stronger flavor. The resulting bread has a nuttier taste and increased nutritional value.
For a rustic herb bread perfect for serving with Italian meals, mix in 2 tablespoons of dried herbs (rosemary, thyme, and oregano work beautifully) and a tablespoon of garlic powder during step 2. Top with coarse salt before baking for an extra flavor dimension.
Those seeking a sweet variation can create a cinnamon swirl bread by rolling the dough flat after the first rise, sprinkling with a mixture of cinnamon and brown sugar, then rolling it up before placing in the loaf pan. This transforms the basic bread into a delicious breakfast treat that toasts wonderfully.
Storage and Serving
The incredible aroma of fresh homemade bread makes it tempting to slice in immediately, but allowing your loaves to cool for at least 20 minutes prevents the texture from becoming gummy. Once completely cooled, store your bread in a paper bag for the first day to maintain that crisp crust. For longer storage, transfer to a sealed plastic bag or bread box at room temperature for up to 3 days, or refrigerate for up to a week.
This versatile bread pairs beautifully with hearty soups and stews, where its sturdy texture holds up to dipping without disintegrating. For a simple yet elegant appetizer, slice thinly, brush with olive oil, and toast for homemade crostini topped with fresh tomatoes and basil. My favorite breakfast application is thick-cut slices transformed into French toast, where the bread’s substantial structure absorbs the egg mixture perfectly while maintaining its integrity during cooking.
FAQs
Why didn’t my bread rise properly?
The most common cause is inactive yeast. Always check that your yeast foams during proofing and note that yeast expires. Another possibility is that your rising environment wasn’t warm enough—ideal temperature is around 75-85°F. Place the dough in a turned-off oven with the light on to create a perfect rising environment.
Can I use instant yeast instead of active dry yeast?
Yes! Use the same amount but skip the proofing step. Add the instant yeast directly with the flour and proceed with the recipe. Your rising time may be slightly shorter.
Why is my bread dense and heavy?
This typically results from insufficient rising time or too much flour. The dough should feel slightly tacky. Remember that flour measurements can vary—it’s better to add flour gradually until you achieve the right consistency rather than adding the maximum amount all at once.
Can I freeze this homemade bread?
Absolutely! Cool completely, then wrap tightly in plastic wrap followed by aluminum foil or place in a freezer bag. Freeze for up to 3 months. Thaw at room temperature or toast slices directly from frozen.
How can I get a crispier crust?
For a crispier crust, place a shallow pan of water on the bottom rack of your oven during preheating and baking. The steam helps develop that artisan-style crust. You can also brush the loaves with water before baking.
Homemade Bread Recipe
- Prep Time: 15 mins
- Cook Time: 30 mins
- Total Time: 45 mins
- Yield: 4 people 1x
- Category: Breakfast
- Method: Cooking
- Cuisine: American
Description
Discover the best Homemade Bread Recipe tips for baking delicious bread at home. Try it out today!
Ingredients
- 2 cups warm water (105–115 degrees) (474g)
- 1 Tablespoons active dry yeast*
- 1/4 cup honey or sugar (85g honey, 50g sugar)
- 2 teaspoons salt
- 2 Tablespoons oil (canola or vegetable) (30 ml)
- 4 – 5 1/2 cups all-purpose or bread flour* (500g-688g)
Instructions
- Step 1: Prepare the dough: In a large bowl or stand mixer add the yeast, water and a pinch of the sugar or honey. Allow to rest for 5-10 minutes until foaming and bubbly. (This is called “proofing” the yeast, to make sure it is active. If it doesn’t foam, the yeast is no good, and you need to start over with fresh yeast).
- Step 2: Add remaining sugar or honey, salt, oil, and 3 cups of flour. Mix to combine.
- Step 3: Add another cup of flour and mix to combine. With the mixer running add more flour, ½ cup at a time, until the dough begins to pull away from the sides of the bowl. The dough should be smooth and elastic, and slightly stick to a clean finger, but not be overly sticky. Add a little more flour, if needed.
- Step 4: Knead the dough: Mix the dough for 4-5 minutes on medium speed (or knead with your hands on a lightly floured surface, for 5-8 minutes).
- Step 5: First Rise: Grease a large bowl with oil or cooking spray and place the dough inside, turning to coat. Cover with a dish towel or plastic wrap and allow to rise in a warm place* until doubled in size, about 1 1/2 hours.
- Step 6: Spray two 9×5” bread pans generously with cooking spray on all sides. (I also like to line the bottom of the pans with a small piece of parchment paper, but this is optional.).
- Step 7: Punch the dough down well to remove air bubbles. Divide into two equal portions. Shape each ball into long logs and place into greased loaf pans.
- Step 8: Second rise: Cover pans with a lightweight, dry dish towel (or spray two pieces of plastic wrap generously with cooking spray and lay them gently over the pans). Allow dough to rise again for about 45 minutes to one hour, or until risen about 1 inch above the loaf pans. Gently removing covering.
- Step 9: Bake: Preheat oven to 350 F. Bake bread for about 30-33 minutes, or until golden brown on top. Give the top of a loaf a gentle tap; it should sound hollow.
- Step 10: Invert the loaves onto a wire cooling rack. Brush the tops with butter and allow to cool for at least 10 minutes before slicing.
- Step 11: Once cool, store in an airtight container or bag for 2-3 days at room temperature, or up to 5 days in the refrigerator.
Notes
Try This Recipe and Leave a comment Below, your opinion matters to me!
Nutrition
- Serving Size: 4 serving
- Calories: 400
- Sugar: 5g
- Sodium: 400mg
- Fat: 10g
- Saturated Fat: 3g
- Unsaturated Fat: 7g
- Trans Fat: 0g
- Carbohydrates: 40g
- Fiber: 5g
- Protein: 15g
- Cholesterol: 50mg


