

Picture yourself savoring a slice of Key Lime Cake with its tangy, zesty flavor that dances on your taste buds with each bite. This refreshing dessert balances the perfect amount of sweetness with the distinctive tartness of authentic key limes, creating a tropical experience that transports you straight to the Florida Keys. The velvety smooth texture and vibrant citrus aroma make this Key Lime Cake an irresistible treat for any occasion. You’ll learn how to create this showstopping dessert from scratch, with tips for achieving that perfect balance of flavors that will have everyone asking for seconds.
Why You’ll Love This Recipe
This Key Lime Cake recipe stands out from ordinary desserts for so many reasons. First, its bright, sunshine-filled flavor profile offers the perfect balance between sweetness and the distinctive tanginess that only real key limes can provide. The contrast between the moist, tender cake layers and the silky cream cheese frosting creates a textural paradise that’s simply unforgettable.
What makes this lime dessert truly special is its versatility – it’s elegant enough for special celebrations yet simple enough to brighten an ordinary weekday dinner. The vibrant green specks of lime zest throughout the cake create a beautiful visual appeal that’s as impressive as the flavor itself.
Even if you’re not an experienced baker, this Key Lime Cake recipe is surprisingly forgiving. The straightforward instructions make the process enjoyable rather than stressful, and the result is a professional-looking dessert that tastes like it came from a high-end bakery. The best part? The refreshing citrus flavor makes it perfect for any season – cooling in summer and bringing brightness to winter days.
Ingredients
For the Key Lime Cake:
- 2½ cups (310g) all-purpose flour
- 2 teaspoons baking powder
- ½ teaspoon baking soda
- ½ teaspoon salt
- 1 cup (226g) unsalted butter, softened
- 1¾ cups (350g) granulated sugar
- 3 large eggs, room temperature
- ¼ cup (60ml) fresh Key lime juice (from approximately 8-10 Key limes)
- 2 tablespoons Key lime zest (from approximately 6-8 Key limes)
- 1 teaspoon vanilla extract
- 1 cup (240ml) buttermilk, room temperature
For the Key Lime Cream Cheese Frosting:
- 8 oz (226g) cream cheese, softened
- ½ cup (113g) unsalted butter, softened
- 4 cups (480g) powdered sugar, sifted
- 2 tablespoons fresh Key lime juice
- 1 tablespoon Key lime zest
- ½ teaspoon vanilla extract
Key ingredient notes: Fresh Key limes are essential for authentic flavor, but regular limes can be substituted in a pinch (though you’ll need to adjust quantities as regular limes are less potent). The buttermilk creates a tender crumb while enhancing the tangy profile that makes this Key Lime Cake so distinctive.
Pro Tips
Creating the perfect Key Lime Cake requires attention to a few critical details that will elevate your dessert from good to exceptional:
First, temperature matters immensely. Ensure all refrigerated ingredients (eggs, butter, cream cheese, buttermilk) reach room temperature before beginning. This seemingly simple step creates a smooth, well-emulsified batter that rises evenly and develops the ideal texture. Cold ingredients don’t incorporate properly, leading to a dense, uneven cake.
Second, master the art of zesting. When collecting lime zest, take only the green outer layer—the white pith underneath is bitter and will compromise your cake’s flavor. A microplane grater yields the finest zest without the pith. For maximum flavor impact, rub the lime zest into the sugar with your fingertips before creaming with butter—this releases the essential oils, infusing your Key Lime Cake with intense citrus flavor.
Lastly, don’t overmix once you add the flour. Alternate additions of the dry ingredients and buttermilk, mixing just until combined after each addition. Overmixing develops gluten, resulting in a tough cake rather than the tender, melt-in-your-mouth texture that makes this dessert extraordinary. Stop mixing the moment you no longer see streaks of flour.
Instructions
Step 1: Prepare Your Equipment
Preheat your oven to 350°F (175°C). Grease and flour two 9-inch round cake pans, then line the bottoms with parchment paper for easy removal. This extra step ensures your Key Lime Cake layers will release perfectly without sticking.
Step 2: Mix Dry Ingredients
In a medium bowl, whisk together the flour, baking powder, baking soda, and salt. This thorough blending ensures your leavening agents are evenly distributed throughout the cake, creating a consistent rise and texture. Set this mixture aside while you prepare the wet ingredients.
Step 3: Cream Butter and Sugar
In a large bowl, beat the softened butter and sugar with an electric mixer on medium-high speed for 4-5 minutes until remarkably light and fluffy. Don’t rush this step—proper creaming incorporates air into the batter, which will give your Key Lime Cake its tender crumb. The mixture should visibly change to a pale, almost white color.
Step 4: Add Eggs and Flavorings
Add eggs one at a time, beating well after each addition. Then mix in the Key lime zest, Key lime juice, and vanilla extract until well combined. Don’t worry if the mixture looks slightly curdled after adding the lime juice—this is normal and will smooth out once you add the dry ingredients.
Step 5: Alternate Dry Ingredients and Buttermilk
With the mixer on low speed, gradually add the flour mixture in three parts, alternating with the buttermilk in two parts, beginning and ending with the flour mixture. Mix just until each addition is incorporated—overmixing now will toughen your cake.
Step 6: Bake the Cake
Divide the batter evenly between the prepared pans, smoothing the tops with a spatula. Bake for 25-30 minutes, or until a toothpick inserted into the center comes out clean or with just a few moist crumbs. The edges should be lightly golden and just pulling away from the sides of the pan.
Step 7: Cool Completely
Allow the cakes to cool in the pans for 10 minutes, then turn out onto wire racks to cool completely. For the best texture and ease of frosting, wrap the cooled layers in plastic wrap and refrigerate for at least an hour (or overnight).
Step 8: Prepare the Frosting
Beat the cream cheese and butter together until smooth and creamy. Gradually add the sifted powdered sugar, mixing on low speed. Once incorporated, add the Key lime juice, zest, and vanilla. Increase speed to medium and beat until light and fluffy, about 2 minutes.
Step 9: Assemble Your Masterpiece
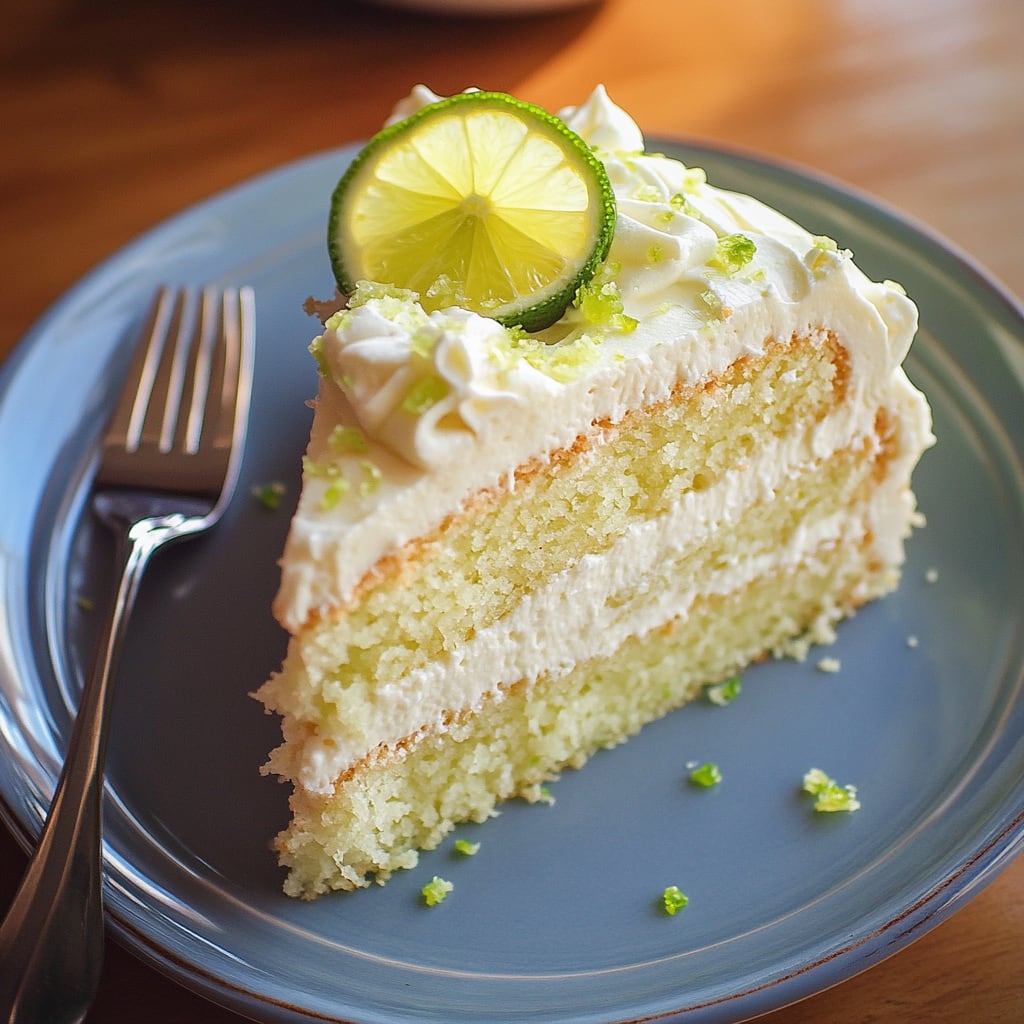
Place one cake layer on your serving plate and spread a generous layer of frosting on top. Position the second layer and cover the entire Key Lime Cake with the remaining frosting. For a decorative touch, garnish with thin lime slices or additional lime zest.
Variations
The classic Key Lime Cake is divine on its own, but these variations offer delicious twists on the original:
Coconut Key Lime Cake: Transform your dessert into a tropical paradise by adding ½ cup toasted coconut flakes to the batter and replacing ¼ cup of the buttermilk with coconut milk. Sprinkle toasted coconut on the frosted cake for a beautiful presentation that enhances the lime dessert with complementary flavors reminiscent of the Caribbean.
Key Lime Bundt Cake: For a simpler presentation with maximum impact, adapt this recipe for a bundt pan (bake at the same temperature for 45-50 minutes). Create a tart Key lime glaze by mixing 1½ cups powdered sugar with 3-4 tablespoons fresh Key lime juice and drizzle it over the cooled cake for a stunning, glistening finish.
Gluten-Free Key Lime Cake: Those with dietary restrictions needn’t miss out on this citrus sensation. Substitute the all-purpose flour with a high-quality cup-for-cup gluten-free flour blend. Add ¼ teaspoon xanthan gum if your blend doesn’t already contain it to ensure the perfect texture that matches the original Key Lime Cake experience.
Storage and Serving
Your Key Lime Cake will stay fresh at room temperature, covered, for up to 24 hours. For longer storage, refrigerate it in an airtight container for up to 5 days. The cream cheese frosting necessitates refrigeration for food safety, but always bring slices to room temperature for 20-30 minutes before serving to fully experience the complex flavors and soft texture.
For make-ahead convenience, you can freeze unfrosted cake layers for up to 2 months. Wrap each layer individually in plastic wrap, then aluminum foil. Thaw overnight in the refrigerator before frosting.
For an elegant presentation, serve your Key Lime Cake with a dollop of fresh whipped cream and a thin slice of lime on each plate. The contrast of the tangy cake with the sweet, creamy topping is sublime. For a more decadent dessert experience, pair it with a small scoop of vanilla bean ice cream, allowing the cold creaminess to play against the vibrant citrus notes.
This refreshing cake pairs beautifully with after-dinner coffee or tea, but for a truly sophisticated pairing, serve with prosecco or champagne—the bubbles complement the citrus notes perfectly, making your Key Lime Cake the star of any special occasion.
FAQs
Can I use regular limes instead of Key limes?
Yes, you can substitute regular Persian limes, but the flavor profile will be slightly different. Key limes have a more intense, aromatic quality. If using regular limes, reduce the amount of juice by about 25% since they’re less acidic than Key limes.
Why did my cake sink in the middle?
This typically happens if the cake is underbaked or if you opened the oven door too early in the baking process. Always test for doneness with a toothpick and ensure your oven is properly preheated before baking your Key Lime Cake.
Can I make this cake in advance for a party?
Absolutely! You can bake the layers up to 2 days ahead and store them wrapped in the refrigerator, or freeze them for longer storage. The frosting can be made 1 day ahead. Assemble and frost the Key Lime Cake up to 24 hours before serving.
How can I intensify the lime flavor?
For a more pronounced lime flavor, add an additional tablespoon of zest to both the cake and frosting. You can also brush the cake layers with a simple syrup made from equal parts Key lime juice and sugar before frosting.
Is this cake supposed to be bright green?
No, authentic Key Lime Cake has a gentle yellow-green hue from the natural lime zest. Avoid adding food coloring unless you specifically want a more vibrant green color for themed events.
Conclusion
This Key Lime Cake is comfort food at its finest — a perfect balance of tangy citrus and sweet, creamy indulgence that transports you straight to sunny shores with every forkful. It’s the kind of dessert that transforms ordinary gatherings into memorable occasions, leaving everyone talking about that amazing lime cake long after the last crumb has disappeared. Whether you’re celebrating something special or simply treating yourself to a slice of sunshine, this Key Lime Cake delivers pure joy with each bright, zesty bite.
Print
Key Lime Cake
- Prep Time: 25 minutes
- Cook Time: 30 minutes
- Total Time: 55 minutes
- Yield: 12 servings 1x
- Category: Dessert
- Method: Baking
- Cuisine: Americaine
Description
Key Lime Cake bursting with zesty citrus flavor and topped with creamy frosting, perfect for any occasion. Tangy key lime juice, moist cake texture, and irresistible sweet-tart taste.
Ingredients
- 2½ cups (310g) all-purpose flour
- 2 teaspoons baking powder
- ½ teaspoon baking soda
- ½ teaspoon salt
- 1 cup (226g) unsalted butter, softened
- 1¾ cups (350g) granulated sugar
- 3 large eggs, room temperature
- ¼ cup (60ml) fresh Key lime juice (from approximately 8–10 Key limes)
- 2 tablespoons Key lime zest (from approximately 6–8 Key limes)
- 1 teaspoon vanilla extract
- 1 cup (240ml) buttermilk, room temperature
- 8 oz (226g) cream cheese, softened
- ½ cup (113g) unsalted butter, softened
- 4 cups (480g) powdered sugar, sifted
- 2 tablespoons fresh Key lime juice
- 1 tablespoon Key lime zest
- ½ teaspoon vanilla extract
Instructions
- Step 1: Prepare Your Equipment Preheat your oven to 350°F (175°C). Grease and flour two 9-inch round cake pans, then line the bottoms with parchment paper for easy removal. This extra step ensures your Key Lime Cake layers will release perfectly without sticking.
- Step 2: Mix Dry Ingredients In a medium bowl, whisk together the flour, baking powder, baking soda, and salt. This thorough blending ensures your leavening agents are evenly distributed throughout the cake, creating a consistent rise and texture. Set this mixture aside while you prepare the wet ingredients.
- Step 3: Cream Butter and Sugar In a large bowl, beat the softened butter and sugar with an electric mixer on medium-high speed for 4-5 minutes until remarkably light and fluffy. Don’t rush this step—proper creaming incorporates air into the batter, which will give your Key Lime Cake its tender crumb. The mixture should visibly change to a pale, almost white color.
- Step 4: Add Eggs and Flavorings Add eggs one at a time, beating well after each addition. Then mix in the Key lime zest, Key lime juice, and vanilla extract until well combined. Don’t worry if the mixture looks slightly curdled after adding the lime juice—this is normal and will smooth out once you add the dry ingredients.
- Step 5: Alternate Dry Ingredients and Buttermilk With the mixer on low speed, gradually add the flour mixture in three parts, alternating with the buttermilk in two parts, beginning and ending with the flour mixture. Mix just until each addition is incorporated—overmixing now will toughen your cake.
- Step 6: Bake the Cake Divide the batter evenly between the prepared pans, smoothing the tops with a spatula. Bake for 25-30 minutes, or until a toothpick inserted into the center comes out clean or with just a few moist crumbs. The edges should be lightly golden and just pulling away from the sides of the pan.
- Step 7: Cool Completely Allow the cakes to cool in the pans for 10 minutes, then turn out onto wire racks to cool completely. For the best texture and ease of frosting, wrap the cooled layers in plastic wrap and refrigerate for at least an hour (or overnight).
- Step 8: Prepare the Frosting Beat the cream cheese and butter together until smooth and creamy. Gradually add the sifted powdered sugar, mixing on low speed. Once incorporated, add the Key lime juice, zest, and vanilla. Increase speed to medium and beat until light and fluffy, about 2 minutes.
- Step 9: Assemble Your Masterpiece Place one cake layer on your serving plate and spread a generous layer of frosting on top. Position the second layer and cover the entire Key Lime Cake with the remaining frosting. For a decorative touch, garnish with thin lime slices or additional lime zest.
Notes
Fresh ingredients will always yield the best flavor results.
Nutrition
- Serving Size: 1 slice (estimated 150g)
- Calories: 450 kcal per serving
- Sugar: 35g
- Sodium: 300mg
- Fat: 20g
- Saturated Fat: 12g
- Unsaturated Fat: 6g
- Trans Fat: 0g
- Carbohydrates: 60g
- Fiber: 1g
- Protein: 4g
- Cholesterol: 85mg


