
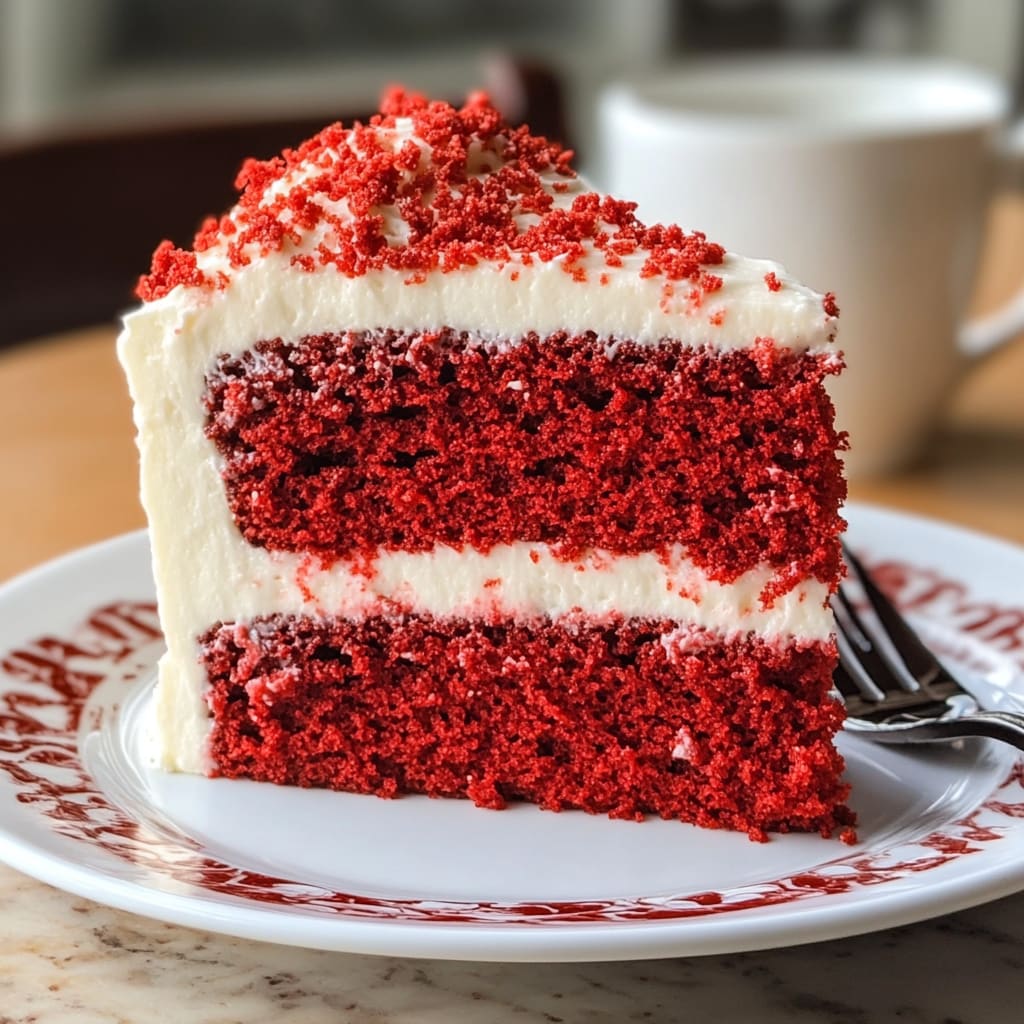
The rich, velvety texture and stunning crimson color of a perfect Red Velvet Cake creates an unforgettable sensory experience that captivates before you take your first bite. This iconic dessert balances subtle chocolate notes with a tangy cream cheese frosting that has made it a staple at celebrations for generations. Whether you’re baking for a special occasion or simply craving something extraordinary, this classic Red Velvet Cake recipe delivers consistent, impressive results. You’ll learn how to create bakery-quality layers with the perfect crumb, mix the ideal batter consistency, and frost your cake like a professional.
Why You’ll Love This Recipe
This Red Velvet Cake recipe stands apart from ordinary chocolate or vanilla cakes with its distinctive character and elegant presentation. The cake layers offer an impossibly tender crumb that practically melts on your tongue, while maintaining enough structure to hold up to the rich frosting. You’ll appreciate the perfect balance of flavors—the subtle cocoa notes complemented by vanilla and a gentle tang from buttermilk that creates depth without overwhelming.
Home bakers especially love how this recipe produces consistent results despite its impressive appearance. The vibrant red color creates a dramatic moment when you slice into the cake, revealing layers that contrast beautifully with the snow-white frosting. The combination of textures—from the soft, moist cake to the smooth, creamy frosting—creates a truly memorable dessert experience.
Even better, this Red Velvet Cake recipe uses straightforward techniques that don’t require specialized equipment, making it accessible for bakers of all skill levels while still delivering that “wow” factor when presented.
Ingredients
For the Red Velvet Cake layers:
- 2½ cups (315g) all-purpose flour
- 1½ cups (300g) granulated sugar
- 1 teaspoon baking soda
- 1 teaspoon fine sea salt
- 2 tablespoons (15g) unsweetened cocoa powder
- 1 cup (240ml) buttermilk, room temperature
- 1 cup (230g) unsalted butter, softened
- 2 large eggs, room temperature
- 2 tablespoons (30ml) red food coloring (liquid) or 1 tablespoon gel coloring
- 1 teaspoon pure vanilla extract
- 1 teaspoon white vinegar
For the cream cheese frosting:
- 16 ounces (450g) cream cheese, softened
- ½ cup (115g) unsalted butter, softened
- 4 cups (480g) powdered sugar, sifted
- 1 teaspoon pure vanilla extract
- Pinch of salt
The unsweetened cocoa powder provides the signature subtle chocolate flavor without overpowering the delicate balance of the classic red velvet recipe. Buttermilk is crucial for the cake’s moisture and tangy undertone, while the vinegar helps activate the baking soda for proper rise and contributes to the cake’s distinctive flavor profile.
Pro Tips
Use Room Temperature Ingredients
The secret to a perfectly textured Red Velvet Cake lies in using room temperature ingredients. Cold eggs or buttermilk can cause the batter to curdle and result in an uneven texture. Take your refrigerated items out at least an hour before baking. If you’re short on time, place eggs in warm water for 5 minutes and microwave buttermilk for 10-15 seconds until just tepid (not hot).
Perfect Your Coloring Technique
For the most vibrant red velvet color, mix your food coloring with the cocoa powder first to form a paste before adding to the batter. This prevents the cocoa from reacting with the baking soda prematurely and ensures even color distribution. Gel food coloring provides more intense color with less liquid, which helps maintain the proper batter consistency. Start with less coloring than you think you need—you can always add more.
Master the Mixing Method
Overmixing is the number one cause of dense, tough cake layers. After adding the flour mixture, mix just until the ingredients are incorporated—about 30 seconds on low speed. Then finish folding by hand with a spatula, scraping the bottom of the bowl where flour often hides. This gentle approach preserves the air bubbles needed for a light, tender Red Velvet Cake crumb.
Instructions
Step 1: Prepare Your Pans and Ingredients
Preheat your oven to 350°F (175°C). Grease two 9-inch round cake pans and line the bottoms with parchment paper. Dust the sides lightly with flour, tapping out any excess. Ensure all refrigerated ingredients have reached room temperature for optimal blending and texture in your Red Velvet Cake.
Step 2: Mix Dry Ingredients
In a medium bowl, whisk together the flour, cocoa powder, salt, and baking soda until well combined. This pre-mixing ensures the leavening agents and cocoa distribute evenly throughout your cake batter, preventing bitter spots or uneven rising.
Step 3: Cream Butter and Sugar
In the bowl of a stand mixer fitted with the paddle attachment (or using a hand mixer), cream the butter and sugar on medium-high speed for 4-5 minutes until light and fluffy. Don’t rush this step—proper creaming incorporates air into the batter, creating the foundation for a tender Red Velvet Cake.
Step 4: Add Eggs and Vanilla
Add eggs one at a time, beating well after each addition until fully incorporated. Mix in the vanilla extract. Scrape down the sides and bottom of the bowl to ensure everything blends evenly.
Step 5: Create the Red Velvet Color
In a small bowl, mix the cocoa powder with the red food coloring to form a paste. Add this mixture to your batter and beat on medium speed until completely incorporated and the color is uniform throughout.
Step 6: Alternate Dry Ingredients and Buttermilk
With the mixer on low speed, add the dry ingredients in three batches, alternating with the buttermilk (beginning and ending with the dry ingredients). Mix just until combined after each addition to avoid overmixing.
Step 7: Add Vinegar and Final Mix
Stir in the vinegar by hand using a spatula. The vinegar reacts with the baking soda to give your Red Velvet Cake its characteristic rise and tender texture. Give the batter a final gentle fold to ensure everything is mixed, being careful not to deflate the air you’ve worked to incorporate.
Step 8: Bake to Perfection
Divide the batter evenly between your prepared pans. Bake for 25-30 minutes, or until a toothpick inserted in the center comes out clean with a few moist crumbs. The tops should spring back when lightly touched.
Step 9: Cool Completely
Allow cakes to cool in pans for 10 minutes before turning out onto wire racks to cool completely. Don’t rush this cooling process—frosting a warm cake will result in melted, sliding frosting.
Step 10: Prepare Frosting and Assemble
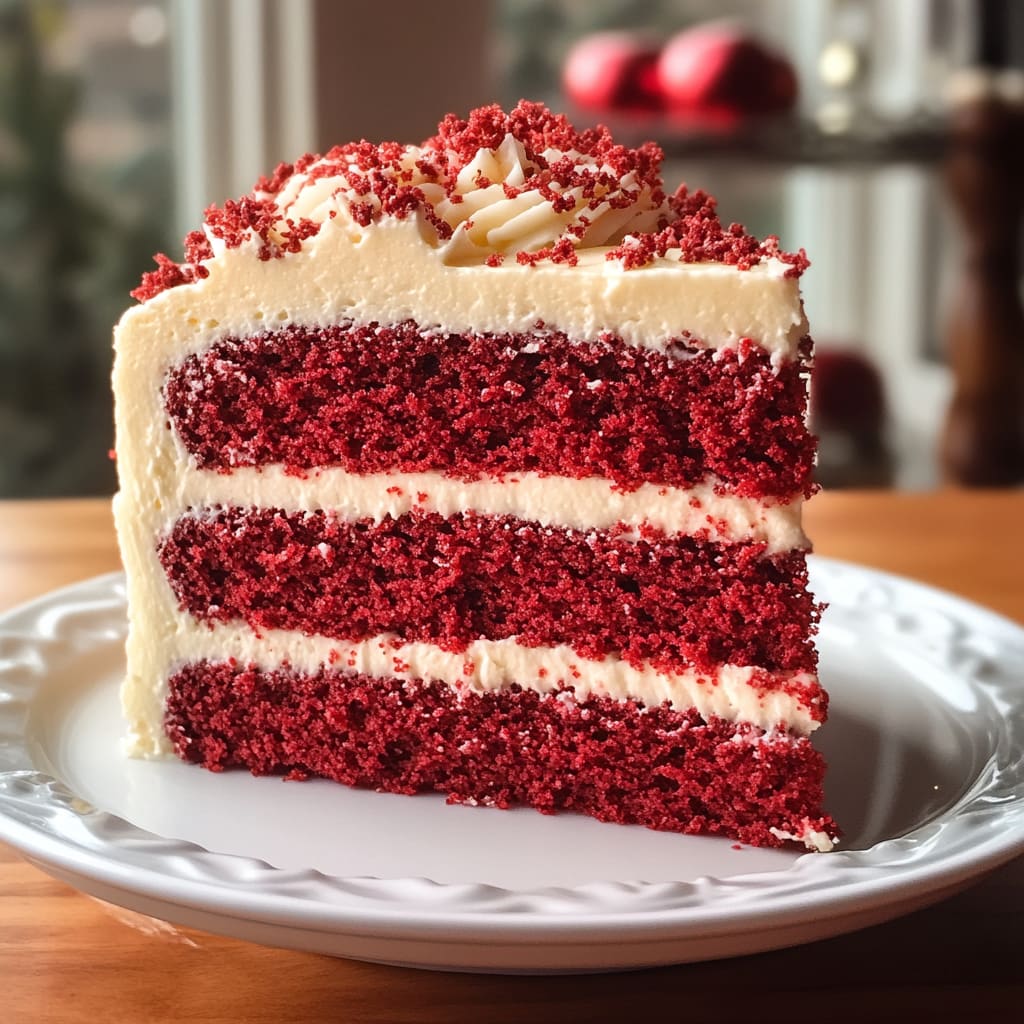
Beat cream cheese and butter until smooth and creamy. Gradually add sifted powdered sugar, vanilla, and salt, beating until light and fluffy. Place one Red Velvet Cake layer on your serving plate, spread with frosting, top with the second layer, and frost the entire cake. For the classic look, leave some red crumbs showing on the sides or decorate the bottom edge with cake crumbs.
Variations
Southern-Style Red Velvet
For an authentic southern twist on this Red Velvet Cake, substitute part of the butter with ½ cup vegetable shortening to achieve that distinctive mouthfeel cherished in traditional recipes. Increase the vinegar to 1½ teaspoons for extra tanginess, and consider adding 1 tablespoon of strong brewed coffee to deepen the cocoa flavor without making it overtly chocolatey. Many southern bakers also prefer a heritage-style ermine frosting (cooked flour frosting) instead of cream cheese for the most traditional version.
Gluten-Free Red Velvet
Create a gluten-free version of this beautiful red velvet dessert by substituting the all-purpose flour with a high-quality cup-for-cup gluten-free flour blend that contains xanthan gum. Add an extra egg to provide structure and moisture that might otherwise be lost. The results are nearly indistinguishable from the traditional version, making this adaptation perfect for celebrations where everyone can enjoy the same stunning dessert regardless of dietary restrictions.
Red Velvet Cupcakes
Transform this recipe into approximately 24 Red Velvet Cupcakes by filling lined cupcake pans about 2/3 full and reducing the baking time to 18-20 minutes. Top each with a swirl of cream cheese frosting and a light dusting of cake crumbs or tiny heart sprinkles for an elegant finish perfect for Valentine’s Day, bridal showers, or any occasion calling for individual servings.
Storage and Serving
Your finished Red Velvet Cake will stay fresh at room temperature for up to 2 days when stored in an airtight container or covered with a cake dome. For longer storage, refrigerate for up to 5 days, though the texture is best when allowed to come to room temperature for about 30 minutes before serving. If you need to prepare in advance, the unfrosted cake layers can be wrapped tightly in plastic wrap and frozen for up to 2 months—just thaw overnight in the refrigerator before frosting.
For the most elegant presentation, serve your Red Velvet Cake on a white cake stand to highlight its dramatic color. A sprinkle of crushed pecans around the edge adds textural contrast and a nod to Southern traditions. For special occasions, garnish individual slices with fresh raspberries or strawberries, which complement both the color and flavor profile beautifully. If you’re feeling particularly indulgent, serve with a small scoop of vanilla bean ice cream on the side to create a temperature contrast that enhances the cake’s rich flavors.
FAQs
Why did my Red Velvet Cake turn out brown instead of red?
Natural cocoa powder (not Dutch-processed) is critical for achieving the right color reaction in Red Velvet Cake. If you used Dutch-processed cocoa or too much cocoa powder, it can overpower the red coloring. Additionally, make sure your food coloring is fresh and use gel coloring for more intense results without adding excess liquid to the batter.
Can I use natural food coloring for Red Velvet Cake?
Yes, you can create a natural red velvet cake using beet powder (about 3 tablespoons) or beet juice (reduce other liquids accordingly). The color won’t be as vibrant as with artificial coloring, but it provides a naturally beautiful burgundy hue with subtle earthy undertones that many prefer.
Why is my cream cheese frosting too runny?
Runny frosting typically results from cream cheese or butter that’s too warm or overbeaten. Make sure both are cool but softened, and beat just until smooth. If it’s still too soft, refrigerate for 20 minutes before continuing. Using full-fat cream cheese also produces a more stable frosting for your Red Velvet Cake.
Is Red Velvet just chocolate cake with red coloring?
No, Red Velvet Cake has a unique flavor profile distinct from chocolate cake. It contains a small amount of cocoa powder (typically 2-3 tablespoons) for subtle chocolate notes, along with buttermilk and vinegar that create its characteristic slight tanginess. These elements combine to create its distinctive flavor that’s neither chocolate nor vanilla.
How far in advance can I make Red Velvet Cake?
You can bake the Red Velvet Cake layers up to 2 days in advance before frosting, keeping them wrapped tightly at room temperature. Alternatively, freeze unfrosted layers for up to 2 months. The fully assembled cake is best eaten within 2-3 days for optimal moisture and texture.
Conclusion
This Red Velvet Cake is comfort food at its finest — a perfect balance of subtle chocolate notes, velvety texture, and that unmistakable crimson color that makes every slice feel like a celebration. It’s the kind of dish that transforms ordinary moments into memorable occasions, whether you’re serving it at a birthday party, holiday gathering, or simply as a special weekend treat. With its impressive appearance but approachable technique, this classic Red Velvet Cake proves that sometimes the most beloved recipes are the ones that have stood the test of time.
Print
Red Velvet Cake
- Prep Time: 20 minutes
- Cook Time: 25-30 minutes
- Total Time: 45-50 minutes
- Yield: 12 servings 1x
- Category: Dessert
- Method: Baking
- Cuisine: Americaine
Description
Indulge in a decadent Red Velvet Cake with rich cocoa, tangy buttermilk, and creamy frosting. Perfect for any occasion!
Ingredients
- 2½ cups (315g) all-purpose flour
- 1½ cups (300g) granulated sugar
- 1 teaspoon baking soda
- 1 teaspoon fine sea salt
- 2 tablespoons (15g) unsweetened cocoa powder
- 1 cup (240ml) buttermilk, room temperature
- 1 cup (230g) unsalted butter, softened
- 2 large eggs, room temperature
- 2 tablespoons (30ml) red food coloring (liquid) or 1 tablespoon gel coloring
- 1 teaspoon pure vanilla extract
- 1 teaspoon white vinegar
- 16 ounces (450g) cream cheese, softened
- ½ cup (115g) unsalted butter, softened
- 4 cups (480g) powdered sugar, sifted
- 1 teaspoon pure vanilla extract
- Pinch of salt
Instructions
- Step 1: Prepare Your Pans and Ingredients Preheat your oven to 350°F (175°C). Grease two 9-inch round cake pans and line the bottoms with parchment paper. Dust the sides lightly with flour, tapping out any excess. Ensure all refrigerated ingredients have reached room temperature for optimal blending and texture in your Red Velvet Cake.
- Step 2: Mix Dry Ingredients In a medium bowl, whisk together the flour, cocoa powder, salt, and baking soda until well combined. This pre-mixing ensures the leavening agents and cocoa distribute evenly throughout your cake batter, preventing bitter spots or uneven rising.
- Step 3: Cream Butter and Sugar In the bowl of a stand mixer fitted with the paddle attachment (or using a hand mixer), cream the butter and sugar on medium-high speed for 4-5 minutes until light and fluffy. Don’t rush this step—proper creaming incorporates air into the batter, creating the foundation for a tender Red Velvet Cake.
- Step 4: Add Eggs and Vanilla Add eggs one at a time, beating well after each addition until fully incorporated. Mix in the vanilla extract. Scrape down the sides and bottom of the bowl to ensure everything blends evenly.
- Step 5: Create the Red Velvet Color In a small bowl, mix the cocoa powder with the red food coloring to form a paste. Add this mixture to your batter and beat on medium speed until completely incorporated and the color is uniform throughout.
- Step 6: Alternate Dry Ingredients and Buttermilk With the mixer on low speed, add the dry ingredients in three batches, alternating with the buttermilk (beginning and ending with the dry ingredients). Mix just until combined after each addition to avoid overmixing.
- Step 7: Add Vinegar and Final Mix Stir in the vinegar by hand using a spatula. The vinegar reacts with the baking soda to give your Red Velvet Cake its characteristic rise and tender texture. Give the batter a final gentle fold to ensure everything is mixed, being careful not to deflate the air you’ve worked to incorporate.
- Step 8: Bake to Perfection Divide the batter evenly between your prepared pans. Bake for 25-30 minutes, or until a toothpick inserted in the center comes out clean with a few moist crumbs. The tops should spring back when lightly touched.
- Step 9: Cool Completely Allow cakes to cool in pans for 10 minutes before turning out onto wire racks to cool completely. Don’t rush this cooling process—frosting a warm cake will result in melted, sliding frosting.
- Step 10: Prepare Frosting and Assemble Beat cream cheese and butter until smooth and creamy. Gradually add sifted powdered sugar, vanilla, and salt, beating until light and fluffy. Place one Red Velvet Cake layer on your serving plate, spread with frosting, top with the second layer, and frost the entire cake. For the classic look, leave some red crumbs showing on the sides or decorate the bottom edge with cake crumbs.
Notes
Fresh ingredients will always yield the best flavor results.
Nutrition
- Serving Size: 1 slice
- Calories: 390
- Sugar: 42g
- Sodium: 340mg
- Fat: 20g
- Saturated Fat: 12g
- Unsaturated Fat: 6g
- Trans Fat: 0g
- Carbohydrates: 50g
- Fiber: 1g
- Protein: 4g
- Cholesterol: 90mg


