
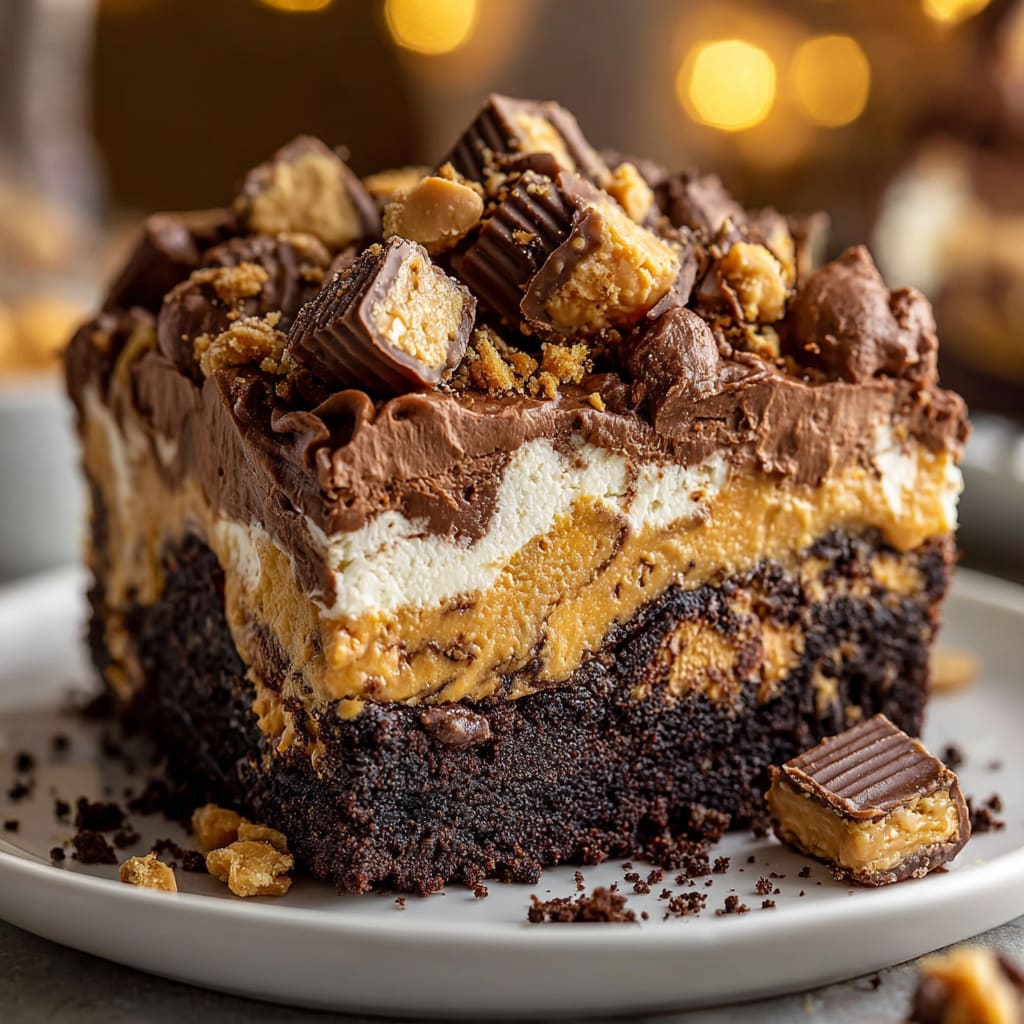
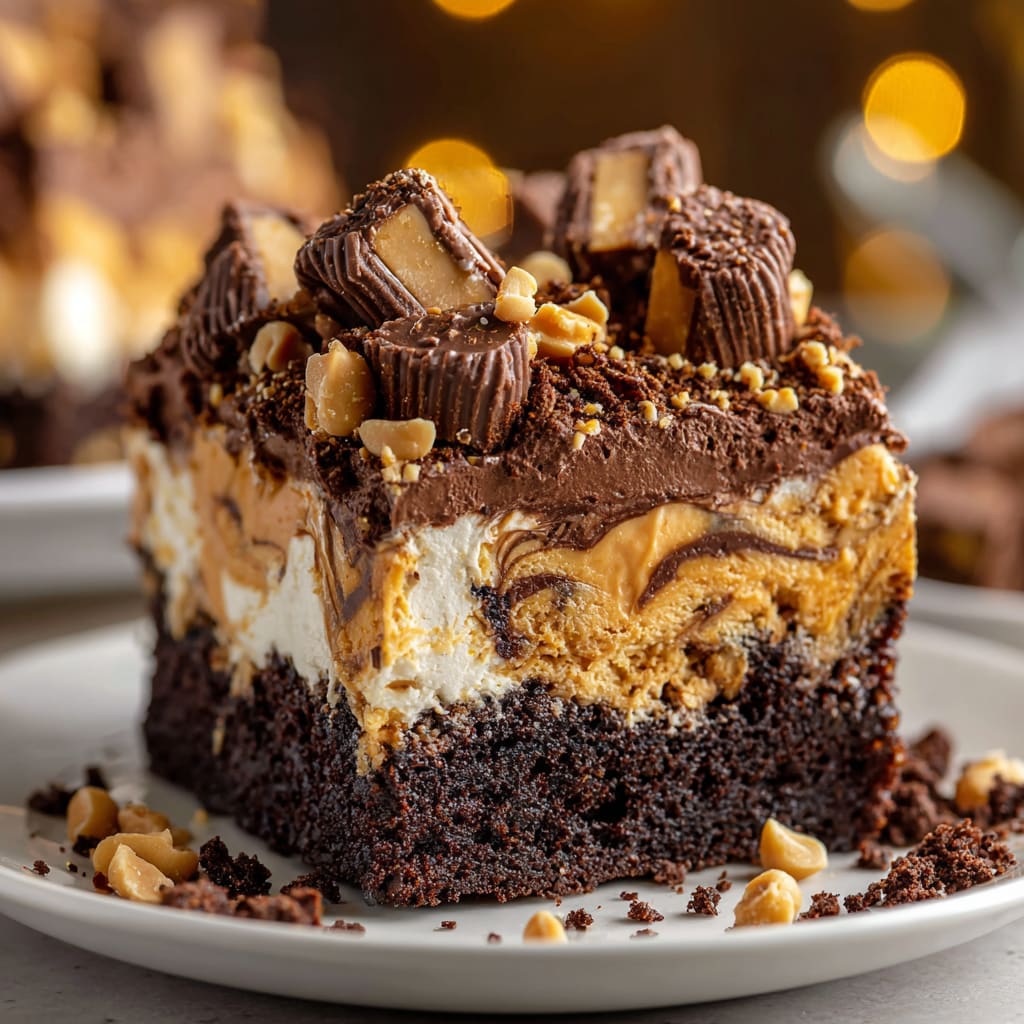
Imagine sinking your fork into a warm, gooey chocolate cake with molten rivers of peanut butter and swirls of cream cheese running through every decadent bite. This Reeses Peanut Butter Earthquake Cake delivers an unforgettable dessert experience that quite literally “quakes” as it bakes, creating beautiful cracks and valleys filled with melted chocolate and peanut butter goodness. The combination of rich chocolate cake mix, creamy peanut butter, and chunks of Reeses cups creates a dessert that’s both visually stunning and irresistibly delicious. You’ll learn how to create this show-stopping dessert with simple ingredients and straightforward techniques that guarantee rave reviews at your next gathering.
Why You’ll Love This Recipe
This Reeses Peanut Butter Earthquake Cake is a game-changer for both novice and experienced bakers alike. The beauty of this dessert lies in its perfectly imperfect appearance—no need for fancy decorating skills when the cake creates its own stunning landscape during baking. Each slice delivers an incredible texture contrast: the tender, moist chocolate cake base against pockets of gooey peanut butter and cream cheese filling, with the occasional delightful crunch from chopped Reeses peanut butter cups.
The recipe requires minimal effort but delivers maximum impact. The “dump and bake” approach means you’ll spend less time in the kitchen and more time enjoying the expressions of pure delight from everyone who tastes it. Plus, the aroma of chocolate and peanut butter wafting through your home as it bakes creates an anticipation that’s almost as satisfying as the first bite. The balance of sweet and salty flavors makes this peanut butter chocolate earthquake cake utterly addictive and impossible to forget.
Ingredients
For the Reeses Peanut Butter Earthquake Cake, you’ll need:
- 1 box (15.25 oz) chocolate cake mix
- 3 large eggs, at room temperature
- 1/2 cup vegetable oil
- 1 cup water
- 8 oz cream cheese, softened
- 1/2 cup (1 stick) unsalted butter, melted
- 2 cups powdered sugar
- 1 cup creamy peanut butter
- 2 cups Reeses peanut butter cups, roughly chopped (about 16-20 miniature cups)
- 1 cup semi-sweet chocolate chips
- 1/2 cup Reeses peanut butter chips
- 1/4 teaspoon sea salt (optional, to enhance flavor)
- 1 teaspoon vanilla extract
- Non-stick cooking spray for the pan
Pro Tips
Getting the perfect earthquake effect in your Reeses Peanut Butter Earthquake Cake requires a few key techniques. First, avoid overmixing your cake batter – mix just until the ingredients are combined. Overmixing introduces too much air, which can prevent those beautiful cracks and swirls from forming properly during baking.
Temperature management is crucial for the cream cheese peanut butter layer. Make sure your cream cheese is fully softened (but not melted) to achieve the perfect swirling consistency. If it’s too cold, you’ll get chunks rather than smooth ribbons throughout the cake. For the best results, leave cream cheese at room temperature for at least an hour before beginning.
For the most dramatic earthquake effect, resist the urge to completely incorporate the cream cheese mixture into the cake batter. Instead, pour it in the center and let it sink naturally as it bakes. This creates that signature “earthquake” appearance with distinct layers and pockets of filling. For the most impressive visual impact, reserve about 1/4 cup of chopped Reeses cups to sprinkle on top during the last 5 minutes of baking.
Instructions
Step 1: Prepare Your Baking Pan
Preheat your oven to 350°F (175°C). Generously spray a 9×13 inch baking pan with non-stick cooking spray, making sure to coat the sides well. This cake tends to stick, so don’t skimp on this step! If you have parchment paper, line the bottom of the pan for even easier removal.
Step 2: Mix the Cake Batter
In a large mixing bowl, combine the chocolate cake mix, eggs, vegetable oil, and water. Using an electric mixer, beat on medium speed for about 2 minutes until smooth and well combined. The batter will be relatively thin, but that’s exactly what you want for this type of cake. Pour the cake batter into your prepared baking pan, spreading it evenly with a spatula.
Step 3: Prepare the Cream Cheese Peanut Butter Layer
In another mixing bowl, beat the softened cream cheese until light and fluffy, about 2 minutes. Add the melted butter and continue beating until well incorporated. Gradually add the powdered sugar, beating on low speed to avoid a sugar cloud. Mix in the peanut butter and vanilla extract until smooth and creamy. This mixture should be pourable but not too thin.
Step 4: Create the Earthquake Effect
Pour the cream cheese and peanut butter mixture in several large dollops over the chocolate cake batter. Don’t spread it out – the goal is to have it sit on top. Sprinkle 1 1/2 cups of the chopped Reeses peanut butter cups, the chocolate chips, and the peanut butter chips evenly over the entire surface.
Step 5: Bake to Perfection
Bake in your preheated oven for 40-45 minutes, or until the edges are set but the center still has some jiggle. Remember, this cake is meant to be gooey in the middle! During the last 5 minutes of baking, sprinkle the remaining chopped Reeses cups on top for a beautiful presentation. The cake will “earthquake” during baking, creating magical cracks and swirls throughout.
Step 6: Cool and Serve
Allow the Reeses Peanut Butter Earthquake Cake to cool for at least 20 minutes before serving. This gives the cake time to set up slightly while still maintaining that warm, gooey center that makes it so irresistible. For clean slices, run your knife under hot water and wipe dry between cuts.
Variations
Chocolate Lover’s Earthquake Cake: For an even more intense chocolate experience, swap the chocolate cake mix for a dark chocolate or devil’s food cake mix. Add 1/4 cup of unsweetened cocoa powder to the cake batter and use a combination of milk chocolate and dark chocolate chips instead of semi-sweet. This variation creates a deeper, more intense chocolate flavor that contrasts beautifully with the sweet peanut butter swirls.
White Chocolate Reeses Earthquake Cake: For a striking visual contrast, use a white cake mix as your base and add 1/2 cup of white chocolate chips to the batter. Substitute regular Reeses cups with white chocolate Reeses cups for a portion of the topping. This creates a gorgeous golden cake with chocolate peanut butter swirls throughout – perfect for those who prefer a less intense chocolate flavor but still crave that peanut butter magic.
Gluten-Free Option: This cake adapts beautifully to dietary needs. Simply substitute the standard cake mix with your favorite gluten-free chocolate cake mix and double-check that your peanut butter and chocolate chips are gluten-free certified. The texture may be slightly different, but the earthquake effect and delicious flavor remain intact.
Storage/Serving
The Reeses Peanut Butter Earthquake Cake can be stored at room temperature, covered tightly with plastic wrap or in an airtight container, for up to 2 days. For longer storage, refrigerate for up to 5 days – just note that refrigeration will firm up the texture, making it less gooey. To recapture that fresh-baked experience, microwave individual slices for 15-20 seconds before serving.
For an elevated dessert experience, serve warm slices with a scoop of vanilla ice cream on top – the contrast between the warm cake and cold ice cream creates magic in every bite. For an extra-special presentation, drizzle each serving with warm peanut butter sauce and chocolate syrup, then sprinkle with crushed Reeses pieces.
This cake also makes an impressive centerpiece for a dessert buffet. Cut into smaller squares and arrange on a tiered stand alongside other chocolate and peanut butter treats for a themed dessert table that will have everyone reaching for seconds.
FAQs
Can I make this earthquake cake ahead of time?
Yes! You can prepare the Reeses Peanut Butter Earthquake Cake up to 2 days in advance. Store it covered at room temperature or refrigerated if keeping longer. For the best gooey texture, warm individual slices slightly before serving.
Why didn’t my cake “earthquake” properly?
The earthquake effect comes from the cream cheese mixture sinking during baking. If your cake didn’t crack properly, your cream cheese mixture may have been too thin or the oven temperature might have been too low. Make sure your cream cheese is softened but not melted, and verify your oven temperature with an oven thermometer.
Can I freeze this cake?
Yes, this cake freezes well for up to 3 months. Wrap individual portions tightly in plastic wrap, then foil. Thaw in the refrigerator overnight and warm slightly before serving for the best texture.
Can I use crunchy peanut butter instead of creamy?
Absolutely! Crunchy peanut butter adds extra texture and nutty flavor to the Reeses Peanut Butter Earthquake Cake. Just be aware that the cream cheese layer might be slightly less smooth.
Is there a way to make this cake less sweet?
Yes, you can reduce the powdered sugar in the cream cheese mixture to 1 1/2 cups instead of 2 cups. You can also use dark chocolate chips instead of semi-sweet for a more balanced sweetness level.

Reeses Peanut Butter Earthquake Cake
- Prep Time: 15 mins
- Cook Time: 30 mins
- Total Time: 45 mins
- Yield: 4 servings 1x
- Category: Dessert
- Method: Cooking
- Cuisine: Americaine
Description
Reeses Peanut Butter Earthquake Cake – Indulgent chocolate cake filled with peanut butter cups, drizzled with peanut butter, irresistible treat for all!
Ingredients
- 1 box (15.25 oz) chocolate cake mix
- 3 large eggs, at room temperature
- 1/2 cup vegetable oil
- 1 cup water
- 8 oz cream cheese, softened
- 1/2 cup (1 stick) unsalted butter, melted
- 2 cups powdered sugar
- 1 cup creamy peanut butter
- 2 cups Reeses peanut butter cups, roughly chopped (about 16–20 miniature cups)
- 1 cup semi-sweet chocolate chips
- 1/2 cup Reeses peanut butter chips
- 1/4 teaspoon sea salt (optional, to enhance flavor)
- 1 teaspoon vanilla extract
Instructions
- Step 1: Prepare Your Baking Pan Preheat your oven to 350°F (175°C). Generously spray a 9×13 inch baking pan with non-stick cooking spray, making sure to coat the sides well. This cake tends to stick, so don’t skimp on this step! If you have parchment paper, line the bottom of the pan for even easier removal.
- Step 2: Mix the Cake Batter In a large mixing bowl, combine the chocolate cake mix, eggs, vegetable oil, and water. Using an electric mixer, beat on medium speed for about 2 minutes until smooth and well combined. The batter will be relatively thin, but that’s exactly what you want for this type of cake. Pour the cake batter into your prepared baking pan, spreading it evenly with a spatula.
- Step 3: Prepare the Cream Cheese Peanut Butter Layer In another mixing bowl, beat the softened cream cheese until light and fluffy, about 2 minutes. Add the melted butter and continue beating until well incorporated. Gradually add the powdered sugar, beating on low speed to avoid a sugar cloud. Mix in the peanut butter and vanilla extract until smooth and creamy. This mixture should be pourable but not too thin.
- Step 4: Create the Earthquake Effect Pour the cream cheese and peanut butter mixture in several large dollops over the chocolate cake batter. Don’t spread it out – the goal is to have it sit on top. Sprinkle 1 1/2 cups of the chopped Reese’s peanut butter cups, the chocolate chips, and the peanut butter chips evenly over the entire surface.
- Step 5: Bake to Perfection Bake in your preheated oven for 40-45 minutes, or until the edges are set but the center still has some jiggle. Remember, this cake is meant to be gooey in the middle! During the last 5 minutes of baking, sprinkle the remaining chopped Reese’s cups on top for a beautiful presentation. The cake will ‘earthquake’ during baking, creating magical cracks and swirls throughout.
- Step 6: Cool and Serve Allow the Reese’s Peanut Butter Earthquake Cake to cool for at least 20 minutes before serving. This gives the cake time to set up slightly while still maintaining that warm, gooey center that makes it so irresistible. For clean slices, run your knife under hot water and wipe dry between cuts.
Notes
Fresh ingredients will always yield the best flavor results.
Nutrition
- Serving Size: 1 serving
- Calories: 300
- Sugar: 5g
- Sodium: 400mg
- Fat: 10g
- Saturated Fat: 3g
- Unsaturated Fat: 7g
- Trans Fat: 0g
- Carbohydrates: 40g
- Fiber: 5g
- Protein: 15g
- Cholesterol: 50mg


