
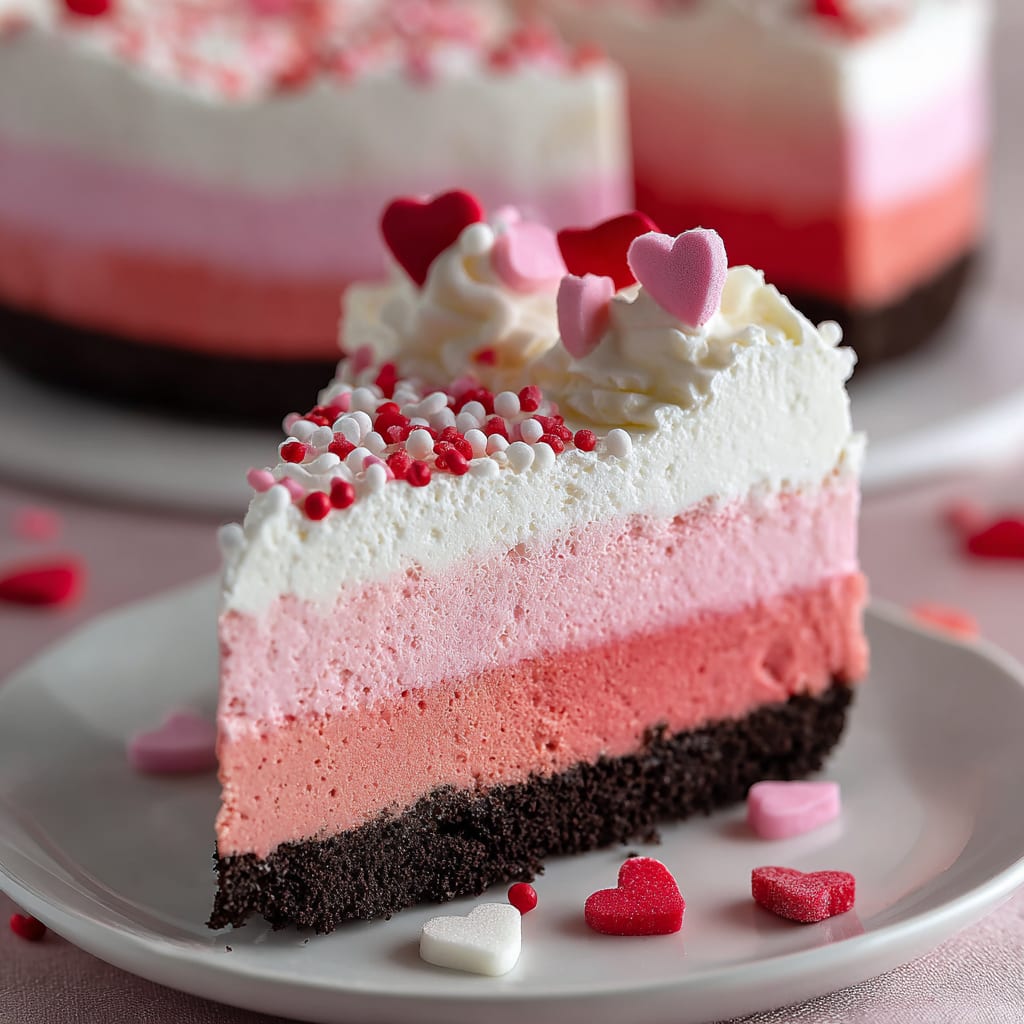
Imagine sinking your fork into a velvety, decadent Valentine’s Day Cheesecake that melts in your mouth with each heavenly bite. This romantic dessert strikes the perfect balance between rich creaminess and delicate sweetness, making it the ultimate expression of love for your special someone. Whether you’re planning an intimate dinner for two or surprising your partner with a homemade treat, this Valentine’s Day Cheesecake is guaranteed to make hearts flutter. You’ll learn how to create a showstopping dessert with a buttery graham cracker crust, silky-smooth filling, and eye-catching romantic decorations that will make your Valentine swoon.
Why You’ll Love This Recipe
This Valentine’s Day Cheesecake is more than just a dessert—it’s an experience your loved one won’t forget. The contrast between the crisp, buttery graham cracker crust and the luscious, cloud-like filling creates a textural symphony that’s simply irresistible. Unlike store-bought alternatives that often taste overly sweet or artificial, this homemade version delivers pure, authentic flavor that speaks of genuine care and affection.
What makes this Valentine’s Day Cheesecake truly special is its versatility and foolproof nature. Even if you’re not a seasoned baker, the straightforward instructions will guide you to success. The beautiful pink hue can be customized to your preference—from subtle blush to vibrant raspberry—making it perfectly Instagram-worthy for capturing your Valentine’s celebration.
Best of all, you can prepare this romantic cheesecake ahead of time, allowing you to focus on other aspects of your Valentine’s Day plans while knowing a spectacular finale to your meal is already waiting in the refrigerator.
Ingredients
For the Crust:
- 2 cups (200g) graham cracker crumbs
- 6 tablespoons (85g) unsalted butter, melted
- 3 tablespoons (38g) granulated sugar
- Pinch of salt
For the Filling:
- 4 packages (32 oz/907g) cream cheese, room temperature
- 1 cup (200g) granulated sugar
- 4 large eggs, room temperature
- 1 tablespoon (15ml) vanilla extract
- 1/4 cup (60ml) heavy cream
- 2 tablespoons (16g) all-purpose flour
- 3-4 drops pink or red food coloring (gel preferred)
- Optional: 2 tablespoons (30ml) raspberry liqueur
For the Topping:
- 1 cup (240ml) heavy cream
- 3 tablespoons (38g) powdered sugar
- 1/2 teaspoon vanilla extract
- Fresh raspberries or strawberries
- Chocolate shavings or heart-shaped chocolates
The cream cheese is the star ingredient in this Valentine’s Day Cheesecake, so splurge on a high-quality brand for the creamiest, most decadent result. The subtle tang of cream cheese beautifully balances the sweetness, creating a sophisticated flavor profile.
Pro Tips
Temperature Matters
The secret to a crack-free Valentine’s Day Cheesecake lies in temperature control. Always bring your refrigerated ingredients (especially cream cheese and eggs) to room temperature before mixing. Cold ingredients don’t blend properly and can lead to lumps and cracks. Plan ahead by removing them from the refrigerator at least 2 hours before baking. If you’re short on time, place sealed cream cheese packages in warm water for 15 minutes to speed up the process.
The Water Bath Method
For the silkiest, most luxurious Valentine’s Day Cheesecake, a water bath is non-negotiable. This creates a gentle, humid environment that prevents the cheesecake from drying out or cracking during baking. Double-wrap your springform pan with heavy-duty aluminum foil to prevent water seepage, then place it in a larger roasting pan filled with an inch of hot water before baking. This simple step makes a remarkable difference in texture and appearance.
The Cooling Process
Patience yields the perfect Valentine’s Day Cheesecake. After baking, resist the urge to immediately remove it from the oven. Instead, turn off the heat, crack the oven door, and let the cheesecake cool gradually for about an hour. This gentle cooling prevents the dramatic temperature change that can cause the surface to crack. Then refrigerate for at least 6 hours (preferably overnight) to allow the flavors to meld and the texture to set properly.
Instructions
Step 1: Prepare Your Pan and Oven
Preheat your oven to 325°F (165°C). Wrap the outside of a 9-inch springform pan with two layers of heavy-duty aluminum foil, making sure it covers the bottom and extends all the way up the sides. This waterproofing is crucial for the water bath later. Lightly grease the inside of your pan with butter or cooking spray.
Step 2: Create the Perfect Crust
In a medium bowl, combine graham cracker crumbs, melted butter, sugar, and salt. Mix until the texture resembles wet sand and the mixture holds together when pressed. Transfer to your prepared springform pan and press firmly into an even layer across the bottom and about 1 inch up the sides. Use the bottom of a measuring cup to compact the crust, creating a solid foundation for your Valentine’s Day Cheesecake. Pre-bake the crust for 10 minutes, then remove and let cool while preparing the filling.
Step 3: Mix Your Filling
In the bowl of a stand mixer fitted with the paddle attachment (or using a hand mixer), beat the cream cheese on medium-low speed until completely smooth and free of lumps, about 4 minutes. Add the sugar and continue beating for another 2 minutes until well incorporated and slightly fluffy. Add eggs one at a time, mixing well after each addition and scraping down the sides of the bowl frequently. Mix in the vanilla extract, heavy cream, and flour until just combined. Be careful not to overmix, as this can incorporate too much air and cause cracks.
Step 4: Add the Valentine’s Touch
Divide your batter if you want to create a gradient effect. Otherwise, add your food coloring to the entire batch, starting with just a few drops and adding more until you achieve your desired shade of pink or red. If using raspberry liqueur, gently fold it in now. Pour the filling onto the cooled crust, smoothing the top with a spatula.
Step 5: Bake with Care
Place your foil-wrapped springform pan into a larger roasting pan. Carefully pour hot water into the roasting pan until it reaches about 1 inch up the sides of the springform pan. Bake at 325°F for 60-70 minutes, or until the edges are set but the center still has a slight jiggle (like Jell-O). Turn off the oven, crack the door open, and let the Valentine’s Day Cheesecake cool in the oven for 1 hour. Remove from the water bath, discard the foil, and refrigerate uncovered until completely cool, about 2 hours. Cover and refrigerate overnight for best results.
Step 6: Decorate with Love
Before serving, whip the heavy cream with powdered sugar and vanilla until stiff peaks form. Pipe decorative swirls around the edge of your Valentine’s Day Cheesecake, or spread over the entire surface. Arrange fresh berries in a heart shape or scatter them artistically. Add chocolate shavings or heart-shaped chocolates for that final romantic touch. For extra indulgence, drizzle with melted chocolate or raspberry sauce.
Variations
Chocolate Lover’s Valentine’s Day Cheesecake
Transform this dessert into a chocolate lover’s dream by adding 8 ounces of melted, cooled dark chocolate to the filling. Use chocolate graham crackers or chocolate sandwich cookies for the crust, and top with chocolate ganache for a triple-chocolate experience. Garnish with chocolate-dipped strawberries for the ultimate romantic indulgence.
Raspberry Swirl Valentine’s Day Cheesecake
For a fruity variation that screams romance, create a raspberry swirl effect. Prepare a quick raspberry sauce by simmering 2 cups of fresh or frozen raspberries with 3 tablespoons of sugar and 1 tablespoon of lemon juice until thickened, then strain to remove seeds. After pouring the cheesecake filling into the crust, dollop spoonfuls of raspberry sauce on top and gently swirl with a knife for a marbled effect that’s both beautiful and delicious.
Vegan Valentine’s Day Cheesecake
For those following a plant-based diet, substitute the cream cheese with dairy-free alternatives like soaked and blended cashews combined with coconut cream. Replace eggs with a mixture of cornstarch and aquafaba (chickpea liquid). The result is surprisingly creamy and just as festive, proving that love-inspired desserts can accommodate all dietary preferences.
Storage and Serving
Your Valentine’s Day Cheesecake will stay fresh in the refrigerator for up to 5 days when stored in an airtight container or tightly wrapped with plastic wrap. For the best flavor and texture, remove it from the refrigerator about 30 minutes before serving to take the chill off. This allows the creamy texture to soften slightly and the flavors to become more pronounced.
For longer storage, you can freeze the cheesecake (without toppings) for up to 2 months. Wrap it tightly in plastic wrap, followed by aluminum foil, and place in a freezer-safe container. Thaw overnight in the refrigerator before decorating and serving.
For an elegant presentation, serve your Valentine’s Day Cheesecake on a decorative cake stand surrounded by fresh rose petals or alongside champagne flutes filled with sparkling rosé. For an extra-special touch, accompany each slice with chocolate-dipped strawberries or a small glass of Chambord liqueur. A light dusting of powdered sugar just before serving adds a snow-kissed romantic finish that’s sure to impress your Valentine.
FAQs
Why did my cheesecake crack on top?
Cracks usually form when cheesecakes are overbeaten (incorporating too much air), baked at too high a temperature, or cooled too quickly. For a perfect Valentine’s Day Cheesecake, beat ingredients just until combined, always use a water bath, and cool gradually in the oven with the door cracked before refrigerating.
Can I make this cheesecake without a springform pan?
While a springform pan is ideal for easy removal, you can use a regular 9-inch cake pan lined with parchment paper with extra hanging over the sides to lift the cheesecake out. You can also use a pre-made graham cracker crust in a pie dish for a shallower, but still delicious Valentine’s Day Cheesecake.
How do I know when my cheesecake is done baking?
The perfect Valentine’s Day Cheesecake should still have a slight wobble in the center when done (about a 2-3 inch diameter in the middle should jiggle slightly when gently shaken). The edges should be more set and may have pulled away from the sides of the pan slightly. Remember, it will continue to set as it cools.
Can I prepare this cheesecake in advance?
Absolutely! In fact, your Valentine’s Day Cheesecake will taste even better after the flavors have had time to develop. You can prepare it 2-3 days in advance and keep refrigerated. Add the whipped cream and decorative toppings shortly before serving for the freshest presentation.
What’s the best way to achieve a vibrant red or pink color without affecting the taste?
For the most vibrant color in your Valentine’s Day Cheesecake without an artificial taste, use gel food coloring rather than liquid. Gel colors are more concentrated, so you’ll need less. Alternatively, natural options include beetroot powder or freeze-dried strawberry powder, which add a subtle fruity flavor that complements the cheesecake beautifully.
Print
Valentines Day Cheesecake
- Prep Time: 30 minutes
- Cook Time: 70 minutes
- Total Time: 7 hours
- Yield: 12 servings 1x
- Category: Dessert
- Method: Baking
- Cuisine: Americaine
Description
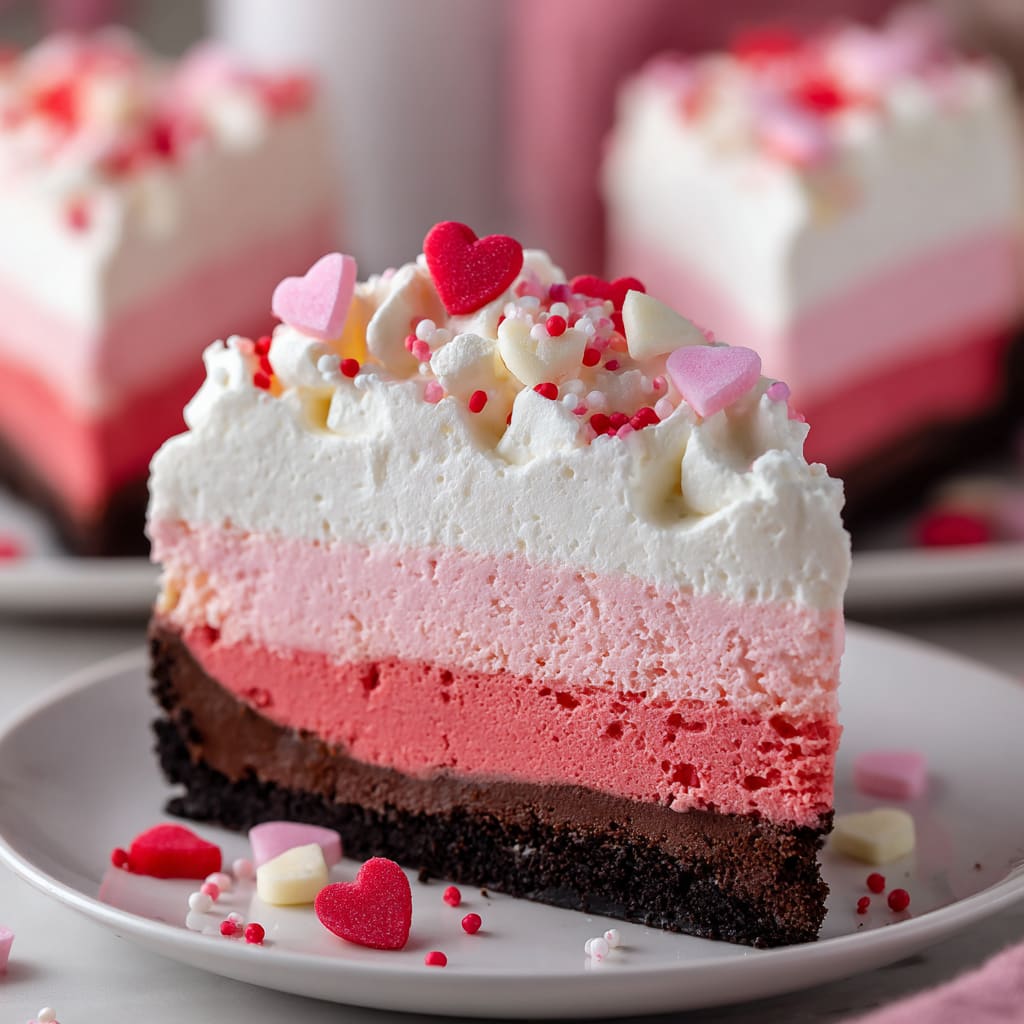
Valentines Day Cheesecake: Rich chocolate ganache on a creamy cheesecake base. Indulgent, romantic, and perfect for sharing.
Ingredients
- 2 cups graham cracker crumbs
- 6 tablespoons unsalted butter, melted
- 3 tablespoons granulated sugar
- Pinch of salt
- 4 packages cream cheese, room temperature
- 1 cup granulated sugar
- 4 large eggs, room temperature
- 1 tablespoon vanilla extract
- 1/4 cup heavy cream
- 2 tablespoons all-purpose flour
- 3–4 drops pink or red food coloring (gel preferred)
- Optional: 2 tablespoons raspberry liqueur
- 1 cup heavy cream
- 3 tablespoons powdered sugar
- 1/2 teaspoon vanilla extract
- Fresh raspberries or strawberries
- Chocolate shavings or heart-shaped chocolates
Instructions
- Step 1: Prepare Your Pan and Oven Preheat your oven to 325°F (165°C). Wrap the outside of a 9-inch springform pan with two layers of heavy-duty aluminum foil, making sure it covers the bottom and extends all the way up the sides. This waterproofing is crucial for the water bath later. Lightly grease the inside of your pan with butter or cooking spray.
- Step 2: Create the Perfect Crust In a medium bowl, combine graham cracker crumbs, melted butter, sugar, and salt. Mix until the texture resembles wet sand and the mixture holds together when pressed. Transfer to your prepared springform pan and press firmly into an even layer across the bottom and about 1 inch up the sides. Use the bottom of a measuring cup to compact the crust, creating a solid foundation for your Valentine’s Day Cheesecake. Pre-bake the crust for 10 minutes, then remove and let cool while preparing the filling.
- Step 3: Mix Your Filling In the bowl of a stand mixer fitted with the paddle attachment (or using a hand mixer), beat the cream cheese on medium-low speed until completely smooth and free of lumps, about 4 minutes. Add the sugar and continue beating for another 2 minutes until well incorporated and slightly fluffy. Add eggs one at a time, mixing well after each addition and scraping down the sides of the bowl frequently. Mix in the vanilla extract, heavy cream, and flour until just combined. Be careful not to overmix, as this can incorporate too much air and cause cracks.
- Step 4: Add the Valentine’s Touch Divide your batter if you want to create a gradient effect. Otherwise, add your food coloring to the entire batch, starting with just a few drops and adding more until you achieve your desired shade of pink or red. If using raspberry liqueur, gently fold it in now. Pour the filling onto the cooled crust, smoothing the top with a spatula.
- Step 5: Bake with Care Place your foil-wrapped springform pan into a larger roasting pan. Carefully pour hot water into the roasting pan until it reaches about 1 inch up the sides of the springform pan. Bake at 325°F for 60-70 minutes, or until the edges are set but the center still has a slight jiggle (like Jell-O). Turn off the oven, crack the door open, and let the Valentine’s Day Cheesecake cool in the oven for 1 hour. Remove from the water bath, discard the foil, and refrigerate uncovered until completely cool, about 2 hours. Cover and refrigerate overnight for best results.
- Step 6: Decorate with Love Before serving, whip the heavy cream with powdered sugar and vanilla until stiff peaks form. Pipe decorative swirls around the edge of your Valentine’s Day Cheesecake, or spread over the entire surface. Arrange fresh berries in a heart shape or scatter them artistically. Add chocolate shavings or heart-shaped chocolates for that final romantic touch. For extra indulgence, drizzle with melted chocolate or raspberry sauce.
Notes
Fresh ingredients will always yield the best flavor results.
Nutrition
- Serving Size: 1 slice (1/12 of cheesecake)
- Calories: 485
- Sugar: 21g
- Sodium: 416mg
- Fat: 35g
- Saturated Fat: 20g
- Unsaturated Fat: 12g
- Trans Fat: 0g
- Carbohydrates: 37g
- Fiber: 1g
- Protein: 8g
- Cholesterol: 156mg


